


Dairy-Free (with margarine) • Egg-Free • Contains Gluten
8 flatbreads
Intermediate
45 minutes
2–3 hours (includes resting)
Mezonot
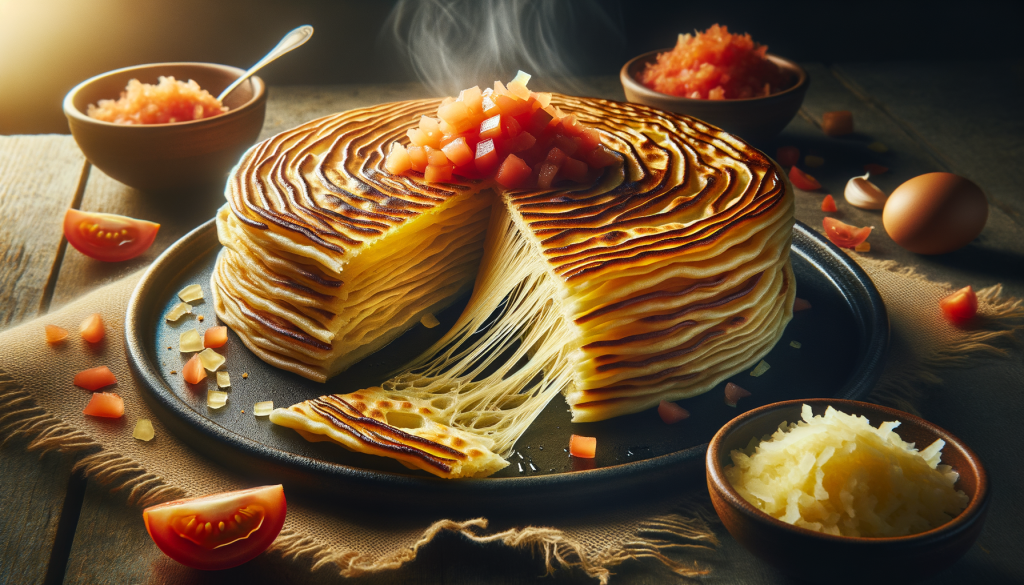
Malawach is the bread that shatters. Imagine lifting a golden disc from a hot skillet, its surface blistered and crackling, and tearing it open to reveal dozens of tissue-thin layers that peel apart like the pages of a parchment manuscript. Steam rises from every stratum, carrying the warm scent of toasted fat and flour. This is malawach — the flaky, laminated flatbread of the Yemenite Jewish table, and one of the most magnificent breads in the entire Jewish baking tradition.
Malawach (malawach, מלאווח) is, at its heart, deceptively simple: flour, water, salt, a pinch of sugar, and generous amounts of fat worked into impossibly thin layers. There is no yeast, no leavening agent of any kind. The magic is entirely structural — the same principle that gives croissants their shatter, that gives puff pastry its lift, but achieved here not with cold butter and precise folding but with warm hands, melted margarine, and a technique perfected over centuries in the kitchens of Sana’a, Aden, and the mountain villages of Yemen.
Where kubaneh is patient and slow, baked overnight in a sealed pot, malawach is bold and immediate. It goes from dough to plate in minutes once shaped — pan-fried in a dry or lightly greased skillet until each side is deeply golden and the layers have puffed with steam. The contrast between the two breads is part of what makes the Yemenite bread tradition so rich: one bread for long waiting, another for the satisfying immediacy of hot fat and a cast-iron pan.
Malawach is traditionally served with grated fresh tomato (resek agvaniyot), hard-boiled eggs, and a generous spoonful of s’chug — the fiery Yemenite chile paste. Tear it open, dip, and eat with your hands. This is Yemenite street food elevated to an art form.
What Makes This Malawach Special
Malawach occupies a unique place among the world’s laminated breads. Every element of the process is designed for maximum flakiness with minimum complexity:
- Hand-laminated layers without folding or turning — unlike croissants or puff pastry, malawach achieves its dozens of layers through a simple roll-and-fold technique that requires no chilling, no precise timing, and no marble countertop. The dough is stretched paper-thin, brushed with fat, folded into a square or coiled into a spiral, and pressed flat. That is it.
- Pan-fried, not baked — malawach is cooked in a dry skillet or with the barest film of oil. The direct contact with hot metal creates a shattering, almost cracker-like exterior while the interior layers remain soft, steamy, and tender.
- No leavening required — every bit of lift comes from steam trapped between the fat-separated layers. When the malawach hits the hot pan, the water in the dough turns to steam and puffs each layer apart. Pure physics, pure deliciousness.
- Completely pareve — made with margarine, this malawach is dairy-free and can be served alongside meat or dairy meals with equal ease. A true kitchen workhorse.
- Freezes beautifully — shaped malawach can be stacked between parchment paper and frozen for months. Cook directly from frozen in a hot pan. This is why Israeli freezer sections are stacked with malawach — it is the ultimate make-ahead bread.
The Yemenite Bread Trio: Malawach, Kubaneh & Jachnun
Malawach is the third pillar of the great Yemenite Jewish bread tradition, alongside kubaneh (the golden overnight pull-apart bread) and jachnun (the slow-baked rolled pastry). Together, these three breads represent one of the most distinctive and beloved culinary legacies in all of Jewish cuisine.
Each bread has its own character and its own relationship to Shabbat. Kubaneh goes into the oven before candle-lighting and bakes overnight, emerging on Shabbat morning as a golden, steaming dome. Jachnun follows the same overnight method, slow-baking into a dark, sweet, almost caramelized roll. Malawach takes a different path entirely: it is prepared and shaped before Shabbat, stacked between parchment, and then pan-fried fresh — or reheated from frozen — for Shabbat morning or any weekday meal.
When the Yemenite Jewish community was airlifted to Israel during Operation Magic Carpet (1949–1950), they carried these recipes in memory and in practice. Within a generation, malawach had become one of Israel’s most popular street foods, sold at market stalls, bus station kiosks, and corner bakeries from Eilat to Haifa. Today, it is as Israeli as falafel — but its roots remain deeply, beautifully Yemenite.
The word malawach likely derives from the Arabic mulawwah, meaning “folded” or “rolled.” And indeed, the folding is everything. A single ball of dough, stretched to near-transparency and folded upon itself with fat between every layer, becomes something that transcends the sum of its ingredients.
Kosher Observance & Halachic Notes
Kosher Classification: Pareve (with margarine)
This recipe uses margarine as the laminating fat, making the malawach fully pareve and suitable to serve alongside meat or dairy meals. If you substitute butter, the malawach becomes dairy — clearly label which version you have made to avoid confusion.
Hafrashat Challah (Separating Challah)
This recipe calls for 500 g of flour. According to most Ashkenazi poskim, this amount requires separating challah without a bracha. If you double the recipe (1,000 g flour), you should separate challah with a bracha (consult your community’s minhag for exact thresholds). Sephardi practice may differ.
How to perform Hafrashat Challah:
- After the dough is fully mixed, pinch off a small piece — at least a kezayit (roughly 28 g / 1 oz).
- If the total flour exceeds the bracha threshold for your community, recite the bracha:
Hebrew:
בָּרוּךְ אַתָּה ה’ אֱלֹהֵינוּ מֶלֶךְ הָעוֹלָם אֲשֶׁר קִדְּשָׁנוּ בְּמִצְוֹתָיו וְצִוָּנוּ לְהַפְרִישׁ חַלָּהTransliteration:
Baruch Atah Adonai, Eloheinu Melech ha’olam, asher kid’shanu b’mitzvotav v’tzivanu l’hafrish challah.Translation:
“Blessed are You, Lord our God, King of the universe, Who has sanctified us with His commandments and commanded us to separate challah.”
- Say: “Harei zu challah” (“This is challah”).
- Wrap the separated piece in foil and burn it. It may not be eaten.
Checking Eggs for Blood Spots
This recipe does not contain eggs in the dough. However, malawach is traditionally served with hard-boiled or fried eggs. Each egg should be cracked individually into a clear glass or small bowl and inspected before cooking. If a blood spot is found, the egg must be discarded entirely.
Pas Yisroel
When a Jewish person lights the stove or contributes to the cooking in any way, the malawach fulfills Pas Yisroel requirements. This is particularly relevant during the Aseret Yemei Teshuvah.
Brachot (Blessings)
- Before eating (snack or side dish): Borei Minei Mezonot — malawach is a pat haba’ah b’kisnin (baked/fried item not typically eaten as a bread meal). When eaten as a snack or side dish, the bracha is Mezonot.
- After eating (snack): Al HaMichya.
- If eaten as a meal: When malawach is the basis of a full meal (eaten in significant quantity, “kevi’at se’uda”), the bracha becomes HaMotzi with washing, and Birkat HaMazon after. Consult your rabbi if unsure about your specific situation.
Ingredients
Dough
| Ingredient | Grams | Volume | Baker’s % |
|---|---|---|---|
| All-purpose flour (unbleached) | 500 g | 4 cups | 100% |
| Fine sea salt | 8 g | 1½ tsp | 1.6% |
| Granulated sugar | 15 g | 1 Tbsp | 3% |
| Warm water (see DDT note below) | 275 g | 1 cup + 2 Tbsp | 55% |
| Vegetable oil (for the dough) | 15 g | 1 Tbsp | 3% |
| Total Dough Weight | ~813 g | — | — |
Laminating Fat
| Option | Amount | Classification |
|---|---|---|
| Pareve: Margarine (stick, not tub), softened | 200 g (⅞ cup) | Pareve — serve with meat or dairy |
| Dairy: Unsalted butter, softened | 200 g (⅞ cup) | Dairy — serve only with dairy meals |
The fat should be softened to a spreadable consistency — not melted, not cold. Think of room-temperature margarine that yields easily to a knife. This consistency allows you to spread it evenly across the paper-thin dough without tearing.
Traditional Accompaniments
- Grated tomato (resek agvaniyot) — halve ripe tomatoes and grate on a box grater, discarding the skin
- S’chug (zhug) — Yemenite hot green or red chile paste
- Hard-boiled or fried egg — one per person, served alongside
- Hilbeh — whipped fenugreek paste (optional, for the adventurous)
- Honey or date syrup — for a sweet variation, drizzle on the hot malawach
Equipment
- Large heavy skillet or flat griddle — cast iron is ideal, 25–30 cm (10–12 inch)
- Rolling pin (a thin, French-style rolling pin works best for stretching the dough)
- Large clean work surface — the dough needs room to be stretched very thin
- Kitchen scale
- Pastry brush or offset spatula for spreading fat
- Parchment paper (for stacking and freezing)
- Plastic wrap (for resting the dough)
Desired Dough Temperature (DDT)
Target DDT: 25°C (77°F)
A slightly warm dough is more pliable and easier to stretch paper-thin — which is critical for malawach. To calculate your water temperature:
Water Temp = (DDT × 2) − Flour Temp
Example: If your flour is 21°C:
Water = (25 × 2) − 21 = 29°C (84°F)
The water should feel barely warm. Since there is no yeast to kill, temperature is less critical than with yeasted doughs — but a warm, relaxed dough stretches far more easily than a cold one.
Step-by-Step Instructions
Step 1: Make the Dough
In a large mixing bowl, combine the warm water, sugar, salt, and vegetable oil. Stir until the sugar and salt dissolve.
Add the flour and mix with a wooden spoon or your hand until a shaggy dough forms. Turn the dough out onto a clean, unfloured work surface.
Knead by hand for 8–10 minutes until the dough is:
- Smooth and supple — it should feel like soft clay, yielding easily when pressed.
- Slightly tacky but not sticky — it should not cling to your hands or the work surface.
- Extensible — you can stretch a small piece without it snapping back. Unlike bread dough, malawach dough should be more extensible than elastic. We want it to stretch, not spring back.
Stand mixer method: Use the dough hook on low speed (speed 2) for 6–8 minutes. The dough should clear the sides of the bowl and wrap around the hook.
Resist the urge to add extra flour. The dough should be soft — softer than you might expect. A soft dough stretches thin; a stiff dough fights you.
Step 2: Rest the Dough
Coat the dough lightly with vegetable oil. Place it back in the bowl, cover tightly with plastic wrap, and let it rest at room temperature for 30 minutes.
This rest is essential. It allows the gluten to relax fully, which is what makes the dough stretchable to near-transparency. Do not skip it.
Step 3: Divide the Dough
Turn the rested dough out onto a lightly oiled work surface. Using a bench scraper and kitchen scale, divide the dough into 8 equal pieces (~100 g each).
Shape each piece into a smooth ball by tucking the edges underneath and rolling gently against the surface. Place the balls on an oiled sheet pan or plate, spacing them apart so they don’t touch. Brush the tops with a thin film of oil.
Cover with plastic wrap and let rest for another 30 minutes. This second rest makes the balls extraordinarily pliable — they will practically stretch themselves.
Step 4: Roll and Stretch Paper-Thin
This is the defining moment of malawach — the step that creates the layers.
Working with one ball at a time (keep the rest covered):
- Oil your work surface lightly — not flour. Oil keeps the dough pliable; flour makes it stiff.
- Press the ball flat with your palm into a disc about 12 cm (5 inches) across.
- Roll outward with a rolling pin, working from the center to the edges. Rotate the dough a quarter turn after every few strokes. Roll until you have a very thin circle or rectangle, roughly 35–40 cm (14–16 inches) across.
- Stretch by hand if needed. Drape the dough over the backs of your hands (knuckles up, like pizza makers) and gently stretch outward. The dough should be nearly translucent — you should be able to see the surface underneath through it. A few small tears are acceptable and will not affect the final result.
The golden rule: Thinner is always better. Every extra millimeter of thickness is a layer you lose. The best malawach comes from dough so thin it looks like it could not possibly hold together — and yet it does.
Step 5: Spread with Fat and Fold into Layers
With the dough stretched paper-thin on your work surface:
- Spread a thin, even layer of softened margarine (about 25 g / 1 heaping tablespoon) over the entire surface. Use your fingers, an offset spatula, or the back of a spoon. Cover right to the edges — the fat is what creates separation between every layer.
- Fold into thirds like a business letter: bring the bottom third up, then fold the top third down over it. You now have a long rectangle, three layers thick.
- Fold into thirds again from the short side: bring one end to the center, then fold the other end over it. You now have a roughly square packet, nine layers thick.
- Press gently to flatten the packet slightly and seal the edges. Do not press hard — you want to preserve the air between layers.
Alternative spiral method: Instead of folding into thirds, you can roll the fat-coated sheet into a tight log from one edge, then coil the log into a spiral (like a snail shell) and press flat. This creates a different layer pattern — more concentric rings than rectangular sheets. Both methods are traditional.
Place each folded malawach on a parchment-lined sheet pan. Do not stack without parchment between them — they will fuse together.
Repeat with all remaining dough balls. You will have 8 folded, layered malawach ready to cook or freeze.
Step 6: Final Rest (or Freeze)
Cover the sheet pan of folded malawach with plastic wrap and refrigerate for at least 30 minutes (or up to overnight). The cold rest firms the fat between the layers, which is critical for flakiness — when the cold fat hits the hot pan, it creates bursts of steam that puff each layer apart.
Freezing for later (highly recommended):
Stack the folded malawach with a square of parchment paper between each one. Place the stack in a large zip-top freezer bag or wrap tightly in plastic wrap, then foil. Freeze for up to 3 months.
To cook from frozen: Place the frozen malawach directly in a hot skillet — no thawing needed. Cook 3–4 minutes per side over medium heat. The frozen state actually helps the layers, as the fat stays solid longer and creates more steam separation.
Step 7: Pan-Fry Until Golden and Shattering
Heat a large, heavy skillet (cast iron is ideal) over medium heat for 2–3 minutes. The pan should be hot but not smoking.
No oil is needed in the pan — the margarine in the dough provides all the fat for frying. If your pan is well-seasoned, the malawach will not stick.
- Place one malawach in the dry skillet. You will hear an immediate gentle sizzle — that is the margarine beginning to render.
- Cook for 3–4 minutes on the first side over medium heat. Do not press down with a spatula — pressing squeezes out the steam and compresses the layers. The bottom should become deeply golden with dark spots, and the edges should begin to look crisp and layered.
- Flip carefully with a large spatula (or slide onto a plate, invert the pan over it, and flip). Cook the second side for 3–4 minutes until equally golden.
- Remove to a cutting board. Immediately — while it is screaming hot — scrunch the malawach between your palms (use a towel to protect your hands) or crumple it gently by pushing in from the sides with two spatulas. This loosens and separates the layers, creating that signature shattered, flaky texture.
Temperature control: If the malawach browns too quickly, reduce the heat slightly. If it takes much longer than 4 minutes per side, increase the heat. The goal is a deeply golden, almost leopard-spotted exterior with fully cooked, steamy layers inside.
Serve each malawach immediately as it comes off the pan, or keep cooked malawach warm in a 100°C (200°F) oven while you fry the remaining ones.
How to Serve Malawach
Malawach is served hot from the pan, torn open by hand. The classic Yemenite way:
- Grated tomato (resek agvaniyot) — Grate ripe tomatoes on a coarse box grater, discard the skin, season with salt. The cool, fresh tomato against the hot, crisp bread is the essential combination.
- Hard-boiled egg — One per person, peeled and roughly mashed or quartered.
- S’chug — Green or red Yemenite hot sauce. A little goes a long way. The heat cuts through the richness of the bread beautifully.
- Sweet variation — Drizzle hot malawach with honey or date syrup (silan) and sprinkle with sesame seeds. A popular Israeli breakfast and street food presentation.
Tear, don’t cut. Malawach is meant to be ripped open by hand to reveal the layers. Cutting with a knife compresses the very layers you worked so hard to create.
Storage & Make-Ahead
- Uncooked (refrigerator): Shaped, folded malawach can be refrigerated between parchment paper for up to 2 days. The extended cold rest actually improves flakiness.
- Uncooked (freezer): Stack between parchment, wrap tightly, and freeze for up to 3 months. Cook directly from frozen — no thawing needed. This is the best make-ahead method.
- Cooked (same day): Malawach is best eaten immediately, but cooked flatbreads can be kept warm in a 100°C (200°F) oven for up to 30 minutes.
- Cooked (leftovers): Wrap cooled malawach in foil and refrigerate for up to 2 days. Reheat in a dry skillet over medium heat for 1–2 minutes per side to restore crispness. Do not microwave — it turns the bread soft and gummy, destroying the layers.
- Shabbat planning: Shape and freeze malawach during the week. Before Shabbat, cook them and wrap in foil. Reheat on a plata (Shabbat hot plate) or blech on Shabbat morning. They will not be as crisp as fresh, but remain delicious.
Troubleshooting Guide
| Problem | Likely Cause | Solution |
|---|---|---|
| Malawach is dense, not flaky | Dough not stretched thin enough; insufficient fat between layers | Stretch thinner — you should see the surface through the dough. Use a full 25 g of margarine per piece. More fat = more layers. |
| Dough tears when stretching | Dough not rested enough; too much flour in the mix | Let the dough ball rest another 15–20 minutes. Ensure dough is soft and tacky. Small tears are fine — they close during folding. |
| Dough springs back when rolling | Gluten is too tight; insufficient resting time | Walk away for 10 minutes. The gluten will relax and the dough will hold its shape. Work on another ball in the meantime. |
| Malawach burns on the outside, raw inside | Pan too hot | Reduce heat to medium-low. Malawach needs 3–4 minutes per side — if it browns in under 2 minutes, your pan is too hot. |
| Malawach sticks to the pan | Pan not properly seasoned; heat too low so fat did not render | Use a well-seasoned cast iron pan. Ensure the pan is properly preheated. A tiny film of oil can be added if needed. |
| Layers are greasy, not crisp | Too much fat; heat too low; malawach not scrunched after cooking | Use no more than 25 g fat per piece. Cook over steady medium heat. Scrunch immediately after removing from pan to release steam and crisp the layers. |
Frequently Asked Questions
What is malawach?
Malawach is a traditional Yemenite Jewish flatbread made from unleavened dough that is stretched paper-thin, spread with fat (margarine or butter), folded into layers, and pan-fried until golden and flaky. It belongs to the family of laminated flatbreads alongside Indian paratha and Malaysian roti canai, but has its own distinctive character shaped by centuries of Yemenite Jewish baking tradition. In Israel, malawach is one of the most beloved street foods and breakfast items, served with grated tomato, hard-boiled egg, and s’chug (hot sauce).
What is the difference between malawach, kubaneh, and jachnun?
All three are Yemenite Jewish breads, but each is made differently. Malawach is an unleavened, laminated flatbread that is pan-fried — it is flaky and crisp. Kubaneh is a yeasted, layered pull-apart bread that is slow-baked overnight in a sealed pot — it is soft, golden, and pillowy. Jachnun is an unleavened dough rolled paper-thin and baked overnight — it emerges dark, dense, and naturally sweet from long caramelization. Together, they form the Yemenite bread trio, one of the richest bread traditions in the Jewish culinary world.
Is malawach the bracha Mezonot or HaMotzi?
When eaten as a snack or as a side dish alongside other foods, malawach is considered pat haba’ah b’kisnin and the bracha is Mezonot before and Al HaMichya after. However, if you eat malawach as the basis of a full meal (kevi’at se’uda) — consuming a significant quantity as your primary food — the bracha becomes HaMotzi with netilat yadayim (hand washing), and Birkat HaMazon after. When in doubt, consult your rabbi.
Can I make malawach with butter instead of margarine?
Yes. Butter produces an even richer flavor and slightly crispier texture. However, using butter makes the malawach dairy, which limits when you can serve it in a kosher kitchen. The margarine version is pareve and can accompany meat or dairy meals, which is why most Israeli and diaspora recipes default to margarine. Both are completely traditional — in Yemen, clarified butter (samneh) was the original fat of choice.
Can I bake malawach in the oven instead of pan-frying?
You can, though the result will be different. Place the shaped malawach on a parchment-lined baking sheet and bake at 200°C (400°F) for 12–15 minutes, flipping once halfway through. The oven version will be puffier and more bread-like, with less of the characteristic crisp, shattering exterior that pan-frying provides. For the authentic experience, the skillet is the way to go. However, the oven method is useful for cooking a large batch at once.
Complete Your Yemenite Bread Collection
You have mastered malawach. Now bake kubaneh overnight, and the Yemenite trio is nearly complete. Three breads, one magnificent tradition.
Save This Recipe
Bake Our Kubaneh Next →
Have questions? Tag us @kosherbreadpro on Instagram or leave a comment below. We answer every one.