Search 150+ Kosher Recipes
Dairy-Free • Egg-Free • Contains Gluten
12 bialys
Intermediate
45 minutes
3–4 hours
HaMotzi
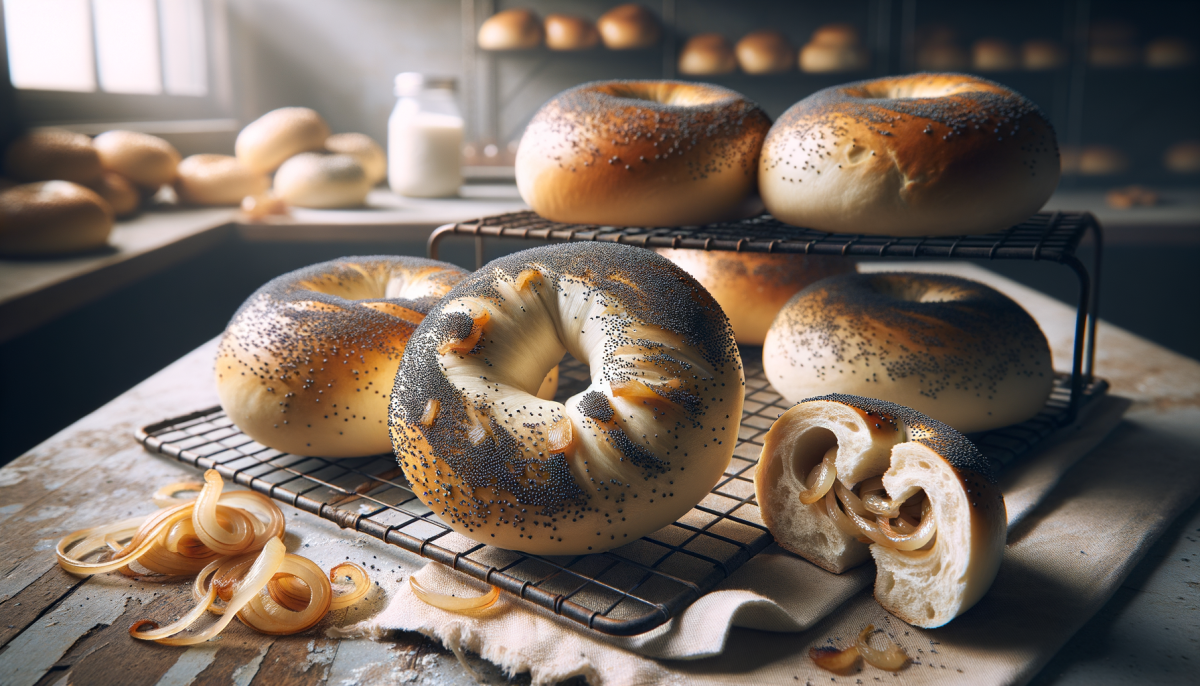
The bialy is the bagel’s forgotten cousin — and in many ways, the more interesting one. Where the bagel has conquered the world, the bialy has remained a quiet, stubborn treasure, beloved by those who know it and almost unknown to everyone else. It is not boiled. It is not shiny. It has no hole. What it has is a shallow crater filled with caramelized onions and poppy seeds, a chewy-tender crumb, a flour-dusted crust that crackles softly under your fingers, and a flavor so deeply savory and aromatic that one bite can rearrange your entire understanding of what a roll can be.
The bialy — properly called bialystoker kuchen, the “cake from Białystok” — was born in the Jewish community of Białystok, a city in northeastern Poland near the Lithuanian border. For centuries, Jewish bakers there shaped these small, flat rolls with their distinctive onion-filled depression, baking them in blisteringly hot ovens until the bottoms charred slightly and the onion filling turned sweet and golden. They were the everyday bread of a thriving Yiddish-speaking world.
Unlike bagels, bialys are never boiled, never glazed, and never meant to be toasted. They are best eaten fresh from the oven, still warm, when the contrast between the crisp exterior and the soft, almost custardy center is at its most dramatic. Split one open, spread it with cream cheese or butter if you like, but a truly great bialy needs nothing at all — the caramelized onion filling is its own condiment.
In New York, the bialy survived thanks to a handful of bakeries on the Lower East Side — most famously Kossar’s Bialys, which has been baking them since 1936. If the bagel is New York’s most famous Jewish bread, the bialy is its most soulful. If you love our New York Bagel Recipe, the bialy is the essential next step in your Jewish bread education.
What Makes This Bialy Special
A bialy is deceptively simple — just flour, water, yeast, salt, and an onion filling. But every choice in the process shapes the final roll:
- High-gluten flour for authentic chew — bialys demand a strong flour (at least 12–13% protein) to develop the chewy, resilient crumb that distinguishes them from ordinary rolls. We use high-gluten bread flour, the same flour New York’s bialy bakeries rely on.
- No boiling, no egg wash, no sweetener — unlike bagels, bialys go straight into a very hot oven with nothing but a dusting of flour on their surface. The result is an honest, wheaty bread with a matte, crackled crust — no shine, no gloss, just pure bread.
- The crater, not a hole — the signature depression is pressed into each roll by hand, stretched thin at the center but left thick and puffy at the rim. This creates two textures in one bread: the chewy, pillow-soft outer ring and the thin, almost cracker-like center laden with filling.
- Slow-cooked onion and poppy seed filling — diced onions are sautéed low and slow until deeply caramelized, then mixed with poppy seeds and a touch of oil. The filling caramelizes further in the oven, becoming sweet, savory, and intensely aromatic.
- Blistering oven heat — bialys bake at 260°C (500°F) for just 8–10 minutes. The intense heat puffs the rim dramatically while charring the bottom slightly, creating the characteristic leopard-spotted base that bialy lovers prize.
The Story of the Bialy: From Białystok to the Lower East Side
Before the Second World War, Białystok was home to one of Poland’s largest and most vibrant Jewish communities — roughly 50,000 Jews in a city of 100,000. They were weavers, scholars, bundists, Zionists, yeshiva students, and bakers. The Jewish bakeries of Białystok produced the bialystoker kuchen by the thousands every day: small, flat, onion-centered rolls that were as ordinary and essential as the Yiddish language itself.
Then came the Holocaust. In August 1943, the Nazis liquidated the Białystok ghetto. Of the city’s 50,000 Jews, fewer than a thousand survived. An entire world was destroyed — its language, its culture, its daily bread. The bialys of Białystok should have vanished with the community that created them.
But they did not. In the decades before the war, waves of Białystok Jews had emigrated to New York’s Lower East Side, and they brought their bread with them. On Grand Street and Essex Street, Jewish bakeries continued to shape bialys by hand, bake them in coal-fired ovens, and sell them by the dozen from storefront windows. The bread of a murdered community lived on in a new city, carried forward by the hands of those who remembered.
Today, the bialy remains a distinctly New York phenomenon. Unlike the bagel, which has been adapted (and often diminished) worldwide, the bialy has resisted mass production. It does not freeze well, it does not ship well, and it is at its best within an hour of baking. This fragility is part of its beauty — and part of why baking them at home is one of the most rewarding things a Jewish baker can do. For the bialy’s natural companion, see our New York Bagel Recipe.
Kosher Observance & Halachic Notes
Kosher Classification: Pareve
This recipe is entirely pareve. It contains no dairy, eggs, or meat products. The onion filling uses neutral vegetable oil. Bialys can be served alongside both meat and dairy meals without restriction.
Hafrashat Challah (Separating Challah)
This recipe calls for 650 g of flour. According to most Ashkenazi poskim, this amount requires separating challah without a bracha. If you double the recipe (1,300 g flour), you should separate challah with a bracha. Sephardi practice may differ — consult your community’s minhag.
How to perform Hafrashat Challah:
- After the dough is fully mixed, pinch off a small piece — at least a kezayit (roughly 28 g / 1 oz).
- If the total flour exceeds the bracha threshold for your community, recite the bracha:
Hebrew:
בָּרוּךְ אַתָּה ה’ אֱלֹהֵינוּ מֶלֶךְ הָעוֹלָם אֲשֶׁר קִדְּשָׁנוּ בְּמִצְוֹתָיו וְצִוָּנוּ לְהַפְרִישׁ חַלָּהTransliteration:
Baruch Atah Adonai, Eloheinu Melech ha’olam, asher kid’shanu b’mitzvotav v’tzivanu l’hafrish challah.Translation:
“Blessed are You, Lord our God, King of the universe, Who has sanctified us with His commandments and commanded us to separate challah.”
- Say: “Harei zu challah” (“This is challah”).
- Wrap the separated piece in foil and burn it. It may not be eaten.
Checking Eggs for Blood Spots
This recipe does not contain eggs. However, if you choose to add an egg wash or modify the dough to include eggs, each egg should be cracked individually into a clear glass or small bowl and inspected before adding to the dough. If a blood spot is found, the egg must be discarded entirely.
Pas Yisroel
When a Jewish person sets the oven temperature or contributes to the baking in any way, the bialys fulfill Pas Yisroel requirements. This is particularly relevant during the Aseret Yemei Teshuvah.
Brachot (Blessings)
- Before eating: HaMotzi Lechem Min Ha’Aretz — bialys are bread in every halachic sense. Wash and make HaMotzi.
- After eating: Birkat HaMazon (Grace After Meals).
Ingredients
Dough
| Ingredient | Grams | Volume | Baker’s % |
|---|---|---|---|
| High-gluten bread flour (12–13% protein) | 650 g | 5 cups | 100% |
| Water (see DDT note below) | 400 g | 1⅔ cups | 61.5% |
| Instant (rapid-rise) yeast | 5 g | 1½ tsp | 0.8% |
| Fine sea salt | 12 g | 2 tsp | 1.8% |
| Barley malt syrup (or diastatic malt powder) | 8 g | 1½ tsp | 1.2% |
| Total Dough Weight | ~1,075 g | — | — |
Onion & Poppy Seed Filling
| Ingredient | Grams | Volume |
|---|---|---|
| Yellow onions, finely diced | 300 g | 2 medium onions |
| Neutral vegetable oil (canola or sunflower) | 30 g | 2 Tbsp |
| Poppy seeds | 15 g | 2 Tbsp |
| Fine sea salt | 2 g | ¼ tsp |
| Freshly ground black pepper | — | pinch |
The filling should be prepared in advance and cooled completely before shaping the bialys.
Equipment
- Stand mixer with dough hook (or large bowl for hand kneading)
- Kitchen scale
- Large skillet or sauté pan for the onion filling
- Two large baking sheets lined with parchment paper
- Baking stone or steel (strongly recommended for a crisp bottom; a heavy inverted baking sheet works as substitute)
- Bench scraper
- Kitchen towels or plastic wrap for covering dough
Desired Dough Temperature (DDT)
Target DDT: 24°C (75°F)
A slightly cool dough ferments slowly and develops more flavor, which is ideal for bialys. To calculate your water temperature:
Water Temp = (DDT × 3) − Flour Temp − Room Temp
Example: If your kitchen is 22°C and your flour is 21°C:
Water = (24 × 3) − 22 − 21 = 29°C (84°F)
The water should feel barely warm — just slightly above room temperature. Never exceed 38°C (100°F) or you risk overactivating the yeast.
Step-by-Step Instructions
Step 1: Prepare the Onion Filling
Begin with the filling so it has time to cool while the dough ferments.
Heat the vegetable oil in a large skillet over medium-low heat. Add the finely diced onions and salt. Cook, stirring occasionally, for 15–20 minutes until the onions are deeply golden, sweet, and soft — they should be caramelized, not merely softened. Reduce the heat if they begin to brown too quickly.
Remove from heat, stir in the poppy seeds and black pepper. Transfer to a bowl and let cool to room temperature. The filling can be made up to 2 days ahead and refrigerated.
Step 2: Mix the Dough
In the bowl of a stand mixer, combine the water and barley malt syrup. Stir briefly to dissolve.
Add the flour, salt, and instant yeast (keep salt and yeast on opposite sides). Mix on low speed (speed 1–2) for 2–3 minutes until a shaggy, rough dough forms. The dough will look dry at first — this is correct. Bialys use a relatively stiff dough.
Increase to medium speed (speed 3–4) and knead for 10–12 minutes until the dough is:
- Smooth and elastic — it should pull cleanly from the sides of the bowl.
- Firm but not hard — stiffer than challah dough, similar in feel to bagel dough.
- Passes a windowpane test — a small piece stretches thin enough to see light through without tearing.
Hand kneading: Combine in a large bowl, turn onto an unfloured surface, and knead 12–15 minutes. The dough is stiff, so hand kneading requires patience and effort. Use the heel of your palm and fold repeatedly.
Step 3: Bulk Fermentation
Lightly oil a large bowl. Place the dough inside, turn to coat, and cover tightly with plastic wrap.
Let rise at room temperature for 1.5 to 2 hours until doubled in volume. The dough should be puffy and should hold an indentation when pressed gently with a floured finger.
Step 4: Divide and Pre-Shape
Turn the risen dough out onto a lightly floured work surface. Gently deflate.
Using a bench scraper and scale, divide the dough into 12 equal pieces (~89 g each). Shape each piece into a tight, smooth ball by tucking the edges underneath and rolling on the surface with a cupped hand.
Place the balls on a lightly floured surface, cover loosely with a kitchen towel, and let rest for 15–20 minutes. This relaxes the gluten and makes shaping the craters much easier.
Step 5: Shape the Bialys
This is the defining moment — creating the signature bialy crater.
Working with one ball at a time:
- Flatten the ball with your fingertips into a disc roughly 10 cm (4 inches) in diameter.
- Press and stretch the center using your thumbs and fingers, working outward from the middle. Create a wide, shallow depression — the center should be very thin (almost translucent), while the rim stays thick and puffy, about 2 cm (¾ inch) wide.
- Do not create a hole. The center should be paper-thin but intact. Think of it as a small, shallow bowl — a crater, not a puncture.
- Stretch the overall disc to about 10–12 cm (4–5 inches) in diameter. The final bialy should look like a small, slightly irregular flying saucer.
- Place each shaped bialy on a parchment-lined baking sheet, spaced 5 cm (2 inches) apart. Six bialys per sheet.
Do not overfill. Spoon approximately 1 generous tablespoon of cooled onion filling into each crater. The filling should sit in the depression, not overflow onto the rim.
Step 6: Final Proof
Cover the shaped bialys loosely with kitchen towels. Let proof at room temperature for 15–20 minutes — just until the rims look slightly puffy. Bialys should not be over-proofed. They need to hit the oven while still taut so the high heat creates a dramatic puff.
Meanwhile, preheat your oven to 260°C (500°F) — as hot as it will go. If you have a baking stone or steel, place it on the middle rack and preheat for at least 30 minutes. The intense heat is non-negotiable for authentic bialys.
Step 7: Bake
High heat. Fast bake. That is the bialy way.
Lightly dust the tops of the bialys with flour — this gives them their characteristic matte, flour-dusted appearance.
If using a baking stone or steel, slide the parchment with bialys directly onto the hot stone. If using baking sheets, place them directly in the oven.
Bake for 8–10 minutes until the rims are golden-brown and puffed, the bottoms have dark, leopard-spotted char marks, and the onion filling is sizzling and deeply caramelized.
Do not overbake. Bialys should be golden, not dark brown. They continue to firm up as they cool. Remove them from the oven when the rim is just golden and the bottom has some dark spots.
Step 8: Cool and Serve
Transfer bialys to a wire rack. Let cool for 5–10 minutes — just enough to handle comfortably.
Bialys are best eaten within 2–3 hours of baking, while the crust still has its crackle and the interior is soft and fragrant. Split horizontally and eat plain, or with cream cheese, butter, or a smear of good mustard. Purists eat them unsplit, tearing off pieces of the thick rim and scooping up bits of the onion center.
Storage & Reheating
- Same day: Bialys are at their absolute best fresh from the oven. Unlike bagels, they do not improve with age. Eat them the day they are baked.
- Room temperature: Store in a paper bag (not plastic, which softens the crust) for up to 6–8 hours. They will lose their crispness but remain good.
- Reheating: Split and toast cut-side down in a dry skillet over medium heat for 2–3 minutes, or place whole bialys in a 190°C (375°F) oven for 4–5 minutes. Do not microwave — it makes them gummy and lifeless.
- Freezing: Bialys can be frozen, but they are never quite the same. Wrap individually in plastic wrap, then place in a freezer bag. Freeze for up to 1 month. Thaw at room temperature, then refresh in a hot oven for 5 minutes.
- Make-ahead dough: After the bulk fermentation, you can refrigerate the dough overnight (up to 18 hours). The cold retard develops additional flavor. Let the dough warm at room temperature for 30 minutes before dividing and shaping.
Troubleshooting Guide
| Problem | Likely Cause | Solution |
|---|---|---|
| Crater closes up during baking | Center not pressed thin enough; dough over-proofed and too relaxed | Stretch the center paper-thin — almost translucent. Keep the final proof short (15–20 min). The dough should still feel taut when it hits the oven. |
| Bialys are too pale | Oven not hot enough; baked too briefly | Preheat fully to 260°C (500°F). Use a baking stone preheated for at least 30 minutes. Bialys need blistering heat for color and puff. |
| Onion filling burns | Filling too dry; oven rack too high | Ensure filling has enough oil. Bake on the middle rack, not the top. The filling should caramelize, not blacken. |
| Dough is too stiff to shape | Not enough hydration; bench rest too short | Allow the full 15–20 minute bench rest after dividing. If dough still resists, cover and wait another 5 minutes. Do not add extra flour. |
| Bialys are dense and heavy | Under-kneaded; yeast inactive; insufficient fermentation | Knead until the windowpane test passes. Test your yeast before using. Allow full doubling during bulk fermentation — do not rush. |
| Bottom is too dark or burned | Baking stone too hot; baked too long on bottom rack | Use middle rack. Some dark charring on the bottom is traditional and desirable, but if it’s burning, double up your baking sheets for insulation. |
Frequently Asked Questions
What is the difference between a bialy and a bagel?
Though both are iconic Jewish breads from Eastern Europe, the bialy and bagel are fundamentally different. A bagel is shaped into a ring (with a hole), boiled in water before baking, and has a shiny, chewy crust. A bialy has no hole — instead, it has a shallow crater filled with caramelized onions and poppy seeds. Bialys are never boiled, resulting in a softer, more bread-like texture with a flour-dusted, matte crust. Bagels are denser and chewier; bialys are lighter and more delicate. Both are best fresh, but bialys are even more ephemeral — they begin to stale within hours. For a side-by-side baking project, try our New York Bagel Recipe alongside these bialys.
Can I use all-purpose flour instead of high-gluten flour?
You can, but the result will be noticeably different. High-gluten flour (12–13% protein) gives bialys their characteristic chew and structure — the firm, resilient crumb that distinguishes a real bialy from an ordinary roll. All-purpose flour (10–11% protein) will produce a softer, more tender bialy. If all-purpose is all you have, add 1 tablespoon of vital wheat gluten per cup of flour to boost the protein content. King Arthur bread flour (12.7% protein) is an excellent and widely available choice.
Why do my bialys need to bake at such a high temperature?
The blistering 260°C (500°F) heat is essential to the bialy’s character. It accomplishes three things simultaneously: it puffs the thick rim dramatically (creating the airy, chewy ring), it chars the bottom slightly (giving those prized leopard spots), and it deeply caramelizes the onion filling. At lower temperatures, the bialy bakes more slowly, the rim does not puff properly, and the result tastes more like a soft roll than a bialy. If your home oven maxes out at 230°C (450°F), bake for 10–12 minutes and use a preheated baking stone for the best bottom crust.
Can I make bialys ahead of time?
The dough can be made ahead — after the bulk fermentation, punch it down, wrap tightly, and refrigerate for up to 18 hours. The cold overnight retard actually improves flavor. Let it warm for 30 minutes at room temperature before dividing and shaping. However, baked bialys do not keep well. They are at their peak within the first 2–3 hours after baking. Unlike bagels, bialys were never meant to be a make-ahead bread. The Białystok bakers made them fresh every morning for a reason.
What other fillings can I use besides onion?
The classic onion and poppy seed filling is traditional and definitive — it is what makes a bialy a bialy. That said, some modern variations include: garlic and fresh herbs (minced garlic sautéed with parsley and dill), everything seasoning (a nod to the everything bagel, using sesame, poppy, dried onion, dried garlic, and salt), or caramelized leeks for a milder, sweeter filling. Whatever you choose, keep the filling savory and use restraint — the bialy is about the bread, not the topping. The filling accents; it does not overwhelm.
🍞 Get a New Kosher Recipe Every Week
Join our baking community. One recipe, one tip, one story — delivered every Friday before Shabbat.
No spam. Just bread. Unsubscribe anytime.
Bake the Bread Białystok Remembers
Every bialy you shape is a small act of memory — a bread that survived when the community that created it did not. Bake them fresh, eat them warm, share them generously.
Save This Recipe
Bake Our New York Bagels Too →
Have questions? Tag us @kosherbreadpro on Instagram or leave a comment below. We answer every one.
You Might Also Enjoy
- New York Bagels — The boiled cousin from NYC
- Everything Bialy — Loaded seed and onion version
- Onion Pletzl — Flat onion-topped bread
- Yerushalmi Bagel — Soft Jerusalem-style rings
Leave a Reply
You must be logged in to post a comment.