Categories
Recipes

Shlissel Challah Recipe — Key Challah After Pesach

Pareve
Dairy-Free • Egg • Contains Gluten
Yield
2 challahs
Difficulty
Intermediate
Active Time
45 minutes
Total Time
3–4 hours
Bracha
HaMotzi

Shlissel challah is the first challah you bake after Pesach — and it carries the weight of an entire week of longing. For eight days you have eaten matzah: flat, humble, the bread of affliction and of freedom. And now, on the first Shabbat after the holiday ends, you return to chametz. You return to yeast, to rising dough, to the golden braided loaf that anchors the Jewish table. But this is no ordinary challah. This one is shaped like a key, or bears a key pressed into its surface, or hides a key wrapped in foil inside its braids. This is shlissel challah — the key challah — and it is baked as a segulah (spiritual remedy) for parnassah, for livelihood and sustenance.

The word shlissel comes from the Yiddish shlisl (שליסל), meaning “key.” The tradition holds that on the Shabbat immediately following Pesach, the gates of heaven that were opened during the holiday begin to close. By baking a challah in the shape of a key — or with a key — we symbolically ask that the gates of parnassah remain open for us and for our families. It is a prayer you can hold in your hands, a petition baked in dough.

There is something deeply moving about this minhag. After a week without bread, the first challah you bake is not just for Shabbat — it is an act of faith. You are saying: I trust that sustenance will come. I am opening the door. And so you shape the dough into a key and place it in the oven, and you wait for it to rise.

Shlissel challah is baked on the first Shabbat after Pesach. In 2026, Pesach ends on Saturday evening, April 11, making the shlissel challah Shabbat on April 17–18. Mark your calendar — this is a once-a-year bake.

What Makes This Shlissel Challah Special

Shlissel challah is a once-a-year tradition that transforms ordinary challah baking into something spiritually charged and deeply symbolic:

  • Key-shape symbolism — the key represents opening the gates of heaven for parnassah (livelihood). Whether you shape the dough itself into a key, press a key into the top, or braid a foil-wrapped key inside, every method carries the same intention and prayer.
  • The first challah after Pesach — after eight days without chametz, this is your triumphant return to bread-baking. The dough feels different in your hands after a week away. The aroma of yeast is intoxicating. This challah marks the transition from Pesach back to the rhythm of ordinary Shabbat.
  • A segulah for parnassah — the tradition holds that baking shlissel challah with the proper kavanah (intention) is a spiritual merit for financial sustenance. Many families have upheld this minhag for generations, passing it from mother to daughter.
  • Three shaping techniques — we provide detailed instructions for all three traditional methods: shaping the dough itself into a key form, pressing or stamping a clean key into the top of the challah, and braiding a foil-wrapped key inside the loaf. Choose the method that speaks to you.
  • Rich, golden challah dough — the base recipe is a classic, egg-enriched challah with oil, delivering a soft, pillowy crumb and beautiful golden crust. This is the same beloved challah elevated by a once-a-year purpose.

The Story of Shlissel Challah: Origins, Meaning & Debate

The minhag (custom) of baking shlissel challah is most commonly traced to the Chassidic communities of Eastern Europe, particularly from the 18th and 19th centuries. The earliest known references appear in Chassidic writings, where the key is connected to the verse in Tehillim (Psalms 118:19): “Pitchu li sha’arei tzedek” — “Open for me the gates of righteousness.” The Shabbat after Pesach, known as the first “regular” Shabbat of the new season, became a natural moment for this prayer to take physical form.

Several explanations are offered for the timing. One tradition holds that the sha’arei shamayim (gates of heaven) are opened during Pesach — when Hashem pours out abundance for the Jewish people — and begin to close after the holiday. The key-shaped challah is a symbolic request that those gates remain open. Another explanation connects shlissel challah to the manna: the Midrash teaches that the jar of manna that Bnei Yisrael carried through the desert ceased to fall after they entered Eretz Yisrael and ate from the produce of the land for the first time — which occurred during Pesach. The first Shabbat after Pesach, then, marks the moment when sustenance shifted from miraculous to natural, and we ask Hashem to continue providing.

The minhag has spread far beyond Chassidic circles and is now observed by families across the Ashkenazi world and increasingly among Sephardi communities as well. It appears in community cookbooks, synagogue newsletters, and social media every spring.

A note of balance: Not all poskim endorse this practice. Some authorities, including certain Lithuanian (Litvish) rabbis, have questioned whether shlissel challah has a solid Torah or halachic basis, noting that segulot should not substitute for tefillah (prayer) and bitachon (trust in Hashem). Others have raised concerns about the custom’s origins. These are sincere halachic opinions deserving of respect. Many families who bake shlissel challah view it not as a substitute for prayer or effort, but as a beautiful physical expression alongside their tefillos — a way to bring kavanah into the kitchen. As with all minhagim, follow the guidance of your own rav and community tradition.

Kosher Observance & Halachic Notes

Kosher Classification: Pareve

This shlissel challah recipe uses vegetable oil (no butter or dairy), making it fully pareve. It may be served at both meat and dairy Shabbat meals.

Hafrashat Challah (Separating Challah)

This recipe calls for 600 g of flour, which yields two challahs. According to most Ashkenazi poskim, this amount requires separating challah with a bracha. Sephardi practice may differ — consult your community’s minhag.

How to perform Hafrashat Challah:

  1. After the dough is fully mixed, pinch off a small piece — at least a kezayit (roughly 28 g / 1 oz).
  2. Recite the bracha:

Hebrew:
  בָּרוּךְ אַתָּה ה’ אֱלֹהֵינוּ מֶלֶךְ הָעוֹלָם אֲשֶׁר קִדְּשָׁנוּ בְּמִצְוֹתָיו וְצִוָּנוּ לְהַפְרִישׁ חַלָּה

Transliteration:
  Baruch Atah Adonai, Eloheinu Melech ha’olam, asher kid’shanu b’mitzvotav v’tzivanu l’hafrish challah.

Translation:
  “Blessed are You, Lord our God, King of the universe, Who has sanctified us with His commandments and commanded us to separate challah.”

  1. Say: “Harei zu challah” (“This is challah”).
  2. Wrap the separated piece in foil and burn it. It may not be eaten.

Timing: First Shabbat After Pesach

Shlissel challah is baked specifically for the first Shabbat after Pesach ends. It is not baked on other weeks of the year. Since Pesach chametz restrictions end at nightfall on the final day of the holiday, most families bake their shlissel challah on Thursday or Friday of that week. Ensure that all your utensils, bowls, and pans have been returned from Pesach storage to regular chametz use before beginning.

Checking Eggs for Blood Spots

Each egg should be cracked individually into a clear glass or small bowl and inspected before adding to the dough. If a blood spot is found, the egg must be discarded entirely.

Pas Yisroel

When a Jewish person lights the oven or contributes to the baking in any way, the challah fulfills Pas Yisroel requirements. This is particularly relevant during the Aseret Yemei Teshuvah, though shlissel challah is baked in the spring.

Brachot (Blessings)

  • Before eating: HaMotzi Lechem Min Ha’Aretz — wash hands and make HaMotzi as with any challah.
  • After eating: Birkat HaMazon (Grace After Meals).

If Using a Real Key Inside the Challah

If you bake a real key inside the loaf, it must be thoroughly cleaned and wrapped completely in aluminum foil so that it does not come into direct contact with the dough. Some families prefer to use a new, unused key. Others use a decorative key reserved specifically for this purpose each year.

Ingredients

Challah Dough

Ingredient Grams Volume Baker’s %
Bread flour (or all-purpose, unbleached) 600 g 4¾ cups 100%
Fine sea salt 10 g 1¾ tsp 1.7%
Granulated sugar 75 g 6 Tbsp 12.5%
Instant (rapid-rise) yeast 9 g 2¼ tsp 1.5%
Large eggs, room temperature (check for blood spots) 150 g 3 large eggs 25%
Vegetable oil (canola or sunflower) 80 g ⅓ cup + 1 Tbsp 13.3%
Warm water (see DDT note below) 180 g ¾ cup 30%
Total Dough Weight ~1,104 g

Egg Wash

Ingredient Amount
Large egg (check for blood spots) 1
Water 1 tsp

Optional Toppings

  • Sesame seeds, poppy seeds, or everything-bagel seasoning
  • Coarse sea salt flakes (for a salted finish)

For Key Shaping (choose one method)

  • Method A — Key-shaped challah: No extra materials needed; you will shape the dough itself into a key form.
  • Method B — Key pressed into top: A large, clean decorative key (metal, thoroughly washed).
  • Method C — Key baked inside: A clean key wrapped completely in aluminum foil.

Equipment

  • Stand mixer with dough hook (or large bowl for hand kneading)
  • Kitchen scale
  • 2 baking sheets lined with parchment paper
  • Pastry brush (for egg wash)
  • Bench scraper
  • Clear glass or small bowl for egg checking
  • Plastic wrap or damp towel
  • Aluminum foil (if baking a key inside)

Desired Dough Temperature (DDT)

Target DDT: 26°C (78°F)

A properly warm dough ensures even fermentation and a good rise. To calculate your water temperature:

Water Temp = (DDT × 3) − Flour Temp − Room Temp

Example: If your kitchen is 22°C and your flour is 21°C:
Water = (26 × 3) − 22 − 21 = 35°C (95°F)

The water should feel comfortably warm — like bath water. Never exceed 43°C (110°F), which can kill the yeast.

Step-by-Step Instructions

Step 1: Make the Dough

Crack each egg individually into a clear glass and inspect for blood spots. If clear, add to the bowl of a stand mixer along with the warm water, sugar, and oil. Whisk briefly to combine.

Add the flour, salt, and instant yeast (keep salt and yeast on opposite sides of the bowl). Mix on low speed (speed 1–2) for 2–3 minutes until a shaggy dough forms and no dry flour remains.

Increase to medium speed (speed 3–4) and knead for 8–10 minutes until the dough is:

  • Smooth and elastic — it should pull away from the bowl sides cleanly.
  • Soft and slightly tacky — but not wet or sticky. It should not cling to dry fingers when touched briefly.
  • Passes a windowpane test — stretch a small piece thin; it should become translucent before tearing.

Hand kneading: Combine ingredients in a large bowl, turn onto a lightly oiled surface, and knead 12–15 minutes. Challah dough is enriched and takes longer to develop gluten by hand.

Perform hafrashat challah now (see Halachic Notes above).

Step 2: First Rise

Lightly oil a large bowl. Place the dough inside, turn to coat, and cover tightly with plastic wrap or a damp towel.

Let rise at room temperature for 1 to 1.5 hours until doubled in volume. The dough should be puffy and spring back slowly when pressed with a floured finger.

Step 3: Divide the Dough

Gently turn the risen dough onto a lightly oiled surface and deflate. Using a bench scraper and scale, divide the dough into 2 equal pieces (~550 g each) for two challahs.

Now choose your shaping method. You may use the same method for both loaves or try different methods.

Step 4: Shape the Challah — Three Methods

Method A: Key-Shaped Challah (dough formed into a key)

This is the most dramatic and visual approach. The challah itself looks like a large key.

  1. Take one portion of dough (~550 g). Pinch off about 100 g and set aside for the key “teeth.”
  2. Divide the remaining ~450 g into 3 equal strands (~150 g each). Roll each strand into a rope about 40 cm (16 inches) long.
  3. Braid the three strands into a classic three-braid challah, pinching the ends together. This forms the “shaft” of the key.
  4. At one end, curve the braid into a round loop — the “bow” (head) of the key. Pinch the end securely to the body of the braid to seal the loop. The loop should be roughly 8–10 cm (3–4 inches) in diameter.
  5. With the reserved 100 g of dough, form 2–3 small rectangular “teeth” at the opposite (straight) end. Roll small pieces into short strips about 5–6 cm (2 inches) long and attach them perpendicular to the shaft, pressing firmly to adhere. Dab a little water at the attachment points if needed.
  6. Transfer carefully to a parchment-lined baking sheet.

Method B: Key Pressed Into the Top

The simplest method. You bake a traditional braided challah and press a decorative key into the top before baking.

  1. Divide the ~550 g portion into 3 or 4 strands and braid into a classic challah shape. Pinch and tuck the ends underneath.
  2. Place on a parchment-lined baking sheet.
  3. After the second rise (Step 5) and after applying egg wash, press a clean, large key firmly into the top of the challah so it is partially embedded in the dough. The key will remain visible on the surface as the challah bakes, leaving a permanent impression.
  4. Remove the key after baking (it will lift out easily). The key imprint will remain beautifully visible on the golden crust.

Method C: Traditional Braid with Key Baked Inside

The key is hidden inside the challah — a surprise revealed only when you slice or tear the bread at the Shabbat table.

  1. Wrap a clean key thoroughly in aluminum foil — at least two layers, ensuring no metal is exposed. The foil prevents the key from touching the dough directly.
  2. Divide the ~550 g portion into 3 or 4 strands and begin braiding.
  3. About halfway through the braid, tuck the foil-wrapped key into the center of the dough, nestling it between the strands. Continue braiding over and around it so the key is fully enclosed.
  4. Pinch and tuck the ends. Transfer to a parchment-lined baking sheet.
  5. Important: Warn your family that there is a key inside before serving, so no one bites into it unexpectedly.

Step 5: Second Rise

Cover the shaped challahs loosely with plastic wrap or a damp towel. Let rise for 45 minutes to 1 hour in a warm place until the loaves are visibly puffy and have increased in size by about 50%. They should feel light and airy when you gently nudge the baking sheet.

While the challahs rise, preheat your oven to 180°C (350°F) with a rack in the center position.

Step 6: Egg Wash

Beat the egg wash egg with 1 tsp water. Using a pastry brush, apply a thin, even coat over the entire surface of each challah, getting into the crevices of the braid. Be gentle — do not deflate the risen dough.

If using Method B (key pressed into top), press the key into the challah now, after the egg wash.

Sprinkle with sesame seeds, poppy seeds, or your preferred topping if desired.

Step 7: Bake

Place the challahs in the preheated oven and bake for 25–30 minutes until:

  • The crust is deep golden brown — a rich, burnished color, not pale.
  • The bottom sounds hollow when tapped.
  • The internal temperature reads 88–93°C (190–200°F) on an instant-read thermometer.

Key-shaped challah (Method A): The thinner “teeth” at the end of the key may brown faster. If they darken too quickly, tent loosely with a small piece of foil for the last 10 minutes.

Remove from the oven and let cool on a wire rack for at least 20 minutes before serving. If using Method B, carefully remove the key from the top while the challah is still warm.

Storage & Make-Ahead

  • Room temperature: Wrap cooled challah tightly in plastic wrap or place in an airtight bag. Keeps well for 2–3 days at room temperature.
  • Freezing: Wrap cooled challah in plastic wrap, then a layer of aluminum foil. Freeze for up to 2 months. Thaw at room temperature for 2–3 hours, then refresh in a 150°C (300°F) oven for 8–10 minutes.
  • Make-ahead option: Shape the challahs, place on baking sheets, cover tightly with plastic wrap, and refrigerate overnight (up to 12 hours). Remove from the fridge 45–60 minutes before baking to let them come to room temperature and finish rising, then egg wash and bake as directed.
  • Day-old challah: Makes outstanding French toast, challah bread pudding, or croutons for soup.

Troubleshooting Guide

Problem Likely Cause Solution
Key shape lost during baking Dough over-proofed and spread; key teeth not attached firmly Do not over-proof — bake when loaves are puffy but still holding their shape. Use water to glue the teeth to the shaft. Chill shaped challah for 15 minutes before baking if shape is soft.
Challah is pale and soft on top Insufficient egg wash; oven temperature too low Apply egg wash evenly and thoroughly. Verify oven temperature with a thermometer. A second light coat of egg wash after 5 minutes in the oven can boost color.
Dough is sticky and hard to braid Too much water; humidity; under-kneaded Add flour 1 Tbsp at a time during kneading until dough pulls away from bowl sides. Oil your hands lightly when shaping. Ensure full 8–10 minute knead.
Braid unraveled during baking Strands not pinched tightly; under-proofed dough fighting the shape Pinch strand ends very firmly and tuck them underneath the loaf. Allow a full second rise so the dough relaxes into its shape before the oven spring.
Challah is dense or heavy Yeast was old or killed by hot water; insufficient rise time Test yeast in warm water with a pinch of sugar before adding to dough — it should foam within 10 minutes. Allow full doubling in first rise. Water must not exceed 43°C (110°F).
Key impression (Method B) disappeared Key not pressed deep enough; too much oven spring Press the key firmly — at least halfway into the dough. Use a heavy, large key for a more dramatic impression. Leave the key in place during baking for the deepest mark.

Frequently Asked Questions

What does “shlissel” mean?

Shlissel (שליסל) is the Yiddish word for “key,” derived from the German Schlüssel. Shlissel challah literally means “key challah.” The key symbolizes our prayer that Hashem open the gates of parnassah (livelihood) and sustenance for us and our families. The physical act of shaping bread into a key — or baking a key inside — transforms an abstract prayer into something tangible, something you can hold and share at your Shabbat table.

Is shlissel challah halacha or minhag?

Shlissel challah is a minhag (custom), not a halachic obligation. It is not mentioned in the Shulchan Aruch or in the Talmud. The practice is rooted primarily in Chassidic tradition and has spread widely through Ashkenazi communities over the past two centuries. Some poskim and rabbinical authorities have expressed reservations about the practice, questioning its origins and cautioning that segulot should complement — not replace — sincere tefillah (prayer), hishtadlut (effort), and bitachon (trust in Hashem). Many families who observe this minhag view it as a beautiful, meaningful expression of faith alongside their prayers, not as a substitute. Follow your own rav’s guidance and your family’s tradition.

When exactly is shlissel challah baked?

Shlissel challah is baked for the first Shabbat after Pesach ends. Since Pesach ends at nightfall (after Havdalah on the final day of the holiday outside of Israel), you would bake your shlissel challah during the week following Pesach — typically on Thursday or Friday — for that upcoming Shabbat. It is a once-a-year tradition. Some communities also have a custom of baking shlissel challah for the second Shabbat after Pesach, but the primary and most widely observed practice is the first Shabbat only.

Which shaping method is “most correct”?

All three methods are equally valid and widely practiced. Shaping the dough into a key form (Method A) is the most visually striking and is especially popular on social media and in bakeries. Pressing a key into the top (Method B) is the simplest and most accessible method, ideal for beginners. Baking a key inside the challah (Method C) is perhaps the most traditional Chassidic approach — the key is hidden, like the hidden blessings we pray for. Choose the method that resonates with you, or try a different one each year.

Can I use my regular challah recipe for shlissel challah?

Absolutely. Shlissel challah is not about a specific dough recipe — it is about the shaping, the timing, and the kavanah (intention). Any challah dough you love can become shlissel challah. The recipe we provide here is a classic, reliable egg challah that shapes beautifully, but if you have a family recipe you prefer — whether it is a honey challah, a whole wheat challah, or a water challah — use it with confidence. The key is the key.

Open the Gates of Parnassah at Your Shabbat Table

Shlissel challah is a once-a-year opportunity to turn your baking into a prayer. Shape the key. Open the door. Welcome the blessing.

Save This Recipe
Classic Kosher Challah →
Honey Challah →

Have questions? Tag us @kosherbreadpro on Instagram or leave a comment below. We answer every one.

Categories
Recipes

Honey Challah Recipe — Round Rosh Hashanah Bread

Pareve
Dairy-Free • Egg • Contains Gluten
Yield
2 round challahs
Difficulty
Beginner–Intermediate
Active Time
30 minutes
Total Time
3½–4 hours
Bracha
HaMotzi

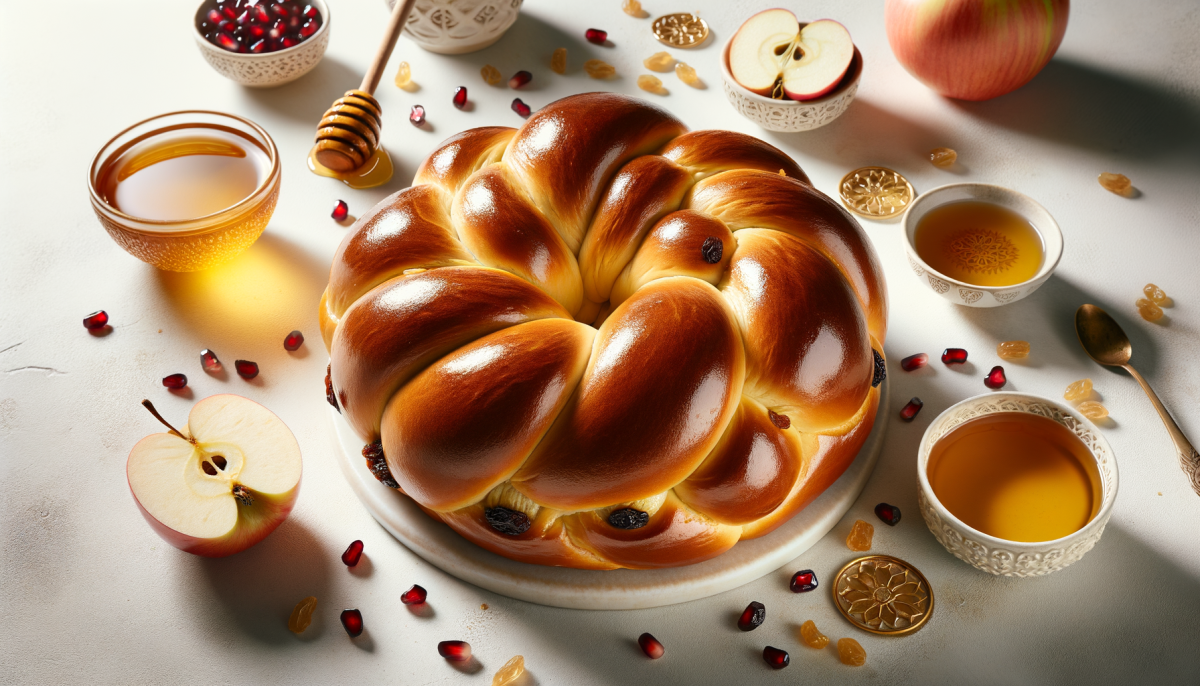
Round honey challah is THE bread of Rosh Hashanah. If there is one loaf that defines the Jewish New Year, this is it — golden, glistening with honey glaze, shaped into a tight spiral that speaks of cycles, continuity, and hope. From the first night of Rosh Hashanah through the final meal of Sukkot, this round, honey-sweetened challah replaces the traditional braided loaf on every observant Jewish table.

The symbolism is woven into every element. The round shape represents the cycle of the year — no beginning, no end, the eternal turning of seasons and festivals. Honey replaces sugar in the dough, because we ask God for a shanah tovah u’metukah — a good and sweet new year. And the spiral, rising upward from the center, is said to evoke a crown, a reminder of God’s sovereignty on the Day of Judgment.

If you have baked our Classic Kosher Challah, you already have the foundation. Honey challah uses the same core technique but swaps most of the sugar for rich, floral honey and reshapes the dough from a braid into a beautiful round coil. It is a small shift in method that carries enormous meaning.

On Rosh Hashanah night, the round challah is dipped in honey before eating — doubling the sweetness. Some families place a bowl of honey at the center of the table and let each person tear a piece and dip it themselves, making the wish for a sweet new year a communal, tactile act.

What Makes This Honey Challah Special

This is not simply a regular challah bent into a circle. Every choice in the recipe is deliberate:

  • Honey replaces most of the sugar — real honey contributes moisture, a deeper golden color, a subtle floral complexity, and a softer crumb that stays fresh longer than sugar-only doughs. We use a generous amount for unmistakable honey flavor.
  • Round spiral shape with authentic technique — we teach the traditional single-rope coil method, producing a tight, even spiral that rises beautifully and slices cleanly. No braiding required.
  • Optional raisins — many families add raisins to their Rosh Hashanah challah for extra sweetness. We include them as an option, with guidance on how to incorporate them without disrupting the dough structure.
  • Golden honey glaze — a warm honey wash applied immediately after baking gives the challah a gorgeous, lacquered sheen and a hint of sticky sweetness on the crust.
  • Full baker’s percentages — every ingredient is scaled to flour weight so you can confidently adjust the batch size for your table.

The Round Challah: Rosh Hashanah Bread Traditions

The custom of baking round challah for Rosh Hashanah is observed across virtually all Jewish communities — Ashkenazi, Sephardi, Mizrachi, and Yemenite — though the specific shape and enrichments vary. The practice dates back centuries and is rooted in deep symbolism.

The round shape carries multiple layers of meaning. Most commonly, it represents the cycle of the year — as one year ends and another begins, the circle reminds us of the continuous, unbroken flow of time. The Kabbalistic tradition sees the spiral as a crown (keter), symbolizing God’s sovereignty, which we affirm on Rosh Hashanah when we declare God as King. Some commentators also note that the round shape, with no visible beginning or end, reflects our prayer that the coming year will be complete and whole.

Honey is central to Rosh Hashanah as one of the simanim — the symbolic foods eaten on the first night. The most well-known siman is apple dipped in honey, accompanied by the prayer: “Yehi ratzon… she’techadesh aleinu shanah tovah u’metukah” — “May it be Your will to renew for us a good and sweet year.” By sweetening the challah itself with honey, we extend that symbolism to the bread, the centerpiece of every Jewish meal.

The round, honey-sweetened challah is served from Rosh Hashanah through Hoshana Rabbah (the seventh day of Sukkot) — the entire period of the High Holidays and the festival season. After Sukkot, we return to the standard braided challah shape for the rest of the year. Some families also bake round challah for the meal before Yom Kippur (seudah hamafseket), sending the faster into the fast with sweetness and sustenance.

Kosher Observance & Halachic Notes

Kosher Classification: Pareve

This honey challah is fully pareve, made with vegetable oil rather than butter. It can be served alongside meat or dairy meals — making it appropriate for any Rosh Hashanah table, whether the main course is brisket, chicken, or a dairy meal.

Hafrashat Challah (Separating Challah)

This recipe calls for 600 g of bread flour, which produces two round challahs. According to most Ashkenazi poskim, this amount requires separating challah with a bracha. Sephardi practice may differ — consult your community’s minhag.

How to perform Hafrashat Challah:

  1. After the dough is fully mixed, pinch off a small piece — at least a kezayit (roughly 28 g / 1 oz).
  2. Recite the bracha:

Hebrew:
  בָּרוּךְ אַתָּה ה’ אֱלֹהֵינוּ מֶלֶךְ הָעוֹלָם אֲשֶׁר קִדְּשָׁנוּ בְּמִצְוֹתָיו וְצִוָּנוּ לְהַפְרִישׁ חַלָּה

Transliteration:
  Baruch Atah Adonai, Eloheinu Melech ha’olam, asher kid’shanu b’mitzvotav v’tzivanu l’hafrish challah.

Translation:
  “Blessed are You, Lord our God, King of the universe, Who has sanctified us with His commandments and commanded us to separate challah.”

  1. Say: “Harei zu challah” (“This is challah”).
  2. Wrap the separated piece in foil and burn it. It may not be eaten.

Checking Eggs for Blood Spots

Each egg should be cracked individually into a clear glass or small bowl and inspected before adding to the dough. If a blood spot is found, the egg must be discarded entirely.

Pas Yisroel

When a Jewish person lights the oven or contributes to the baking in any way, the challah fulfills Pas Yisroel requirements. This is especially important during the Aseret Yemei Teshuvah (the Ten Days of Repentance between Rosh Hashanah and Yom Kippur), when many communities that are lenient about Pas Yisroel year-round are strict about it.

Simanim (Symbolic Foods) on Rosh Hashanah

The round honey challah itself serves as a siman for a sweet year. On the first night of Rosh Hashanah, it is customary to dip the challah in honey instead of the usual salt. Some continue dipping in honey through Sukkot. The challah is eaten after the traditional simanim (apple in honey, pomegranate, dates, etc.) and the associated yehi ratzon prayers.

Shehecheyanu on Rosh Hashanah

On the first night of Rosh Hashanah, the Shehecheyanu blessing is recited during Kiddush. On the second night, it is customary to place a new fruit (one not yet eaten this season) on the table to serve as the basis for the Shehecheyanu. The round challah, while central to the meal, does not require its own Shehecheyanu.

Brachot (Blessings)

  • Before eating: HaMotzi Lechem Min Ha’Aretz — wash hands with the bracha for netilat yadayim, then recite HaMotzi. On Rosh Hashanah, dip the challah in honey.
  • After eating: Birkat HaMazon (Grace After Meals), with the Rosh Hashanah insertions (Ya’aleh v’Yavo).

Ingredients

Dough

Ingredient Grams Volume Baker’s %
Bread flour 600 g 4¾ cups 100%
Honey (preferably raw, mild-flavored) 115 g ⅓ cup 19.2%
Granulated sugar 25 g 2 Tbsp 4.2%
Instant (rapid-rise) yeast 9 g 2¼ tsp 1.5%
Fine sea salt 10 g 1¾ tsp 1.7%
Large eggs, room temperature (check for blood spots) 150 g 3 large eggs 25%
Vegetable or canola oil 80 g ⅓ cup + 1 Tbsp 13.3%
Warm water (see DDT note below) 180 g ¾ cup 30%
Total Dough Weight ~1,169 g

Optional Raisins

Ingredient Amount Notes
Golden or dark raisins 120 g (¾ cup) Soak in hot water for 10 minutes, drain and pat dry before adding

Egg Wash

  • 1 large egg + 1 Tbsp water, beaten (check egg for blood spots)

Honey Glaze

  • 2 Tbsp honey + 1 Tbsp warm water, stirred until smooth

Desired Dough Temperature (DDT)

Target DDT: 26°C (78°F)

An enriched dough like challah benefits from a warm, active fermentation. To calculate your water temperature:

Water Temp = (DDT × 3) − Flour Temp − Room Temp

Example: If your kitchen is 22°C and your flour is 21°C:
Water = (26 × 3) − 22 − 21 = 35°C (95°F)

The water should feel comfortably warm — like bath water. Never exceed 43°C (110°F), which can kill yeast.

Step-by-Step Instructions

Step 1: Mix the Dough

Crack each egg individually into a clear glass and inspect for blood spots. If clear, add to the bowl of a stand mixer.

Add the warm water, honey, sugar, and oil to the eggs. Whisk briefly to combine.

Add the bread flour, salt, and instant yeast (keep salt and yeast on opposite sides of the bowl). Mix on low speed (speed 1–2) for 2–3 minutes until a shaggy, cohesive dough forms and no dry flour remains.

Increase to medium speed (speed 3–4) and knead for 8–10 minutes until the dough is:

  • Smooth and elastic — it should pull away from the bowl sides cleanly.
  • Soft and slightly tacky — but not sticky. It should not cling to dry fingers when poked.
  • Passes a windowpane test — stretch a small piece gently; it should thin out without tearing immediately.

If adding raisins: Add the drained, dried raisins during the last 1–2 minutes of kneading on low speed. Mix just until evenly distributed. Do not over-knead after adding raisins or they will tear and bleed into the dough.

Hand kneading: Combine wet and dry ingredients in a large bowl, turn onto a lightly oiled surface, and knead 12–15 minutes. Enriched doughs take longer by hand — be patient. The dough should feel supple, smooth, and alive.

Step 2: First Rise

Lightly oil a large bowl. Place the dough inside, turn to coat, and cover tightly with plastic wrap or a damp towel.

Let rise at room temperature for 1.5 to 2 hours until doubled in volume. Honey-enriched doughs can be slightly slower to rise than sugar-only doughs — be patient and judge by size, not by time alone.

Step 3: Shape the Round Challahs

Line two baking sheets with parchment paper.

Turn the risen dough out onto a lightly oiled work surface. Gently deflate. Using a bench scraper and scale, divide the dough into 2 equal pieces (~585 g each).

The Round Spiral Shaping Technique:

Working with one piece at a time (keep the other covered):

  1. Roll into a long rope. Using both hands, roll the dough piece on the work surface into a rope approximately 60–70 cm (24–28 inches) long. Keep the rope slightly thicker at one end and gently tapered at the other. If the dough resists and springs back, let it rest under a towel for 5 minutes, then continue rolling.
  2. Begin the coil. Take the thicker end and curl it inward on itself to form a small, tight knot or rosette in the center — this is the heart of the spiral.
  3. Wind the rope around the center. Working outward, wrap the remaining rope around the center knot in a snug spiral, keeping the coil flat on the work surface. Each layer should sit snugly against the previous one.
  4. Tuck the tail. When you reach the thin tapered end, tuck it firmly underneath the coil so it does not unravel during proofing or baking.
  5. Gently flatten. With your palm, press the coil down very slightly to even its height. It should be about 8–10 cm (3–4 inches) in diameter at this stage — it will expand significantly.

Place each shaped round challah on a prepared baking sheet, leaving plenty of room for expansion. Cover loosely with plastic wrap or a damp towel.

Step 4: Second Rise (Proof)

Let the shaped challahs proof at room temperature for 45 minutes to 1 hour until they are puffy and have grown by about 50%. The dough should spring back slowly when pressed gently with a fingertip — if it springs back quickly, it needs more time; if the indent stays, it is slightly over-proofed.

During the last 20 minutes of proofing, preheat your oven to 180°C (350°F) with a rack in the center position.

Step 5: Egg Wash

Beat the egg wash (1 egg + 1 Tbsp water) and brush it gently and evenly over the entire surface of each challah. Be thorough — get into the crevices of the spiral — but use a light hand to avoid deflating the dough.

Optional: For an extra-deep golden color, apply a second coat of egg wash after 5 minutes.

Step 6: Bake

Place the challahs in the preheated oven. Bake for 28–35 minutes until:

  • The crust is a deep golden brown — honey challah browns faster than sugar challah, so watch carefully in the last 10 minutes.
  • The internal temperature reaches 88–93°C (190–200°F) on an instant-read thermometer inserted into the center.
  • The bottom sounds hollow when tapped.

If the tops are browning too quickly: Tent loosely with aluminum foil after the first 20 minutes and continue baking.

Step 7: Honey Glaze

As soon as the challahs come out of the oven, stir together 2 Tbsp honey and 1 Tbsp warm water until smooth. Immediately brush this honey glaze generously over the hot challahs. The heat of the bread will set the glaze into a beautiful, slightly tacky, golden sheen.

Transfer to a wire rack and let cool for at least 30 minutes before slicing or tearing. The interior continues to set as it cools — cutting too early will result in a gummy crumb.

Storage & Make-Ahead Tips

  • Room temperature: Wrap tightly in plastic wrap or store in a large zip-top bag. Honey challah stays soft and fresh for 2–3 days at room temperature — the honey acts as a natural humectant, retaining moisture longer than sugar-only challah.
  • Freezing: Wrap cooled challah tightly in plastic wrap, then in aluminum foil. Freeze for up to 3 months. Thaw at room temperature for 2–3 hours (still wrapped to prevent condensation on the crust).
  • Reheating: Wrap in foil and warm in a 165°C (325°F) oven for 10–15 minutes. For a crisp crust, unwrap for the final 3 minutes.
  • Make ahead for Rosh Hashanah: Bake 1–2 days before Yom Tov and freeze immediately. Thaw the morning of erev Rosh Hashanah for a fresh-tasting challah at the holiday table.

Troubleshooting Guide

Problem Likely Cause Solution
Spiral unravels during baking Tail not tucked securely; coil wound too loosely; over-proofed Tuck the tail firmly underneath. Wind the spiral snugly (but not so tight that it tears). Reduce proof time slightly.
Challah is too dark or burns on top Honey browns faster than sugar; oven runs hot Tent with foil after 20 minutes. Reduce oven to 170°C (340°F). Use an oven thermometer to verify temperature.
Dough is too sticky to shape Honey adds moisture; insufficient kneading; too much water Knead longer to develop gluten. Use a lightly oiled (not floured) surface. The dough should be tacky but manageable after full kneading.
Crumb is dense or gummy Under-baked; cut while too hot; insufficient rising Bake until internal temp reaches 90°C (194°F). Let cool at least 30 minutes. Ensure dough fully doubled in the first rise.
Raisins sink to the bottom Raisins too wet; added too early in kneading Pat raisins very dry after soaking. Toss in 1 Tbsp flour before adding. Fold in gently at the very end of kneading.
Challah is flat, did not rise well Yeast is expired; water too hot; salt killed yeast Test yeast freshness by proofing in warm water with a pinch of sugar. Never exceed 43°C (110°F). Keep salt away from yeast when adding to bowl.

Frequently Asked Questions

Why is Rosh Hashanah challah round instead of braided?

The round shape carries deep symbolism for the Jewish New Year. It represents the cycle of the year — as one year ends and another begins, the circle reminds us of the continuous flow of time and seasons. The spiral is also said to resemble a crown, reflecting God’s sovereignty that we affirm on Rosh Hashanah. Additionally, the shape has no visible beginning or end, symbolizing our prayer for a year that is complete and whole. The custom of baking round challah extends from Rosh Hashanah through Sukkot, after which we return to the traditional braided shape.

Can I add raisins to the challah?

Absolutely — raisin challah is a beloved Rosh Hashanah tradition in many Ashkenazi communities. The raisins add pockets of sweetness that complement the honey beautifully. Use 120 g (¾ cup) of golden or dark raisins, soaked in hot water for 10 minutes and thoroughly drained and dried. Add them during the last 1–2 minutes of kneading on low speed. Some families also add a handful of raisins pressed into the surface of the shaped challah before the final proof.

Can I use this dough to make a braided challah instead?

Yes. This honey-enriched dough works beautifully for a traditional 4- or 6-strand braid. Simply divide each half into the appropriate number of strands and braid as you would for our Classic Kosher Challah. However, for Rosh Hashanah specifically, the round shape is the strong and nearly universal minhag. Save the braid for after Sukkot.

What type of honey should I use?

Use a mild, light-colored honey such as clover, acacia, or wildflower. These have a clean sweetness that enriches the dough without overpowering it. Avoid very dark, strongly flavored honeys (like buckwheat) for the dough itself — their intense flavor can be bitter when baked. For the glaze, any honey works well since it is applied in a thin layer. Raw or pasteurized honey both work; just ensure the honey is liquid enough to mix into the dough smoothly.

How far in advance can I bake honey challah for Rosh Hashanah?

Honey challah freezes exceptionally well. You can bake up to 3 months ahead, wrap tightly in plastic wrap and foil, and freeze. Thaw at room temperature (still wrapped) for 2–3 hours on the day of erev Rosh Hashanah. For the freshest possible result, bake 1–2 days before Yom Tov and freeze immediately after cooling. The honey in the dough acts as a humectant, helping the challah retain moisture better than sugar-only versions even after freezing.

Shanah Tovah U’Metukah — A Sweet New Year

This round honey challah belongs on your Rosh Hashanah table. Bake it with intention, tear it with joy, and dip it in honey with hope for the year ahead.

Save This Recipe
Bake Our Classic Challah Too →

Have questions? Tag us @kosherbreadpro on Instagram or leave a comment below. We answer every one.

Categories
Recipes

Jerusalem Kugel Bread — Caramelized Pepper Shabbat Loaf

Pareve
Dairy-Free • Egg • Contains Gluten
Yield
1 large loaf (10–12 servings)
Difficulty
Intermediate
Active Time
45 minutes
Total Time
4–5 hours
Bracha
HaMotzi

Jerusalem Kugel Bread is a bread that captures the soul of Yerushalmi kugel — caramelized sugar, bold black pepper, and a sweet-savory-spicy warmth that is unlike anything else in Jewish baking. If you have ever tasted Yerushalmi kugel, you know the flavor: that deep, amber caramel that walks the line between bitter and sweet, shot through with enough black pepper to make your lips tingle. Now imagine those flavors woven into a soft, enriched, pull-apart bread. That is what we are making here.

This is not a kugel shaped like bread. It is a true yeasted bread — enriched with eggs and oil, layered with a caramelized sugar-pepper syrup, shaped into a pull-apart loaf that tears into glossy, amber-streaked pieces. The caramel melts into the dough during proofing and baking, creating pockets of bittersweet intensity. The black pepper, far more than a whisper, provides the signature counterpoint that makes Yerushalmi flavors so addictive.

Where classic challah is golden and mild, Jerusalem Kugel Bread is dark-streaked and assertive. It is the bread for the baker who loves contrast — sweet against spicy, soft against sticky, the familiar comfort of bread against the startling depth of burnt caramel. Serve it on Shabbat and watch it disappear before the main course arrives.

The combination of caramelized sugar and black pepper is ancient and unmistakable — the signature of Jerusalem’s Old Yishuv. This bread brings those flavors from the kugel pot to the bread basket, creating something entirely new yet deeply rooted in tradition.

What Makes This Jerusalem Kugel Bread Special

This bread takes the iconic flavor profile of Yerushalmi kugel and reimagines it in bread form. Every element is deliberate:

  • Caramelized sugar syrup folded into the dough — real caramel, cooked to a deep amber, is cooled and incorporated into the dough layers. This is not a sugar glaze — it is the same bittersweet caramel that defines authentic Yerushalmi kugel, creating pockets of dark, sticky sweetness throughout the bread.
  • Generous black pepper throughout — 2 full tablespoons of freshly ground black pepper, far more than any conventional bread. The pepper is the soul of the Yerushalmi flavor profile, providing warmth and spice that plays against the caramel in every bite.
  • A unique sweet-savory-spicy profile — no other bread in the Jewish baking tradition tastes like this. The interplay of bitter caramel, sharp pepper, and soft enriched dough is addictive and entirely original.
  • Pull-apart shaping — the dough is rolled with the caramel-pepper filling, coiled, and arranged in a pan so each piece tears away with swirls of amber caramel visible in the crumb.
  • Inspired by the iconic Jerusalem Shabbat dish — Yerushalmi kugel is one of the most beloved and distinctive foods in all of Jewish cuisine. This bread pays homage to its flavors while standing entirely on its own as a baked creation.

The Story Behind the Flavors: Yerushalmi Kugel & the Old Yishuv

Yerushalmi kugel — Jerusalem kugel — is the iconic Shabbat dish of the Old Yishuv, the pre-state Jewish community of Jerusalem. Specifically, it is the creation of the Perushim, the Lithuanian Jewish community that settled in Jerusalem in the early 19th century, followers of the Vilna Gaon. These Jews brought Eastern European kugel traditions with them and, in the holy city, transformed them into something entirely new.

The genius of Yerushalmi kugel lies in its caramel. Sugar is cooked in oil until it reaches a deep, almost burnt amber — far past the point where most cooks would lose their nerve. This bitter-sweet caramel is then mixed with cooked noodles, eggs, and an audacious amount of black pepper. The result, baked for hours until the edges darken and the interior sets into a dense, sweet-peppery mass, is unlike any other kugel in the Jewish world. It is served cold or at room temperature, sliced from a towering cylinder, each slice revealing a dark, glistening cross-section.

The dish became so identified with Jerusalem that it is virtually impossible to find a Shabbat table in the city’s religious neighborhoods — Meah Shearim, Geulah, the Jewish Quarter — without it. Bakeries sell it by the slice, families guard their recipes jealously, and debates over the correct ratio of pepper to caramel can escalate with Talmudic intensity.

This bread channels those unmistakable flavors into a new form. The caramelized sugar syrup, the aggressive black pepper, the deep amber color — all are present. But instead of noodles, they are layered into an enriched bread dough, creating a pull-apart loaf that brings Yerushalmi kugel to the bread basket.

Kosher Observance & Halachic Notes

Kosher Classification: Pareve

This bread is made with vegetable oil (no butter or dairy), making it fully pareve. It can be served alongside both meat and dairy Shabbat meals. Verify that all ingredients, including the sugar and oil, bear a reliable hechsher.

Hafrashat Challah (Separating Challah)

This recipe calls for 500 g of flour. According to most Ashkenazi poskim, this amount requires separating challah without a bracha. If you double the recipe (1,000 g flour), you should separate challah with a bracha. Sephardi practice may differ — consult your community’s minhag.

How to perform Hafrashat Challah:

  1. After the dough is fully mixed, pinch off a small piece — at least a kezayit (roughly 28 g / 1 oz).
  2. If the total flour exceeds the bracha threshold for your community, recite the bracha:

Hebrew:
  בָּרוּךְ אַתָּה ה’ אֱלֹהֵינוּ מֶלֶךְ הָעוֹלָם אֲשֶׁר קִדְּשָׁנוּ בְּמִצְוֹתָיו וְצִוָּנוּ לְהַפְרִישׁ חַלָּה

Transliteration:
  Baruch Atah Adonai, Eloheinu Melech ha’olam, asher kid’shanu b’mitzvotav v’tzivanu l’hafrish challah.

Translation:
  “Blessed are You, Lord our God, King of the universe, Who has sanctified us with His commandments and commanded us to separate challah.”

  1. Say: “Harei zu challah” (“This is challah”).
  2. Wrap the separated piece in foil and burn it. It may not be eaten.

Checking Eggs for Blood Spots

Each egg should be cracked individually into a clear glass or small bowl and inspected before adding to the dough. If a blood spot is found, the egg must be discarded entirely.

Pas Yisroel

When a Jewish person sets the oven temperature or contributes to the baking in any way, the bread fulfills Pas Yisroel requirements. This is particularly relevant during the Aseret Yemei Teshuvah.

Brachot (Blessings)

  • Before eating: HaMotzi Lechem Min Ha’Aretz — this is bread in every halachic sense. Wash and make HaMotzi.
  • After eating: Birkat HaMazon (Grace After Meals).

Shabbat Serving

Jerusalem Kugel Bread is ideal for Shabbat lunch, echoing the traditional role of Yerushalmi kugel as a Shabbat day dish. Bake it on Friday before candle-lighting and serve at room temperature or slightly warm on Shabbat. Its sweet-peppery flavor pairs beautifully with cholent and other Shabbat day fare. As a pareve bread, it works alongside both meat and dairy menus.

Ingredients

Enriched Dough

Ingredient Grams Volume Baker’s %
Bread flour (or strong all-purpose flour) 500 g 4 cups 100%
Fine sea salt 8 g 1½ tsp 1.6%
Instant (rapid-rise) yeast 7 g 2¼ tsp 1.4%
Large eggs, room temperature (check for blood spots) 100 g 2 large eggs 20%
Vegetable oil (neutral, such as canola or sunflower) 60 g ¼ cup + 1 Tbsp 12%
Warm water (see DDT note below) 180 g ¾ cup 36%
Granulated sugar (for the dough) 25 g 2 Tbsp 5%
Total Dough Weight ~880 g

Caramelized Pepper Filling

Ingredient Grams Volume Notes
Granulated sugar (for the caramel) 150 g ¾ cup Cooked to deep amber
Water (for the caramel) 60 g ¼ cup Added to stop cooking
Vegetable oil (for the caramel) 30 g 2 Tbsp Creates spreadable consistency
Freshly ground black pepper 12 g 2 Tbsp Coarsely ground for maximum impact

For the Pan

  • Additional 15 g (1 Tbsp) vegetable oil for greasing the pan
  • 1 egg yolk + 1 Tbsp water for egg wash (optional)

Use a 25 cm (10-inch) round springform pan, bundt pan, or deep cake pan. A bundt pan creates a particularly dramatic presentation.

Equipment

  • Medium heavy-bottomed saucepan for making caramel
  • 25 cm (10-inch) bundt pan, springform pan, or deep round cake pan
  • Stand mixer with dough hook (or large bowl for hand kneading)
  • Kitchen scale
  • Rolling pin
  • Offset spatula or pastry brush for spreading caramel
  • Pepper mill or mortar and pestle for coarse grinding
  • Clear glass or small bowl for egg checking
  • Parchment paper (for lining pan bottom)

Desired Dough Temperature (DDT)

Target DDT: 26°C (78°F)

A moderately warm dough ensures consistent fermentation and a soft, enriched crumb. To calculate your water temperature:

Water Temp = (DDT × 3) − Flour Temp − Room Temp

Example: If your kitchen is 22°C and your flour is 21°C:
Water = (26 × 3) − 22 − 21 = 35°C (95°F)

The water should feel comfortably warm — like bath water. Never exceed 43°C (110°F).

Step-by-Step Instructions

Step 1: Make the Caramelized Pepper Syrup

This is the signature step. Take your time and do not rush the caramel.

  1. Place the 150 g sugar in a medium heavy-bottomed saucepan over medium heat. Do not stir. Let the sugar melt from the edges inward, swirling the pan gently as needed.
  2. Cook until the sugar reaches a deep amber color — dark like strong tea, almost the color of mahogany. This takes 5–8 minutes. It should smell bittersweet and intensely caramelized, not burnt. Watch carefully: the line between deep amber and burnt is thin.
  3. Carefully add the 30 g oil — the mixture will bubble vigorously. Stir with a heat-proof spatula until combined.
  4. Carefully add the 60 g water — it will splutter and steam violently. Stand back. Stir until smooth. If any hardened caramel remains, keep stirring over low heat until it dissolves.
  5. Remove from heat. Stir in the 12 g freshly ground black pepper. The mixture will be fragrant, dark, and syrupy.
  6. Let the caramel cool to room temperature (about 30–40 minutes). It should be thick and spreadable, like warm honey. If it hardens too much, warm it gently before using.

Safety note: Caramel is extremely hot — well over 170°C (340°F). Use a deep saucepan, keep children away, and never touch the molten sugar.

Step 2: Make the Dough

While the caramel cools, prepare the dough. Crack each egg individually into a clear glass and inspect for blood spots. If clear, add to the bowl of a stand mixer along with the warm water, 25 g sugar, and oil. Stir briefly to combine.

Add the flour, salt, and instant yeast (keep salt and yeast on opposite sides). Mix on low speed (speed 1–2) for 2–3 minutes until a shaggy dough forms.

Increase to medium speed (speed 3–4) and knead for 8–10 minutes until the dough is:

  • Smooth and elastic — it should pull away from the bowl sides cleanly.
  • Soft and slightly tacky — enriched with eggs and oil, it will be softer than a lean dough. It should not cling to dry fingers.
  • Passes a windowpane test — you can stretch a small piece thin enough to see light through it without tearing.

Hand kneading: Combine in a large bowl, turn onto a lightly oiled surface, and knead 12–15 minutes. The enriched dough takes longer by hand.

Step 3: First Rise

Lightly oil a large bowl. Place the dough inside, turn to coat, and cover tightly with plastic wrap or a damp towel.

Let rise at room temperature for 1 to 1.5 hours until doubled in volume. The dough should be puffy, soft, and pillowy when you press it gently.

Step 4: Roll Out and Apply the Caramel-Pepper Filling

This is where the bread becomes Jerusalem Kugel Bread — the caramel-pepper filling layered into the dough.

  1. Turn the risen dough out onto a lightly oiled work surface (not floured — flour will create dry patches). Gently deflate.
  2. Roll the dough into a large rectangle, roughly 40 × 50 cm (16 × 20 inches). It should be about 5 mm (¼ inch) thick. If the dough springs back, cover it with a towel and let it rest 5 minutes, then continue.
  3. Spread the cooled caramel-pepper syrup evenly over the entire surface of the dough, leaving a 1 cm (½ inch) border along one long edge. Use an offset spatula for even coverage. You should see the dark caramel and specks of black pepper covering the dough like a map of flavors.
  4. Roll up tightly from the long edge (the one without the border), creating a long, snug log. Pinch the seam closed.
  5. Using a sharp knife or bench scraper, cut the log into 8–10 equal pieces, each about 5 cm (2 inches) wide.

The caramel will be sticky. This is correct. Lightly oil your hands and the knife between cuts. The stickiness is what creates the gorgeous, glossy swirls in the finished bread.

Step 5: Arrange in the Pan

Generously grease your chosen pan with oil. If using a springform pan, line the bottom with parchment.

Bundt pan: Place the cut pieces on their sides (swirl facing up) in the pan, fitting them snugly in a single layer around the ring. The pieces should be touching but not compressed.

Round pan / springform: Place one piece in the center (cut side up), then arrange the remaining pieces around it in a snug spiral pattern, swirl sides facing up. They will expand to fill any gaps.

Drizzle any remaining caramel from the work surface over the top of the arranged pieces.

Step 6: Second Rise

Cover the pan loosely with plastic wrap or a damp towel. Let rise in a warm place for 45 minutes to 1 hour until the pieces have puffed noticeably and are pressing against each other, filling the pan.

While the bread rises, preheat your oven to 175°C (350°F). Position a rack in the lower third of the oven.

Step 7: Bake

Optional: brush the tops of the rolls with egg wash (1 yolk beaten with 1 Tbsp water) for a glossy finish.

Bake for 30–35 minutes until the top is deep golden-brown and the internal temperature reaches 88–92°C (190–198°F). The caramel will bubble around the edges and the kitchen will smell intensely of burnt sugar and pepper — this is exactly right.

If the top browns too quickly, tent loosely with aluminum foil for the final 10 minutes.

Step 8: Cool and Serve

Let the bread cool in the pan for 10–15 minutes. This allows the caramel to set slightly so it does not all run out when you unmold.

Invert onto a serving plate or board (or release the springform ring). The bottom, now facing up, will be glossy and amber-streaked. If using a bundt pan, the dramatic ring shape with its dark caramel glaze needs no garnish.

Pull apart at the seams. Each piece will reveal swirls of dark caramel and flecks of black pepper against the soft, golden crumb. Serve warm or at room temperature.

Storage & Make-Ahead

  • Same day: Jerusalem Kugel Bread is at its best the day it is baked, when the caramel is still slightly sticky and the crumb is supremely soft.
  • Room temperature: Wrap tightly in foil and store at room temperature for up to 2 days. The caramel keeps the bread moist longer than a plain loaf.
  • Reheating: Wrap in foil and warm in a 150°C (300°F) oven for 10–15 minutes. The caramel will soften and the bread will taste nearly fresh-baked. Do not microwave — it will make the bread gummy and the caramel rubbery.
  • Freezing: Wrap cooled bread tightly in plastic wrap, then foil. Freeze for up to 2 months. Thaw at room temperature for 2–3 hours, then reheat in foil in the oven.
  • Make-ahead option: Prepare through Step 5 (shaping and arranging in pan), cover tightly with plastic wrap, and refrigerate overnight. In the morning, remove from the fridge, let stand at room temperature for 45–60 minutes to take the chill off, then bake as directed.

Troubleshooting Guide

Problem Likely Cause Solution
Caramel tastes burnt and acrid Sugar was cooked past deep amber to black Discard and start over — there is no fixing burnt caramel. Watch the color: deep amber (like dark tea) is correct; black is too far. Work over medium heat, not high.
Caramel hardened and will not spread Cooled too much; not enough liquid added Warm the caramel gently over low heat, stirring, until it is spreadable again. Add 1–2 Tbsp additional warm water if needed.
Bread is underbaked in the center Caramel insulates the interior; oven temperature too high (browning top before center bakes) Use an instant-read thermometer — center should reach 88–92°C (190–198°F). Tent with foil if top browns early, and continue baking.
Bread sticks to pan Insufficient greasing; caramel bonded to pan surface Grease generously with oil. Use parchment on the bottom. If stuck, place a warm damp towel on the inverted pan for 2 minutes to soften the caramel.
Not enough pepper flavor Pre-ground pepper used; pepper too fine; too little used Grind pepper fresh and coarsely — you should see visible flecks. Use the full 2 Tbsp. Yerushalmi kugel is assertively peppery; do not hold back.
Filling leaked out during baking Dough rolled too thin; seams not sealed; caramel too liquid Some leaking is normal and creates a delicious glaze. To minimize: seal the log seam well, let caramel cool fully before spreading, and do not over-fill.

Frequently Asked Questions

What is Yerushalmi kugel?

Yerushalmi kugel (Jerusalem kugel) is a traditional Shabbat dish from the Old Yishuv — the pre-state Jewish community of Jerusalem, particularly the Lithuanian Perushim community. It is made by cooking thin egg noodles, then mixing them with a deeply caramelized sugar-and-oil syrup and a generous amount of black pepper. The mixture is baked for hours until dense and dark. Served cold or at room temperature in thick slices, it is intensely sweet, peppery, and unlike any other kugel. It remains one of the most iconic and beloved Shabbat foods in Jerusalem today.

How spicy is this bread? Can I reduce the pepper?

The black pepper provides a warm, tingling heat — not fiery like chili, but distinctly present and aromatic. It is the defining characteristic of Yerushalmi flavors. You can reduce the pepper to 1 tablespoon for a milder version, but we encourage you to try the full 2 tablespoons at least once. The interplay between the bittersweet caramel and the bold pepper is what makes this bread extraordinary. The heat mellows slightly during baking.

Can I make this bread dairy instead of pareve?

Yes. Replace the vegetable oil in the dough with 60 g melted unsalted butter, and use 30 g melted butter in the caramel instead of oil. The dairy version will have a richer flavor and slightly more tender crumb. However, you will lose the flexibility to serve it alongside a meat meal. Always clearly label the bread as dairy if you make this substitution.

Can I prepare the caramel in advance?

Absolutely. The caramelized pepper syrup can be made up to 3 days in advance and stored in an airtight container at room temperature. It will thicken as it sits. Before using, warm it gently over low heat or in a microwave for 15–20 seconds, stirring until it reaches a spreadable, honey-like consistency. Making the caramel ahead actually makes baking day smoother and less stressful.

Is this bread suitable for Yom Tov or just Shabbat?

Jerusalem Kugel Bread is wonderful for any occasion. It is particularly fitting for Shabbat (echoing the traditional Yerushalmi kugel served at the Shabbat day meal), but also makes an impressive addition to a Yom Tov table. For Rosh Hashanah, the sweetness of the caramel is a beautiful symbol of a sweet new year. For a seudah shlishit (third Shabbat meal), serve it with fresh fruit and tea. It also makes a memorable lechem mishneh partner alongside a classic challah.

Bring the Flavors of Old Jerusalem to Your Bread Basket

Caramelized sugar, bold black pepper, soft enriched bread — this is the taste of Jerusalem’s most iconic dish, reimagined. Bake it once and it will become part of your Shabbat tradition.

Save This Recipe
Bake Our Classic Challah Too →

Have questions? Tag us @kosherbreadpro on Instagram or leave a comment below. We answer every one.

Categories
Recipes

Sambusak Recipe — Iraqi Jewish Filled Pastries

Pareve
Chickpea Filling • Contains Gluten • Meat option below
Yield
~30 pastries
Difficulty
Intermediate
Active Time
1 hour
Total Time
2–2.5 hours
Bracha
Mezonot

Sambusak are the golden, half-moon pastries that have graced the Shabbat tables of Iraqi and Syrian Jewish families for centuries. Imagine biting through a thin, shatteringly crisp shell — enriched with semolina for a sandy, delicate crunch — into a warm, fragrant filling of spiced chickpeas or seasoned lamb. These are not dumplings, not empanadas, not samosas, though they share ancient DNA with all of them. Sambusak are something entirely their own: the quintessential savory pastry of Babylonian Jewry.

In Iraqi Jewish homes, sambusak (sambusak, סמבוסק) were a labor of love, often made in large batches by mothers and grandmothers on Thursday or Friday morning, the kitchen fragrant with cumin and turmeric. The chickpea version — pareve and endlessly versatile — was the most common, served alongside Shabbat lunch, at kiddush, during holidays, and at every celebration from brit milah to Purim. The meat version, rich with spiced ground lamb or beef, appeared at more festive occasions.

What sets sambusak apart from similar pastries around the Middle East is the dough. Iraqi Jewish bakers developed a distinctive mixture of flour and fine semolina, bound with oil rather than butter, creating a crust that is simultaneously flaky, crisp, and tender — and always pareve. The traditional decorative crimping along the sealed edge is not merely beautiful; it ensures a tight seal that keeps the filling inside during baking and announces to everyone at the table that these were made by hand, with care.

Sambusak are one of the great unifying foods of Mizrachi Jewry. From Baghdad to Aleppo, from Calcutta to Tehran, variations appear under different names — sambousek, samsa, sanbusaj — but the spirit is the same: a humble pastry that transforms simple ingredients into something extraordinary through technique, spice, and generations of practice.

What Makes This Sambusak Special

These sambusak honor the Iraqi Jewish tradition while giving you every detail needed to achieve perfect results at home:

  • Semolina-enriched dough — the addition of fine semolina to the flour creates the signature sandy, crisp texture that distinguishes Iraqi sambusak from ordinary pastry. The dough is oil-based, making it inherently pareve and easy to work with.
  • Two authentic filling options — a classic spiced chickpea filling (pareve) fragrant with cumin, turmeric, and caramelized onions, and a traditional seasoned meat filling with lamb or beef, baharat, and pine nuts.
  • Traditional decorative crimping — step-by-step guidance for the signature rope-edge crimp that seals the half-moon shape. This is not just aesthetic — it creates a thick, crunchy border that is one of the best parts of the pastry.
  • Baked, not fried — while some traditions deep-fry sambusak, this recipe follows the Iraqi Jewish preference for baking, producing a golden, crisp pastry with less oil and more forgiving timing.
  • Freezer-friendly — sambusak freeze beautifully unbaked, making them ideal for preparing ahead of Shabbat, holidays, or entertaining. From freezer to oven to table in under 30 minutes.

The Story of Sambusak: Babylonian Jewish Heritage

The Jewish community of Iraq — historically known as Babylonian Jewry — is one of the oldest Jewish diaspora communities in the world, tracing its roots to the destruction of the First Temple and the Babylonian exile in 586 BCE. For over 2,500 years, Jews thrived in the lands between the Tigris and Euphrates rivers, developing a rich and distinctive culinary tradition that blended ancient Israelite foodways with the flavors of Mesopotamia.

Sambusak are among the most beloved foods of this tradition. The word itself is ancient — derived from the Persian sanbosag, with references appearing in medieval Arab cookbooks dating to the 10th century. Jewish versions, always adapted to the laws of kashrut, became fixtures of communal life. The chickpea sambusak, being pareve, was the great all-purpose pastry: appropriate after a meat meal, at a dairy kiddush, or as a standalone snack. Its simplicity belied its importance — a family’s sambusak recipe was a point of pride, passed from mother to daughter with exacting standards.

The Iraqi Jewish community also developed sambusak traditions linked to specific holidays. During Shavuot, cheese-filled sambusak (sambusak b’jibn) appeared — naturally dairy for the holiday. At Purim, sweet date-filled versions recalled the abundance of the Babylonian date palm groves. And every Shabbat, the savory chickpea sambusak sat alongside t’beet (overnight chicken and rice), amba (mango pickle), and salona (vegetable stew) on the quintessential Iraqi Jewish Shabbat table.

When the vast majority of Iraqi Jews emigrated to Israel in the early 1950s during Operation Ezra and Nehemiah, sambusak traveled with them. Today, these pastries are a staple in Israeli bakeries and homes, and increasingly recognized around the world as one of the great contributions of Mizrachi Jewish cuisine.

Kosher Observance & Halachic Notes

Kosher Classification: Pareve (chickpea filling) or Meat (meat filling)

The chickpea filling and the oil-based dough are fully pareve, making these sambusak suitable to serve at any meal — meat, dairy, or pareve. The meat filling renders the pastries fleishig (meat) — they may not be served at a dairy meal or eaten within the waiting period after dairy, according to your community’s practice. Never combine a cheese filling with a meat filling or meat dough. If making both versions, clearly label and separate them to avoid confusion.

Hafrashat Challah (Separating Challah)

This recipe calls for approximately 400 g of total flour and semolina. According to most Ashkenazi poskim, this amount requires separating challah without a bracha. If you double the recipe (800 g flour/semolina), consult your posek — the threshold for separating with a bracha varies by community. Sephardi practice may differ.

How to perform Hafrashat Challah:

  1. After the dough is fully mixed, pinch off a small piece — at least a kezayit (roughly 28 g / 1 oz).
  2. If the total flour exceeds the bracha threshold for your community, recite the bracha:

Hebrew:
  בָּרוּךְ אַתָּה ה’ אֱלֹהֵינוּ מֶלֶךְ הָעוֹלָם אֲשֶׁר קִדְּשָׁנוּ בְּמִצְוֹתָיו וְצִוָּנוּ לְהַפְרִישׁ חַלָּה

Transliteration:
  Baruch Atah Adonai, Eloheinu Melech ha’olam, asher kid’shanu b’mitzvotav v’tzivanu l’hafrish challah.

Translation:
  “Blessed are You, Lord our God, King of the universe, Who has sanctified us with His commandments and commanded us to separate challah.”

  1. Say: “Harei zu challah” (“This is challah”).
  2. Wrap the separated piece in foil and burn it. It may not be eaten.

Checking Eggs for Blood Spots

The egg used in the dough should be cracked individually into a clear glass or small bowl and inspected before adding to the dough. If a blood spot is found, the egg must be discarded entirely.

Pas Yisroel

When a Jewish person sets the oven temperature or contributes to the baking in any way, the sambusak fulfills Pas Yisroel requirements. This is particularly relevant during the Aseret Yemei Teshuvah.

Meat and Dairy Separation

If preparing both chickpea (pareve) and meat versions, use separate bowls, utensils, and baking sheets for the meat filling and assembled meat sambusak. The pareve dough becomes fleishig the moment it contacts meat filling. Never prepare cheese-filled sambusak on the same surface or at the same time as meat-filled sambusak without thorough cleaning between batches.

Brachot (Blessings)

  • Before eating: Borei Minei Mezonot — sambusak are considered pas haba’ah b’kisnin (baked goods eaten as a snack, not as a meal bread). If you eat enough to constitute a meal (kevi’at seudah), wash and make HaMotzi instead.
  • After eating: Al HaMichya (the abbreviated grace). If you ate a meal quantity and made HaMotzi, say Birkat HaMazon.

Ingredients

Dough

Ingredient Grams Volume Baker’s %
All-purpose flour (unbleached) 300 g 2½ cups 100%
Fine semolina (solet) 100 g ⅔ cup 33%
Fine sea salt 6 g 1 tsp 2%
Granulated sugar 10 g 2 tsp 3.3%
Neutral vegetable oil (sunflower or canola) 80 g 6 Tbsp 27%
Large egg, room temperature (check for blood spots) 50 g 1 large egg 17%
Cold water 80 g ⅓ cup 27%
Total Dough Weight ~626 g

Filling Option 1: Spiced Chickpea (Pareve)

Ingredient Amount Notes
Cooked chickpeas (canned, drained and rinsed, or home-cooked) 400 g (one 15 oz can) Well drained
Large yellow onion, finely diced 1 large (~200 g)
Vegetable oil 2 Tbsp (30 ml) For sautéing
Ground cumin 1½ tsp Freshly toasted and ground is best
Ground turmeric ½ tsp
Ground coriander 1 tsp
Ground cardamom ¼ tsp Optional but traditional
Salt 1 tsp Adjust to taste
Black pepper ½ tsp Freshly ground
Fresh lemon juice 1 Tbsp Brightens the filling

Filling Option 2: Seasoned Meat (Fleishig)

Ingredient Amount Notes
Ground lamb or beef (kosher) 350 g (12 oz) Not too lean — 15–20% fat is ideal
Medium yellow onion, finely diced 1 medium (~150 g)
Pine nuts (snobar) 30 g (3 Tbsp) Lightly toasted
Vegetable oil 1 Tbsp (15 ml) For sautéing
Baharat spice blend 1½ tsp Or ½ tsp each: allspice, cumin, cinnamon
Ground cumin 1 tsp
Salt 1 tsp Adjust to taste
Black pepper ½ tsp Freshly ground
Fresh flat-leaf parsley, chopped 2 Tbsp Optional garnish mixed into filling

For Assembly & Baking

  • 1 egg yolk + 1 Tbsp water (egg wash for golden color)
  • Sesame seeds or nigella seeds for topping (optional, traditional)

Equipment

  • Large mixing bowl
  • Rolling pin
  • Round cookie cutter or glass — 9–10 cm (3.5–4 inch) diameter
  • Fork or fingers for crimping
  • Baking sheets lined with parchment paper
  • Kitchen scale
  • Skillet or sauté pan for fillings
  • Potato masher or fork (for chickpea filling)
  • Pastry brush (for egg wash)
  • Clear glass or small bowl for egg checking

Desired Dough Temperature (DDT)

Target DDT: 20–22°C (68–72°F)

Unlike yeasted bread doughs, this oil-based pastry dough does not rely on fermentation, so DDT is less critical. However, a cool dough is easier to roll and handle. Use cold water straight from the tap. If your kitchen is very warm (above 27°C / 80°F), refrigerate the dough for 15–20 minutes before rolling to prevent it from becoming too soft and oily.

The goal is a pliable, non-sticky dough that rolls thinly without springing back excessively or tearing.

Step-by-Step Instructions

Step 1: Make the Dough

In a large mixing bowl, whisk together the flour, semolina, salt, and sugar until evenly combined.

Crack the egg into a clear glass and inspect for blood spots. If clear, add it to the dry ingredients along with the vegetable oil. Mix with a fork or your fingers until the mixture resembles coarse, damp sand.

Add the cold water gradually, mixing until the dough comes together into a cohesive ball. It should be smooth, pliable, and slightly oily to the touch — not sticky, not crumbly. If it is too dry, add water 1 teaspoon at a time. If too sticky, add a light dusting of flour.

Knead briefly on a clean surface for 2–3 minutes — just until smooth. This is not bread dough; you do not want to develop strong gluten. Overworking will make the pastry tough rather than tender.

Wrap the dough in plastic wrap and let it rest at room temperature for 30 minutes. This rest relaxes the gluten and makes rolling much easier.

Step 2: Prepare the Chickpea Filling (Pareve Option)

Heat the vegetable oil in a skillet over medium heat. Add the diced onion and cook, stirring occasionally, for 8–10 minutes until soft and golden — deeply caramelized onions are the secret to great sambusak filling.

Add the cumin, turmeric, coriander, and cardamom. Stir for 30 seconds until fragrant — the spices should bloom in the oil without burning.

Add the drained chickpeas. Using a potato masher or fork, mash roughly — you want a chunky texture, not a smooth paste. About two-thirds mashed with one-third whole chickpeas remaining is ideal.

Season with salt, pepper, and lemon juice. Taste and adjust — the filling should be boldly seasoned, as the pastry shell will mute the flavors slightly. Remove from heat and cool completely before filling. Warm filling will melt the dough and cause leaks.

Step 3: Prepare the Meat Filling (Fleishig Option)

Heat the vegetable oil in a skillet over medium-high heat. Add the diced onion and cook for 5 minutes until softened.

Add the ground lamb or beef. Break it up with a wooden spoon and cook for 8–10 minutes until fully browned, with no pink remaining. Drain any excess fat if necessary.

Add the baharat, cumin, salt, and pepper. Stir for 1 minute until fragrant. Remove from heat and stir in the toasted pine nuts and parsley (if using).

Cool completely before filling. Taste and adjust seasoning — the filling should be robustly spiced.

Kashrut reminder: If making both fillings, use separate utensils and bowls for the meat filling. The pareve dough becomes fleishig the moment it contacts meat. Assemble meat sambusak on a separate, clean surface or after completing all pareve sambusak.

Step 4: Roll and Cut the Dough

Preheat your oven to 190°C (375°F). Line two baking sheets with parchment paper.

Divide the rested dough in half. Work with one half at a time, keeping the other covered. On a lightly floured surface, roll the dough out to 3 mm (⅛ inch) thickness — thin enough to be delicate but thick enough to hold the filling without tearing.

Using a 9–10 cm (3.5–4 inch) round cutter or the rim of a glass, cut circles from the dough. You should get 15–16 circles per half. Gather the scraps, re-roll once, and cut a few more. Do not re-roll more than once — the dough toughens.

Step 5: Fill and Shape

Working with one circle at a time:

  1. Place filling — spoon about 1 heaping tablespoon of cooled filling onto the center of the dough circle. Do not overfill — leave a 1 cm (⅛ inch) border around the edge.
  2. Fold into a half-moon — lift one side of the circle and fold it over the filling to meet the other edge. Press the edges together firmly to seal, pushing out any trapped air.
  3. Crimp the edge — this is the traditional decorative seal. Starting at one corner of the half-moon, fold a small section of the edge over itself at an angle, press to seal, then fold the next section over the previous fold, creating a rope or braid pattern along the entire curved edge. Alternatively, press the tines of a fork firmly along the edge for a simpler seal.
  4. Place on baking sheet — arrange the sambusak on the lined baking sheet, spaced 2 cm (1 inch) apart. They do not spread significantly.

Tip: If the dough becomes warm and difficult to handle, refrigerate the circles for 10 minutes before filling. Cold dough crimps more cleanly.

Step 6: Egg Wash and Top

Beat the egg yolk with 1 tablespoon of water. Using a pastry brush, lightly brush the top and crimped edge of each sambusak with the egg wash. This creates the signature deep golden-brown color during baking.

If desired, sprinkle with sesame seeds or nigella seeds — a traditional Iraqi touch that adds flavor and visual beauty.

Step 7: Bake Until Golden

Bake at 190°C (375°F) for 22–28 minutes, rotating the baking sheets halfway through, until the sambusak are deep golden brown on top and bottom. The semolina in the dough gives them a distinctive warm, sandy color that is deeper than ordinary pastry.

Remove from the oven and let cool on the baking sheet for 5 minutes before transferring to a wire rack. Sambusak are excellent warm, at room temperature, or even slightly cool.

The moment they come out of the oven — golden, fragrant with cumin and caramelized onion, their crimped edges dark and crunchy — is when you understand why Iraqi grandmothers made these by the dozen. One is never enough.

Storage & Make-Ahead

  • Room temperature: Store baked sambusak in an airtight container at room temperature for up to 2 days. They will soften slightly but remain very good.
  • Reheating: Reheat baked sambusak in a 180°C (350°F) oven for 8–10 minutes to restore crispness. Do not microwave — it makes the pastry soft and chewy.
  • Freezing (unbaked — best method): Assemble sambusak completely, place on a parchment-lined baking sheet, and freeze until solid (about 2 hours). Transfer to zip-lock bags. Freeze for up to 3 months. Bake directly from frozen at 190°C (375°F) for 28–35 minutes — no thawing needed. Add a few extra minutes to the bake time.
  • Freezing (baked): Cool completely, then freeze in airtight containers for up to 2 months. Reheat from frozen in a 180°C (350°F) oven for 12–15 minutes.
  • Make-ahead strategy for Shabbat: Assemble sambusak on Thursday evening, refrigerate overnight, and bake Friday morning. Or freeze unbaked up to a month ahead and bake fresh on Friday.

Troubleshooting Guide

Problem Likely Cause Solution
Pastry is tough and hard Dough overworked; too much flour added during rolling Knead only 2–3 minutes — just until smooth. Use minimal flour when rolling. Let the dough rest fully before rolling.
Filling leaks during baking Overfilled; edges not sealed properly; filling was warm Use no more than 1 heaping tablespoon of filling per pastry. Press edges firmly and crimp thoroughly. Always cool filling completely before assembling.
Sambusak are pale after baking Egg wash too thin or not applied; oven temperature too low Use egg yolk (not whole egg) for deeper color. Brush generously. Verify oven temperature with a thermometer — bake at a true 190°C (375°F).
Dough tears when rolling Dough too dry; insufficient resting time Add water 1 teaspoon at a time if dough is crumbly. Allow the full 30-minute rest. If dough springs back, let it relax 5 more minutes.
Filling is bland Under-seasoned; spices not bloomed; onions not caramelized Season filling boldly — the pastry shell mutes flavors. Toast spices in oil for 30 seconds before adding other ingredients. Cook onions until truly golden.
Bottom of sambusak is soggy Baking sheet overcrowded; filling too wet Space pastries 2 cm apart. Drain chickpeas thoroughly. For meat filling, drain excess fat after browning. Bake on the lower-middle rack.

Frequently Asked Questions

What is sambusak?

Sambusak are savory half-moon shaped pastries from the Iraqi and Syrian Jewish culinary tradition. They feature a thin, crisp dough made with flour and semolina, filled with either spiced chickpeas (pareve) or seasoned ground meat. The edges are sealed with a traditional decorative crimp. Sambusak are baked until golden and served at Shabbat meals, holidays, and celebrations. They are one of the signature foods of Babylonian (Iraqi) Jewry, with roots stretching back centuries in the Middle Eastern Jewish diaspora.

Can I make sambusak ahead of time?

Absolutely — sambusak are one of the best make-ahead foods in the kosher kitchen. The ideal method is to assemble them completely (fill, shape, and crimp), then freeze them unbaked on a parchment-lined tray. Once frozen solid, transfer to zip-lock bags where they will keep for up to 3 months. Bake directly from frozen, adding just a few extra minutes to the baking time. This means you can spend a relaxed afternoon making a large batch and have golden, fresh-baked sambusak ready in under 30 minutes whenever you need them.

What is the difference between sambusak and samosa?

While they share ancient roots — both descend from the medieval Persian sanbosag — sambusak and samosa have diverged over centuries. Sambusak use a flour-and-semolina dough that is rolled thin and baked, producing a crisp, sandy-textured pastry. Indian samosas typically use a flour-only dough, are usually deep-fried, and feature different spice profiles (heavy on garam masala, coriander, and green chiles). The fillings also differ: sambusak favor chickpeas with cumin and turmeric or meat with baharat, while samosas often feature potato and peas. Both are delicious — they are cousins, not twins.

Can I make a cheese filling for sambusak?

Yes — cheese-filled sambusak (sambusak b’jibn) are a beloved tradition, especially for Shavuot. A classic filling combines crumbled feta or kashkaval cheese with a pinch of salt and sometimes fresh herbs. However, cheese sambusak are dairy and must never be mixed with or served alongside meat sambusak. Use separate utensils and baking sheets. If making both cheese and meat versions, prepare and bake them in completely separate batches with thorough cleaning between them.

Why is semolina used in the dough?

Semolina is the key to the distinctive texture of Iraqi sambusak. Fine semolina (also called solet in Hebrew) is made from durum wheat and has a coarser, more granular texture than regular flour. When combined with all-purpose flour in the dough, it creates a crisp, sandy, slightly crumbly pastry that is completely different from a soft, flaky pie crust or a chewy bread dough. The semolina also contributes a warm golden color and a subtle nutty flavor. This flour-semolina combination is characteristic of many Middle Eastern and North African pastries.

Bring Iraqi Jewish Tradition to Your Table

Golden, crisp, fragrant with cumin and history — sambusak connect you to 2,500 years of Babylonian Jewish baking. Make a batch, freeze some for later, and share the rest.

Save This Recipe
Try Our Kubaneh Next →

Have questions? Tag us @kosherbreadpro on Instagram or leave a comment below. We answer every one.

Categories
Recipes

Mufleta Recipe — Moroccan Mimouna Celebration Flatbread

Pareve
Dough is Pareve • Dairy when served with butter • Contains Gluten
Yield
12–15 mufletas
Difficulty
Intermediate
Active Time
45 minutes
Total Time
2 hours
Bracha
Mezonot

Mufleta is the first bread after Pesach — and it tastes like freedom all over again. For seven (or eight) days, Moroccan Jews have lived without chametz. No flour, no yeast, no risen dough. And then, the moment Pesach ends — sometimes literally minutes after havdalah — the flour comes out, the griddle heats up, and the kitchen fills with the scent of something extraordinary: paper-thin rounds of dough, stretched by hand until nearly translucent, sizzling on a hot surface, stacking up in a warm, glistening tower drizzled with honey and melted butter.

This is mufleta (mufleta, מופלטה), the iconic bread of Mimouna — the jubilant Moroccan Jewish celebration that marks the end of Pesach and the joyful return to chametz. It is not merely a recipe. It is a ritual, a homecoming, a communal act of sweetness and abundance. In Moroccan Jewish homes from Casablanca to Fez to Marrakech, and today across Israel and the diaspora, mufleta is the bread that announces: the holiday is over, and the good life continues.

The dough itself could not be simpler — flour, water, salt, a pinch of sugar, and oil. No yeast, no eggs, no dairy. But the technique is everything. Each ball of dough is oiled generously, rested until supple, then stretched by hand on an oiled surface until it becomes a gossamer-thin disc — so thin you can read a newspaper through it. Cooked on a blazing-hot griddle for just seconds per side, the mufletas are stacked one atop another, the residual heat steaming them into pliable, silky sheets. Drizzled with warm honey and a generous pat of butter, rolled or folded, eaten with the fingers — this is Mimouna.

Mufleta is traditionally prepared and served on the evening immediately after Pesach ends (Motzei Pesach). The timing is deliberate and deeply meaningful: this is the very first chametz touching your lips after a week of abstention. The sweetness of the honey, the richness of the butter, the tender warmth of fresh-cooked dough — it is a sensory celebration of abundance, gratitude, and renewal.

What Makes This Mufleta Special

Mufleta looks deceptively simple — it is, after all, just flatbread. But every element of the process is calibrated for a specific, remarkable result:

  • Paper-thin hand-stretching technique — the dough is not rolled with a pin but stretched by hand on a generously oiled surface, producing a translucent disc far thinner than any rolling pin can achieve. This is the soul of mufleta and the skill that distinguishes a good one from a great one.
  • Griddle-cooked at high heat — each mufleta cooks in under a minute on a blazing-hot ungreased surface. The result: blistered, lightly golden spots against a pale, supple background — cooked but not crisp.
  • Stacked and steam-softened — as each mufleta comes off the griddle, it is placed on the growing stack, where residual heat and trapped steam soften every layer into a silky, pliable sheet. The stack is the secret: mufletas are not meant to be eaten alone but as part of this warm, layered tower.
  • Mimouna tradition — mufleta is not an everyday bread. It is prepared specifically for the Mimouna celebration at the end of Pesach, giving it a ritual significance that elevates it far beyond ordinary flatbread. To make mufleta is to participate in a centuries-old Moroccan Jewish tradition of joy, hospitality, and renewal.
  • Impossibly simple ingredients — flour, water, salt, sugar, oil. That is all. The beauty lies entirely in technique and tradition. No special equipment, no exotic ingredients — just skilled hands and a hot griddle.

Mimouna: The Moroccan Jewish Celebration of Sweetness and Freedom

To understand mufleta, you must understand Mimouna. The word likely derives from the Arabic maimoun (good fortune) or possibly from the Hebrew emunah (faith). Whatever its etymology, Mimouna is one of the most distinctive and beloved celebrations in the entire Jewish world — a festival unique to Moroccan Jewry and the communities influenced by them.

Mimouna begins on the evening that Pesach ends. Almost the instant havdalah is recited, Moroccan Jewish homes transform into open houses of extraordinary hospitality. Tables are laid with an elaborate spread: mufletas stacked high, bowls of honey and butter, platters of dried fruits and nuts, marzipan, nougat, fresh spring flowers, stalks of wheat, live fish (symbols of abundance and fertility), and always — always — an open door. Neighbors visit neighbors, friends visit friends, and the streets come alive with a sense of communal joy that is unlike any other night in the Jewish calendar.

The tradition has deep roots in the Jewish communities of Morocco — from the grand cities of Fez, Meknes, Casablanca, and Marrakech to the smaller communities of the Atlas Mountains and the Saharan south. When the vast majority of Moroccan Jews made aliyah to Israel in the 1950s and 1960s, they carried Mimouna with them. Today, Mimouna is celebrated across Israel as a national holiday of sorts, with massive public gatherings, political leaders visiting Moroccan Jewish families, and mufleta consumed by the thousands. It has become a bridge between communities — Ashkenazi, Sephardi, Mizrachi — all united around a griddle and a pot of honey.

For Moroccan Jews in the diaspora — in France, Canada, the United States, and beyond — Mimouna remains a powerful link to heritage. The act of making mufleta, of stretching that first piece of chametz dough after Pesach, connects generations across continents and centuries. It is, in its quiet way, one of the most emotionally resonant moments in the Jewish culinary year.

Kosher Observance & Halachic Notes

Kosher Classification: Pareve Dough (Dairy when served with butter)

The mufleta dough itself is entirely pareve — it contains no dairy or meat ingredients. However, mufleta is traditionally served with butter and honey, which renders the served dish dairy. If you wish to keep the meal pareve, substitute margarine or coconut oil for the butter drizzle. Clearly communicate the dairy status if butter is used at the table.

Hafrashat Challah (Separating Challah)

This recipe calls for 500 g of flour. According to most Ashkenazi poskim, this amount requires separating challah without a bracha. If you increase the recipe to 1,200 g flour or more, you should separate challah with a bracha. Sephardi practice may differ — consult your community’s minhag.

How to perform Hafrashat Challah:

  1. After the dough is fully mixed, pinch off a small piece — at least a kezayit (roughly 28 g / 1 oz).
  2. If the total flour exceeds the bracha threshold for your community, recite the bracha:

Hebrew:
  בָּרוּךְ אַתָּה ה’ אֱלֹהֵינוּ מֶלֶךְ הָעוֹלָם אֲשֶׁר קִדְּשָׁנוּ בְּמִצְוֹתָיו וְצִוָּנוּ לְהַפְרִישׁ חַלָּה

Transliteration:
  Baruch Atah Adonai, Eloheinu Melech ha’olam, asher kid’shanu b’mitzvotav v’tzivanu l’hafrish challah.

Translation:
  “Blessed are You, Lord our God, King of the universe, Who has sanctified us with His commandments and commanded us to separate challah.”

  1. Say: “Harei zu challah” (“This is challah”).
  2. Wrap the separated piece in foil and burn it. It may not be eaten.

Timing: Motzei Pesach

Mufleta must not be prepared until Pesach has fully ended. This means waiting until after havdalah on the night following the last day of Pesach (the eighth day in the diaspora, the seventh day in Israel). All chametz ingredients — flour in particular — must be newly purchased or retrieved from wherever they were sold or stored for Pesach. Many families purchase fresh flour specifically for this occasion. Do not begin mixing the dough until Pesach is definitively over.

Pas Yisroel

When a Jewish person lights the griddle or contributes to the cooking in any way, the mufleta fulfills Pas Yisroel requirements. This is particularly relevant during the Aseret Yemei Teshuvah, though mufleta is almost always made in a Jewish home and thus inherently Pas Yisroel.

Brachot (Blessings)

  • Before eating: Borei Minei Mezonot — mufleta is a flat, unleavened bread that is not typically consumed as a meal-bread (pas ha’ba’ah b’kisnin). If you eat a quantity that constitutes a meal (roughly the equivalent of 3–4 mufletas), wash and make HaMotzi instead.
  • After eating: Al HaMichya (if Mezonot was recited). Birkat HaMazon if HaMotzi was recited.

Ingredients

Dough

Ingredient Grams Volume Baker’s %
All-purpose flour (unbleached) 500 g 4 cups 100%
Warm water (see DDT note below) 300 g 1¼ cups 60%
Fine sea salt 8 g 1½ tsp 1.6%
Granulated sugar 15 g 1 Tbsp 3%
Vegetable or sunflower oil (for dough) 30 g 2 Tbsp 6%
Total Dough Weight ~853 g

For Stretching & Oiling

Ingredient Amount Purpose
Vegetable or sunflower oil 120–150 g (½–⅔ cup) For coating dough balls and oiling the work surface during stretching

Traditional Toppings (for serving)

  • Honey — warm, pourable; the classic Mimouna drizzle
  • Butter — unsalted, at room temperature or melted (makes the dish dairy)
  • Nut butter or almond paste — a traditional Moroccan variation
  • Powdered sugar — optional, for an extra touch of sweetness
  • Fresh fruit and nuts — dates, walnuts, almonds are all traditional on the Mimouna table

Equipment

  • Large flat griddle or heavy skillet — 28–30 cm (11–12 inch). Cast iron, carbon steel, or a heavy non-stick pan all work. The surface should be very hot and ungreased.
  • Large smooth work surface — a countertop, large cutting board, or marble slab for stretching
  • Kitchen scale
  • Large mixing bowl
  • Small bowl for oil (for coating hands and surface)
  • Clean kitchen towel or foil (for keeping the stack warm)
  • Spatula or tongs (for flipping)

Desired Dough Temperature (DDT)

Target DDT: 28°C (82°F)

A warm, pliable dough is essential for mufleta — it must stretch without tearing. Because there is no yeast, the DDT calculation is simpler. Use warm water to achieve a soft, extensible dough.

Water Temp = (DDT × 2) − Room Temp

Example: If your kitchen is 22°C:
Water = (28 × 2) − 22 = 34°C (93°F)

The water should feel comfortably warm — like bath water. Warmer water produces more extensible dough, which is exactly what you want for stretching paper-thin.

Step-by-Step Instructions

Step 1: Mix the Dough

In a large bowl, combine the warm water, salt, sugar, and oil. Stir until the salt and sugar dissolve.

Add the flour gradually, mixing with your hand or a wooden spoon until a shaggy mass forms. Turn the dough out onto a clean, unfloured surface and knead by hand for 5–7 minutes until the dough is:

  • Smooth and soft — it should feel like earlobe-soft playdough.
  • Slightly tacky but not sticky — if it clings to the surface, oil your hands lightly rather than adding flour.
  • Very elastic — when you pull a piece, it should stretch easily without snapping back aggressively. This extensibility is critical for the stretching step.

Do not add extra flour. A slightly soft, slightly tacky dough is exactly right. A stiff dough will not stretch thin enough.

Step 2: Divide and Oil the Dough Balls

Using a scale and bench scraper, divide the dough into 12–15 equal pieces (~57–71 g each). Roll each piece into a smooth ball.

Pour a generous pool of oil into a shallow bowl or onto a tray. Coat each dough ball thoroughly in oil — they should be glistening. Arrange the oiled balls on a tray or plate, leaving a little space between them. The oil prevents sticking and conditions the dough for stretching.

Cover the oiled balls with plastic wrap or a damp towel and let them rest at room temperature for at least 30 minutes, and up to 1 hour. This rest is non-negotiable — it relaxes the gluten and makes the dough dramatically easier to stretch thin.

Pro tip: Longer rest = easier stretching. If you have time, rest for the full hour. The dough balls will spread slightly under their own weight — this is a good sign that the gluten is relaxed and ready.

Step 3: Prepare Your Station

Set up an efficient workspace — you will be stretching and cooking in a rhythm, one mufleta at a time.

  • Oiled surface: Generously oil a smooth, clean countertop or large cutting board with vegetable oil. The surface should be slick — not just lightly coated but genuinely slippery.
  • Hot griddle: Heat your griddle or skillet over medium-high heat — approximately 200–220°C (400–425°F). The surface should be hot enough that a drop of water sizzles and evaporates instantly. Do not oil the griddle.
  • Warm plate: Set a large plate or platter nearby, covered with a clean towel or foil, for stacking the finished mufletas.

Step 4: Stretch Paper-Thin

This is the heart of mufleta — the moment where simple dough becomes something extraordinary.

Working with one oiled ball at a time:

  1. Place the ball on the oiled surface. Oil your palms and fingertips generously.
  2. Press down with your palms to flatten the ball into a thick disc, roughly 10 cm (4 inches) across.
  3. Begin stretching from the center outward using the backs of your hands and your fingertips. Work in a circular motion, gently pulling the dough outward and letting gravity help. Lift the edges and let the weight of the dough stretch itself.
  4. Continue stretching until the disc is paper-thin and nearly translucent — you should be able to see the surface beneath it. The final diameter should be roughly 30–35 cm (12–14 inches). Occasional small holes are fine; do not try to patch them.

The key: Work gently and patiently. If the dough resists or springs back, let it rest on the surface for 1–2 minutes and return to it. Force tears the dough; patience stretches it.

Oil is your ally. Re-oil your hands and the surface as needed. The dough should glide, never stick.

Step 5: Cook on the Hot Griddle

Once stretched, immediately transfer the mufleta to the hot griddle. Drape it over your forearms or gather it gently and lay it flat on the hot surface.

Cook for 30–45 seconds per side until you see:

  • Light golden-brown blisters and spots on the underside
  • The surface begins to look dry and set rather than raw and translucent
  • Small bubbles forming across the surface

Flip carefully with a spatula or your fingers and cook the second side for another 20–30 seconds. The mufleta should be cooked but still pliable — not crispy, not browned all over. Think crepe, not tortilla chip.

Step 6: Stack and Steam

Immediately transfer each cooked mufleta to the warm plate and cover with the towel or foil. This is essential. As the mufletas stack, the residual heat steams the layers below, softening them into silky, supple sheets.

Continue stretching and cooking the remaining dough balls, adding each mufleta to the top of the stack and re-covering immediately. You will develop a rhythm: stretch one, cook one, stack one, reach for the next ball.

By the time you finish, you will have a tall, warm, fragrant stack of 12–15 paper-thin flatbreads — the tower of Mimouna.

Step 7: Serve with Honey and Butter

Serve immediately while warm. Mufleta waits for no one.

Bring the entire stack to the table. Each person peels off a mufleta from the stack, drizzles it with warm honey, adds a generous pat of butter (which melts on contact), and folds or rolls it up. Eat with the hands.

Some families spread the mufleta with almond paste or nut butter before the honey. Others add a dusting of powdered sugar. All variations are traditional and all are magnificent.

The Mimouna greeting: As you serve, say “Terbhu u-tsa’adu” — “May you prosper and be happy.” Your guests reply “Terbhu u-tsa’adu” in return. This is the blessing of Mimouna.

Storage & Make-Ahead

  • Same evening: Mufleta is at its absolute best fresh off the griddle, served immediately during Mimouna. The warmth, the pliability, the way butter melts into the folds — this cannot be replicated after cooling.
  • Room temperature: Stack leftover mufletas with a small piece of parchment or wax paper between each, wrap the stack tightly in foil. Consume within 1 day.
  • Reheating: Warm a skillet or griddle over medium heat. Place a mufleta on the dry surface for 15–20 seconds per side until warmed through and pliable again. Alternatively, wrap the stack in foil and warm in a 150°C (300°F) oven for 5–8 minutes.
  • Freezing: Separate cooled mufletas with parchment paper, stack, and wrap tightly in plastic wrap, then foil. Freeze for up to 1 month. Thaw at room temperature, then reheat on a dry skillet.
  • Make-ahead note: The dough balls can be oiled and refrigerated for up to 4 hours before stretching and cooking. Bring them to room temperature for 20 minutes before stretching. However, the stretching and cooking should ideally happen just before serving.

Troubleshooting Guide

Problem Likely Cause Solution
Dough tears when stretching Dough not rested long enough; too stiff; not enough oil on surface and hands Rest dough balls for the full hour. Add more oil to hands and surface. If dough resists, set it aside for 2–3 minutes and work on the next ball.
Mufleta is too thick / won’t stretch thin Dough too stiff (too much flour); insufficient rest; not enough oil The dough should be soft and slightly tacky after mixing. Never add extra flour. Ensure generous oiling and a full 30–60 minute rest.
Mufleta is crispy or stiff after cooking Griddle too hot; cooked too long; not stacked and covered immediately Reduce heat slightly. Cook only until light golden spots appear — 30–45 seconds per side maximum. Stack and cover immediately to trap steam.
Mufleta sticks to the griddle Residual oil from stretching is pooling; griddle not hot enough Ensure griddle is fully preheated. Shake off excess oil before placing on griddle. The dry, hot surface should cook the mufleta cleanly.
Dough balls stick together during rest Insufficient oil coating Each ball must be generously coated in oil on all sides. Leave space between balls on the tray.
Mufletas are unevenly cooked Uneven thickness; griddle has hot spots Stretch more evenly. Rotate the mufleta on the griddle if your pan has hot spots. A heavy cast iron pan provides the most even heat.

Frequently Asked Questions

What is Mimouna?

Mimouna is a traditional Moroccan Jewish celebration held on the evening and day immediately following the end of Pesach (Passover). It marks the joyful return to chametz (leavened bread) after a week of abstention. Families open their homes to guests, set elaborate tables with symbols of abundance — honey, butter, flour, fresh fruit, live fish, wheat, and flowers — and prepare mufletas as the centerpiece. The celebration has its roots in centuries of Moroccan Jewish culture and is today observed widely across Israel and the Moroccan Jewish diaspora. Mimouna is a festival of sweetness, hospitality, faith, and communal joy.

What is the difference between mufleta and a crepe or tortilla?

While mufleta may look similar to a crepe or flour tortilla, the technique and result are quite different. Mufleta is made from a kneaded, rested, oil-saturated dough that is stretched by hand (not rolled) to paper-thin translucency, then cooked on a dry griddle. A crepe is a poured batter; a tortilla is typically rolled with a pin and uses fat differently. Mufleta’s texture is uniquely silky and supple — softer than a tortilla, sturdier than a crepe — especially when stacked and steamed. The oil-based stretching technique and the stacking method give mufleta a character entirely its own.

Can I make mufleta with a rolling pin instead of stretching by hand?

You can, but the results will not be the same. A rolling pin tends to produce a thicker, more uniform disc, while hand-stretching on an oiled surface yields the characteristic paper-thin translucency that defines great mufleta. The oil on the surface and hands acts as a lubricant that allows the dough to stretch far thinner than a pin can achieve. If you are new to the technique, start with a rolling pin to flatten the dough to about 20 cm (8 inches), then switch to hand-stretching for the final thinning. With practice, you will find yourself reaching for the rolling pin less and less.

Is mufleta only made at Mimouna, or can I make it anytime?

Traditionally, mufleta is strongly associated with Mimouna and the end of Pesach. Its emotional and spiritual power comes partly from this timing — it is the first chametz after a week without, and that context makes it transcendent. However, there is no halachic prohibition against making mufleta at other times of the year, and many Moroccan Jewish families do enjoy it occasionally as a special treat. Some serve it at other celebrations or on Shabbat. That said, if you have never experienced mufleta at Mimouna — fresh off the griddle, at a table overflowing with honey and guests — make that your first time. The context is half the recipe.

Why is the bracha Mezonot and not HaMotzi?

Mufleta is classified as pas ha’ba’ah b’kisnin — a baked (or cooked) product made from dough that is typically eaten as a snack rather than as the basis of a meal. Because each mufleta is thin, sweet-topped, and eaten in a casual, celebratory setting (not as a formal bread meal), the bracha is Mezonot. However, if you eat a substantial quantity — enough that it constitutes a full meal — you should wash, recite HaMotzi, and bench (recite Birkat HaMazon) afterward. When in doubt, consult your rabbi for guidance based on your community’s practice.

Celebrate Mimouna with the Bread That Starts It All

Mufleta is more than a recipe — it is the taste of freedom renewed, sweetness shared, and doors thrown open. Make it this year. Make it every year.

Save This Recipe
Bake Our Classic Challah Next →

Have questions? Tag us @kosherbreadpro on Instagram or leave a comment below. We answer every one.

Categories
Recipes

Lahmajoun Recipe — Crispy Middle Eastern Meat Flatbread

Meat
Contains Ground Lamb/Beef • No Dairy • Contains Gluten
Yield
12 flatbreads
Difficulty
Intermediate
Active Time
45 minutes
Total Time
2–2.5 hours
Bracha
HaMotzi (as meal)

Lahmajoun is the paper-thin, crispy flatbread that proves the best pizza is the one you roll up and eat with your hands. Picture a round of dough stretched impossibly thin — almost translucent — spread with a vivid, spiced layer of ground lamb and tomato, then blasted in a scorching oven until the edges crackle and the meat sizzles. You pull it from the heat, squeeze a wedge of lemon across the surface, scatter fresh parsley and a few leaves of mint, roll the whole thing into a tight cylinder, and bite. The crunch gives way to spiced, tangy warmth. This is lahmajoun.

Known affectionately as “Jewish pizza” or “Armenian pizza,” lahmajoun (lahm bi ajeen, لحم بعجين — literally “meat with dough”) has been a cornerstone of Sephardi and Mizrachi cooking for centuries. From the bustling markets of Aleppo to the Jewish quarters of Istanbul, from the kitchens of Baghdad to modern-day Jerusalem, this flatbread has traveled with Jewish communities across the Ottoman world and beyond, adapting to local spices and traditions while keeping its essential character intact.

What sets lahmajoun apart from other flatbreads is its remarkable restraint. The dough is a vehicle — thin, crisp, and yielding — while the topping does the talking. A vibrant paste of finely ground meat, tomato, onion, and peppers, seasoned with cumin, paprika, and the gentle warmth of Aleppo pepper, spread so thinly that the dough beneath crisps in the oven’s fierce heat. There is no cheese, no heavy sauce, no excess. Just meat, dough, fire, and lemon.

Lahmajoun is always rolled, never sliced. Squeeze fresh lemon juice over the surface, add a handful of flat-leaf parsley and fresh mint, then roll it into a cylinder and eat it out of hand. Some add pickled turnips, sliced radishes, or a drizzle of tahini. This is street food at its most elegant.

What Makes This Lahmajoun Special

Every element of lahmajoun is calibrated for a specific result — maximum flavor from minimum ingredients, achieved through technique rather than complexity:

  • Paper-thin, cracker-crisp dough — rolled to near-translucent thinness so it crisps completely in the oven’s blast of heat, creating the signature shatter when you bite through. The dough has no fat, keeping it lean and pliable.
  • Finely processed meat topping — the lamb or beef is ground to a near-paste consistency with onion, tomato, and peppers, ensuring it cooks through in the brief, intense bake and adheres to the dough like a second skin.
  • Aleppo pepper and warm spices — cumin, paprika, and the fruity, moderate heat of Aleppo pepper (pul biber) give the topping its distinctive character — complex, warm, and never aggressively hot.
  • Lemon and fresh herbs at the finish — a squeeze of lemon juice and a scatter of parsley and mint added after baking provide brightness and contrast that elevate the entire experience.
  • Rolled, not sliced — lahmajoun is eaten rolled into a cylinder, making it perfect hand food for gatherings, Melaveh Malka, or a weeknight meat meal.

The Story of Lahmajoun: From Aleppo to Jerusalem

Lahmajoun sits at one of the most fascinating crossroads in Jewish culinary history — the intersection of Turkish, Armenian, Arab, and Jewish food traditions. The dish itself predates clear national boundaries, originating in the region that spans modern-day southeastern Turkey, northern Syria, and Armenia. For the Jewish communities that thrived in these lands for millennia, lahmajoun was everyday food, market food, celebration food.

In Aleppo (Halab), the great center of Syrian Jewish life, lahmajoun was a staple of the Jewish market quarter. Aleppan Jewish bakers were renowned throughout the city, and their version — seasoned with cumin, allspice, and the local Aleppo pepper — became the benchmark. When the Aleppan Jewish community dispersed in the mid-twentieth century, they carried their lahmajoun recipes to Brooklyn, São Paulo, Mexico City, and Jerusalem.

In Istanbul, the Sephardi Jewish community — descendants of the Spanish expulsion of 1492 — adopted lahmajoun from their Armenian and Turkish neighbors, adding their own touches. The Istanbul Jewish version often features a slightly thicker dough and a topping enriched with pine nuts. In the Jewish quarters of Balat and Kuzguncuk, lahmajoun bakeries served the community for generations.

Today, lahmajoun is ubiquitous in Israel, found in bakeries, restaurants, and home kitchens from Haifa to Beer Sheva. It has become one of the essential expressions of Mizrachi and Sephardi Jewish cooking — a dish that tells the story of communities that moved, adapted, and preserved their culinary identity across continents and centuries.

Kosher Observance & Halachic Notes

Kosher Classification: Meat (Fleishig)

Lahmajoun is a meat (fleishig / basari) dish. The topping contains ground lamb or beef, making the entire flatbread meat. It cannot be served with dairy in any form — no cheese, no butter, no yogurt sauce. Despite the nickname “Jewish pizza,” adding cheese would violate the prohibition of basar b’chalav (mixing meat and milk). Use only kosher-certified meat with proper hechsher.

Basar B’Chalav (Meat and Milk)

Because lahmajoun is meat, all utensils, baking sheets, rolling pins, and surfaces used must be designated for meat or pareve use. Do not use dairy equipment. After eating lahmajoun, observe the standard waiting period before consuming dairy products (6 hours in most Sephardi and many Ashkenazi communities; consult your community’s minhag).

Hafrashat Challah (Separating Challah)

This recipe calls for 500 g of flour. According to most Ashkenazi poskim, this amount requires separating challah without a bracha. If you double the recipe (1,000 g flour), you should separate challah without a bracha (most authorities require a bracha at 1,200–1,666 g, depending on custom). Sephardi practice may differ — consult your community’s minhag.

How to perform Hafrashat Challah:

  1. After the dough is fully mixed, pinch off a small piece — at least a kezayit (roughly 28 g / 1 oz).
  2. If the total flour exceeds the bracha threshold for your community, recite the bracha:

Hebrew:
  בָּרוּךְ אַתָּה ה’ אֱלֹהֵינוּ מֶלֶךְ הָעוֹלָם אֲשֶׁר קִדְּשָׁנוּ בְּמִצְוֹתָיו וְצִוָּנוּ לְהַפְרִישׁ חַלָּה

Transliteration:
  Baruch Atah Adonai, Eloheinu Melech ha’olam, asher kid’shanu b’mitzvotav v’tzivanu l’hafrish challah.

Translation:
  “Blessed are You, Lord our God, King of the universe, Who has sanctified us with His commandments and commanded us to separate challah.”

  1. Say: “Harei zu challah” (“This is challah”).
  2. Wrap the separated piece in foil and burn it. It may not be eaten.

No Eggs in This Recipe

This lahmajoun recipe does not contain eggs, so there is no need to check for blood spots. However, if you modify the dough to include egg for enrichment, each egg must be cracked individually into a clear glass and inspected before use.

Pas Yisroel

When a Jewish person sets the oven temperature or contributes to the baking in any way, the lahmajoun fulfills Pas Yisroel requirements. This is particularly relevant during the Aseret Yemei Teshuvah.

Brachot (Blessings)

  • Before eating (as a meal): HaMotzi Lechem Min Ha’Aretz — when lahmajoun is eaten as the basis of a meal with bread-like intent, wash and make HaMotzi. If eating a single piece as a snack, some authorities hold Mezonot may apply — consult your rav.
  • After eating (as a meal): Birkat HaMazon (Grace After Meals).
  • After eating (as a snack): Al HaMichya (if Mezonot was recited).

Ingredients

Dough

Ingredient Grams Volume Baker’s %
All-purpose flour (unbleached) 500 g 4 cups 100%
Fine sea salt 8 g 1½ tsp 1.6%
Granulated sugar 10 g 2 tsp 2%
Instant (rapid-rise) yeast 5 g 1½ tsp 1%
Olive oil 30 g 2 Tbsp 6%
Warm water (see DDT note below) 300 g 1¼ cups 60%
Total Dough Weight ~853 g

Spiced Meat Topping

Ingredient Grams Volume
Ground lamb or beef (kosher, with hechsher) 400 g 14 oz
Tomato paste 70 g 4 Tbsp
Yellow onion, finely grated or minced 150 g 1 medium onion
Red bell pepper, finely diced 100 g 1 small pepper
Fresh tomato, finely diced (or 100 g crushed canned) 120 g 1 medium tomato
Fresh flat-leaf parsley, finely chopped 15 g ¼ cup
Garlic cloves, minced or pressed 10 g 3 cloves
Ground cumin 4 g 1½ tsp
Sweet paprika 4 g 1½ tsp
Aleppo pepper (pul biber) or ½ tsp cayenne + ½ tsp paprika 3 g 1 tsp
Ground allspice 1 g ¼ tsp
Ground black pepper 1 g ¼ tsp
Fine sea salt 5 g 1 tsp
Lemon juice (for the topping mixture) 15 g 1 Tbsp

For Serving

  • Fresh lemons, cut into wedges — essential, not optional
  • Fresh flat-leaf parsley, whole leaves
  • Fresh mint leaves
  • Sumac (optional) — a sprinkle adds tangy depth
  • Pickled turnips or sliced radishes (optional)
  • Sliced tomatoes and cucumber (optional)

Equipment

  • Baking stone or heavy-duty baking sheet (inverted) — preheated in the oven for maximum heat transfer
  • Rolling pin
  • Kitchen scale
  • Food processor (for the meat topping) or sharp knife for very fine mincing
  • Parchment paper
  • Large bowl for dough
  • Bench scraper
  • Oven capable of reaching at least 250°C (480°F) — the hotter, the better

Desired Dough Temperature (DDT)

Target DDT: 26°C (78°F)

A moderately warm dough ensures a controlled rise without over-proofing during the rest. To calculate your water temperature:

Water Temp = (DDT × 3) − Flour Temp − Room Temp

Example: If your kitchen is 22°C and your flour is 21°C:
Water = (26 × 3) − 22 − 21 = 35°C (95°F)

The water should feel comfortably warm — like bath water. Never exceed 43°C (110°F).

Step-by-Step Instructions

Step 1: Make the Dough

In a large bowl or the bowl of a stand mixer, combine the warm water, sugar, and olive oil. Stir briefly.

Add the flour, salt, and instant yeast (keep salt and yeast on opposite sides). Mix on low speed (speed 1–2) for 2–3 minutes until a shaggy dough forms.

Increase to medium speed (speed 3–4) and knead for 6–8 minutes until the dough is:

  • Smooth and elastic — it should pull away from the bowl sides cleanly.
  • Soft and slightly tacky — but not wet. Lahmajoun dough should be supple and easy to handle.
  • Extensible — you should be able to stretch a small piece thin without it tearing. Extensibility is more important than elasticity here, as you need to roll the dough paper-thin.

Hand kneading: Combine in a large bowl, turn onto a lightly floured surface, and knead 8–10 minutes. The dough should feel smooth, soft, and alive.

Step 2: Rest the Dough

Lightly oil a large bowl. Place the dough inside, turn to coat, and cover tightly with plastic wrap or a damp towel.

Let rest at room temperature for 1 to 1.5 hours until doubled in volume. The dough should be puffy and soft when you press it gently. This rest develops flavor and makes the dough easier to roll thin.

Step 3: Prepare the Meat Topping

While the dough rests, make the topping. This step is crucial — the meat mixture must be processed finely enough to spread in a thin, even layer.

Food processor method (recommended):

  1. Add the onion, red bell pepper, garlic, fresh tomato, and parsley to a food processor. Pulse until very finely minced — almost a paste, but not completely pureed. Transfer to a large bowl.
  2. Add the ground lamb or beef, tomato paste, lemon juice, and all spices (cumin, paprika, Aleppo pepper, allspice, black pepper, salt).
  3. Mix thoroughly with your hands or a wooden spoon for 2–3 minutes until the mixture is homogeneous and paste-like. It should be spreadable, not chunky.

By hand: Grate the onion on a box grater. Mince the pepper, tomato, garlic, and parsley as finely as possible. Combine with the meat and spices and knead the mixture until smooth and spreadable.

Important: If the mixture seems too wet, do not drain it. The moisture helps the topping spread thin and keeps it from drying out in the oven’s intense heat. If it seems too thick, add a tablespoon of water.

Step 4: Preheat the Oven

Place a baking stone or inverted heavy baking sheet on the lowest oven rack. Preheat the oven to 250°C (480°F) — or as high as your oven will go. If your oven reaches 275°C (525°F) or has a “pizza” setting, use it. Allow at least 30 minutes for the stone to fully saturate with heat.

The intense heat is non-negotiable. Lahmajoun needs a blast of fierce, dry heat to crisp the thin dough while cooking the meat topping through in just 5–7 minutes.

Step 5: Divide and Shape the Dough

Turn the risen dough out onto a lightly floured work surface. Gently deflate.

Using a bench scraper and scale, divide the dough into 12 equal pieces (~71 g each). Shape each piece into a smooth ball by tucking the edges underneath and rolling gently on the surface.

Cover the balls loosely with a towel or plastic wrap and let them rest for 10–15 minutes. This relaxes the gluten and makes rolling much easier.

Step 6: Roll Paper-Thin

This is the critical step. Thin is everything.

Working with one ball at a time (keep the rest covered):

  1. Dust your surface lightly with flour. Place a dough ball on the surface and press it flat with your palm.
  2. Roll outward from the center in all directions, rotating the round a quarter turn every few strokes. Roll to a circle roughly 25–28 cm (10–11 inches) in diameter.
  3. The dough should be paper-thin — you should be able to see the surface beneath it. If it springs back, let it rest 2–3 minutes and try again.
  4. Transfer to a sheet of parchment paper for easy handling.

Tip: Roll 2–3 rounds ahead and keep them on parchment, stacked with flour between them. This creates an efficient assembly line for topping and baking.

Step 7: Spread the Topping

Take 2–3 tablespoons (~40 g) of the meat mixture and place it in the center of a rolled-out dough round.

Using the back of a spoon or your fingers, spread the topping in a very thin, even layer all the way to the edges. Do not leave a border — lahmajoun is topped edge to edge. The layer should be thin enough that you can see the dough through it in places. This is not a thick pizza — restraint is key.

Step 8: Bake at Maximum Heat

Carefully slide the topped lahmajoun (on its parchment) onto the preheated baking stone or inverted baking sheet.

Bake for 5–7 minutes at 250°C (480°F) until:

  • The edges of the dough are golden-brown and crisp, with some charred spots (this is desirable).
  • The meat topping is cooked through and no longer pink.
  • The bottom is firm and lightly spotted — not pale or soft.

Watch carefully. At these temperatures, the difference between perfect and burned is 60–90 seconds. Your first batch may need adjustment.

Remove with a large spatula or pizza peel. Repeat with remaining dough and topping.

Step 9: Finish and Serve

This is where lahmajoun becomes transcendent. Immediately after baking:

  1. Squeeze fresh lemon juice generously over the hot surface. The acidity cuts through the richness and brings every flavor alive.
  2. Scatter fresh parsley leaves and torn mint across the top.
  3. Optionally, add a pinch of sumac for extra tang, or tuck in some pickled turnips or sliced radishes.
  4. Roll the lahmajoun into a tight cylinder and eat immediately, out of hand.

Roll, don’t slice. Lahmajoun is never cut into triangles like pizza. Rolling it concentrates the flavors, gives you a satisfying textural contrast of crisp exterior and soft interior, and makes it perfect hand food. This is how it has been eaten for centuries.

Storage & Reheating

  • Same day: Lahmajoun is at its absolute best straight from the oven, rolled with lemon and herbs. The crispness is fleeting — serve immediately.
  • Room temperature: Stack cooled lahmajoun between sheets of parchment paper and store in an airtight container at room temperature for up to 1 day. The crispness will soften but the flavor remains excellent.
  • Reheating: Place on a baking sheet in a preheated 220°C (425°F) oven for 3–4 minutes to re-crisp. Alternatively, heat directly on a dry skillet over high heat for 1–2 minutes per side. Do not microwave — it will make the bread soft and chewy.
  • Freezing (unbaked): Prepare through Step 7 (topped but unbaked). Stack on parchment, wrap tightly in plastic wrap, then foil. Freeze for up to 2 months. Bake directly from frozen — add 1–2 minutes to the baking time.
  • Freezing (baked): Cool completely, stack between parchment, and freeze in airtight bags for up to 2 months. Reheat from frozen in a hot oven for 4–5 minutes.
  • Dough only: The dough balls can be refrigerated for up to 24 hours. Bring to room temperature for 30 minutes before rolling.

Troubleshooting Guide

Problem Likely Cause Solution
Dough is too thick and bready Not rolled thin enough; dough springing back Let dough rest longer (5 minutes) between rolling passes. Roll until you can see the surface through the dough. Lahmajoun should be almost translucent.
Topping is raw but edges are burning Topping spread too thick; oven not hot enough from below Spread the topping thinner — you should see dough through it. Ensure the baking stone is fully preheated (30+ minutes). Move the stone to a lower rack position.
Dough is soggy in the center Topping too wet; baking surface not hot enough If the meat mixture is very watery, let it sit in a fine strainer for 10 minutes. Ensure the baking stone is scorching hot before baking.
Dough tears when rolling Gluten too tight; insufficient rest Let the dough ball rest 5–10 more minutes before rolling again. Ensure the dough had a full 1–1.5 hour rise. Slightly increase hydration next time.
Meat topping is dry and crumbly Not processed finely enough; too little moisture Process the vegetables more finely in the food processor. The mixture should be paste-like, not chunky. Add a tablespoon of water if needed.
Lahmajoun sticks to the stone No parchment; wet dough Always use parchment paper beneath the lahmajoun. Dust the parchment lightly with flour or semolina. The parchment can be removed halfway through baking for extra crispness.

Frequently Asked Questions

What is lahmajoun?

Lahmajoun (also spelled lahmacun, lahm bi ajeen) is a paper-thin flatbread topped with a seasoned mixture of finely ground meat, tomato, onion, peppers, and spices, baked at very high heat until crisp. It originates from the culinary traditions of Turkey, Armenia, and the Levant, and has been a beloved part of Sephardi and Mizrachi Jewish cooking for centuries. It is often called “Jewish pizza” or “Armenian pizza,” though it predates pizza by centuries and is always eaten rolled with lemon and fresh herbs, never sliced.

Can I use ground beef instead of lamb?

Absolutely. While lamb is traditional and gives the most authentic flavor — slightly gamey, rich, and perfectly complemented by the spices — ground beef works beautifully. Many Jewish communities, particularly in Turkey and parts of Syria, traditionally used beef. You can also use a 50/50 blend of lamb and beef for a balanced flavor. Choose ground meat that is not too lean — 15–20% fat content produces the best result, keeping the topping moist during the intense bake.

Why can’t I add cheese to lahmajoun?

Lahmajoun is a meat dish — the topping contains ground lamb or beef. Adding cheese or any dairy product would violate the Torah prohibition of basar b’chalav (cooking meat and milk together). This is one of the most fundamental principles of kashrut. Despite the “pizza” nickname, lahmajoun is not pizza and should never be topped with cheese. The dish is complete and perfect as it is — the lemon, herbs, and spices provide all the complexity you need.

How do I get lahmajoun paper-thin?

Three keys: rest, patience, and a good rolling pin. First, let the dough balls rest for at least 10–15 minutes after shaping — this relaxes the gluten and makes rolling dramatically easier. Second, roll from the center outward, rotating the dough a quarter turn every few strokes. Third, if the dough springs back stubbornly, walk away for 3 minutes and come back. Do not fight the gluten — just give it time. The finished round should be 25–28 cm (10–11 inches) across and thin enough to see through.

Can I make the dough and topping ahead of time?

Yes, both components hold well. The dough can be made, divided into balls, placed on a floured tray, covered with plastic wrap, and refrigerated for up to 24 hours. Bring to room temperature for 30 minutes before rolling. The meat topping can be made up to 24 hours in advance and refrigerated in an airtight container — the flavors actually deepen overnight. For large gatherings, you can assemble topped lahmajoun on parchment, stack them, and freeze unbaked for up to 2 months. Bake directly from frozen, adding 1–2 minutes to the time.

Bring the Flavors of Aleppo to Your Kitchen

Lahmajoun is the kind of recipe that makes your entire home smell extraordinary. Roll the dough thin, spread the spiced meat, and let a blazing oven do the rest. Squeeze, roll, bite — this is how it has been done for centuries.

Save This Recipe
Try Our Yemenite Kubaneh Next →

Have questions? Tag us @kosherbreadpro on Instagram or leave a comment below. We answer every one.

Categories
Recipes

Cinnamon Babka Recipe — Swirled, Streusel-Topped, Irresistible

Dairy
Contains Butter • Egg • Milk • Contains Gluten
Yield
2 loaves (16–20 slices)
Difficulty
Intermediate–Advanced
Active Time
45 minutes
Total Time
5–6 hours (or overnight)
Bracha
HaMotzi or Mezonot*

*See Brachot section below — depends on quantity eaten and meal context.

Cinnamon babka is the other babka — and for many, it is the better babka. While chocolate babka commands the spotlight in bakery windows from Brooklyn to Bnei Brak, the cinnamon version is the quieter triumph: a bread that trades drama for depth, where ribbons of cinnamon-brown sugar wind through a butter-rich dough so tender it tears like silk. Every slice reveals a new landscape of swirled layers, each one glistening with caramelized sugar and warm spice.

The great cinnamon-versus-chocolate debate has raged in Jewish bakeries for decades. Jerry Seinfeld famously declared cinnamon a lesser babka, but legions of bakers and grandmothers disagree. Chocolate impresses on first bite; cinnamon rewards on the fifth, the tenth, the last crumb scraped from the pan. Its sweetness is more subtle, more layered — brown sugar that darkens and deepens in the oven, cinnamon that blooms with heat, butter that caramelizes at the edges. This is a babka that tastes like the memory of every great kitchen you have ever walked into.

What elevates this recipe from good to extraordinary are three finishing touches: a crunchy streusel topping that shatters against the soft crumb, a simple syrup soak brushed on while the loaves are still hot (sealing in moisture and adding a delicate sheen), and an overnight cold rise that develops flavor no short-cut method can replicate. The result is a babka that stays moist for days — not that it will last that long.

If you have baked our Chocolate Babka, you already know this dough. The two share the same rich, brioche-like foundation — it is the filling that transforms each into something entirely different. Master one, and the other is yours.

What Makes This Cinnamon Babka Special

This is not a dry cinnamon loaf with a stripe of spice running through it. Every element is engineered for maximum flavor and texture:

  • Rich brioche-like dough — butter, eggs, and milk create a tender, pillowy crumb with the structure to support heavy swirls of filling without collapsing. The dough is enriched enough to taste indulgent, but not so much that it feels like cake.
  • Cinnamon-brown sugar swirl — a thick, paste-like filling of dark brown sugar, ground cinnamon, and softened butter spread edge-to-edge ensures cinnamon in every single bite. No dry pockets, no bare spots.
  • Streusel topping — a butter-flour-sugar crumble baked on top adds a crispy, sandy contrast to the soft interior. It is the textural element most bakery babkas skip, and the one you will never want to go without.
  • Simple syrup soak — brushed over the babka the moment it leaves the oven, the syrup seeps into every crevice of the swirl, keeping the bread impossibly moist and adding a subtle glossy finish.
  • Overnight cold fermentation — an optional but recommended refrigerator rise develops complex flavor and makes the dough dramatically easier to roll and shape.

Babka in Eastern European Jewish Tradition

Babka was born in the Jewish communities of Eastern Europe — Poland, Ukraine, Belarus — where resourceful home bakers took leftover challah dough and enriched it further with butter and sugar, filled it with whatever was precious and available, and baked it in tall, fluted pans. The name babka comes from baba or bubbe — grandmother — and indeed this was grandmotherly baking at its finest: transforming humble ingredients into something that felt like a celebration.

Before chocolate became widely available in Eastern Europe, cinnamon was the classic filling. Ground cinnamon, a precious spice traded along routes from Ceylon and Sumatra, was the luxury of the Shabbat table — mixed with sugar and sometimes nuts or raisins, then layered into the twisted dough. Chocolate babka rose to prominence later, particularly among Ashkenazi communities in America, but cinnamon babka remained the original and, for purists, the definitive version.

Today babka has experienced a remarkable renaissance. From Breads Bakery on 16th Street in Manhattan to Lehamim Bakery in Tel Aviv, artisan bakers have elevated what was once a simple home bread into one of the most celebrated pastries in the Jewish baking canon. Our recipe draws on this tradition while adding the professional touches — streusel, syrup soak, precise temperatures — that separate an extraordinary babka from a merely good one.

For the chocolate version of this classic, see our Chocolate Babka Recipe — same dough, different filling, equally magnificent.

Kosher Observance & Halachic Notes

Kosher Classification: Dairy

This recipe contains butter in the dough, the filling, and the streusel, as well as milk in the dough. It is fully dairy (chalavi) and may not be served at a meat meal or within the waiting period after eating meat. Clearly label as dairy if serving on a buffet or gifting.

Hafrashat Challah (Separating Challah)

This recipe uses approximately 600 g of flour across both loaves combined. According to most Ashkenazi poskim, this amount requires separating challah with a bracha. Sephardi practice may differ — consult your community’s minhag.

How to perform Hafrashat Challah:

  1. After the dough is fully mixed, pinch off a small piece — at least a kezayit (roughly 28 g / 1 oz).
  2. Recite the bracha:

Hebrew:
  בָּרוּךְ אַתָּה ה’ אֱלֹהֵינוּ מֶלֶךְ הָעוֹלָם אֲשֶׁר קִדְּשָׁנוּ בְּמִצְוֹתָיו וְצִוָּנוּ לְהַפְרִישׁ חַלָּה

Transliteration:
  Baruch Atah Adonai, Eloheinu Melech ha’olam, asher kid’shanu b’mitzvotav v’tzivanu l’hafrish challah.

Translation:
  “Blessed are You, Lord our God, King of the universe, Who has sanctified us with His commandments and commanded us to separate challah.”

  1. Say: “Harei zu challah” (“This is challah”).
  2. Wrap the separated piece in foil and burn it. It may not be eaten.

Checking Eggs for Blood Spots

Each egg should be cracked individually into a clear glass or small bowl and inspected before adding to the dough. If a blood spot is found, the egg must be discarded entirely.

Pas Yisroel

When a Jewish person turns on the oven or contributes to the baking in any way, the babka fulfills Pas Yisroel requirements. This is particularly relevant during the Aseret Yemei Teshuvah (Ten Days of Repentance between Rosh Hashanah and Yom Kippur).

Brachot (Blessings)

  • If eaten as part of a bread meal (washing hands, eating a meal’s worth): HaMotzi Lechem Min Ha’Aretz before, Birkat HaMazon after.
  • If eaten as a snack or dessert (a slice or two without a meal): Borei Minei Mezonot before, Al HaMichya after.

Because babka dough is heavily enriched with sugar, butter, and eggs, many poskim classify it as pas haba’ah b’kisnin (bread-like cake). If you eat enough to constitute a meal (typically the volume of 3–4 eggs of bread), you wash and make HaMotzi. For a casual slice, Mezonot applies. When in doubt, consult your rabbi.

Ingredients

Enriched Dough

Ingredient Grams Volume Baker’s %
All-purpose flour (unbleached) 600 g 4¾ cups 100%
Granulated sugar 100 g ½ cup 16.7%
Fine sea salt 8 g 1½ tsp 1.3%
Instant (rapid-rise) yeast 9 g 2¼ tsp 1.5%
Large eggs, room temperature (check for blood spots) 150 g 3 large eggs 25%
Whole milk, warm (see DDT note below) 120 g ½ cup 20%
Unsalted butter, softened and cubed 115 g ½ cup (1 stick) 19.2%
Pure vanilla extract 8 g 2 tsp 1.3%
Total Dough Weight ~1,110 g

Cinnamon-Brown Sugar Filling

Ingredient Grams Volume
Dark brown sugar, packed 200 g 1 cup
Ground cinnamon (high quality, such as Vietnamese or Ceylon) 15 g 2 Tbsp
Unsalted butter, melted 60 g 4 Tbsp (¼ cup)
All-purpose flour 15 g 2 Tbsp
Pinch of fine sea salt 1 g ¼ tsp

Mix the filling ingredients into a thick, spreadable paste. The flour helps the filling stay put during rolling and prevents it from leaking out during baking.

Streusel Topping

Ingredient Grams Volume
All-purpose flour 65 g ½ cup
Dark brown sugar 50 g ¼ cup
Ground cinnamon 3 g 1 tsp
Unsalted butter, cold, cubed 40 g 3 Tbsp
Pinch of fine sea salt 1 g ¼ tsp

Rub the cold butter into the dry ingredients with your fingertips until the mixture resembles coarse, sandy crumbs. Refrigerate until ready to use.

Simple Syrup

Ingredient Grams Volume
Granulated sugar 100 g ½ cup
Water 100 g ½ cup

Combine sugar and water in a small saucepan. Bring to a boil, stir until dissolved, then remove from heat and let cool slightly. The syrup should be warm — not boiling — when you brush it on.

Equipment

  • Two 9 × 5 inch (23 × 13 cm) loaf pans
  • Stand mixer with dough hook (or large bowl for hand kneading)
  • Kitchen scale
  • Rolling pin
  • Offset spatula (for spreading filling)
  • Parchment paper
  • Pastry brush (for syrup)
  • Clear glass or small bowl for egg checking
  • Instant-read thermometer (optional, for checking internal temperature)

Desired Dough Temperature (DDT)

Target DDT: 24°C (75°F)

A slightly cool DDT keeps the butter from melting out of the enriched dough. To calculate your milk temperature:

Milk Temp = (DDT × 3) − Flour Temp − Room Temp

Example: If your kitchen is 22°C and your flour is 21°C:
Milk = (24 × 3) − 22 − 21 = 29°C (84°F)

The milk should feel barely warm. If it is too hot, the butter will melt prematurely and the dough will become greasy and slack. Never exceed 38°C (100°F).

Step-by-Step Instructions

Step 1: Make the Enriched Dough

Crack each egg individually into a clear glass and inspect for blood spots. If clear, add all 3 eggs to the bowl of a stand mixer along with the warm milk, sugar, and vanilla extract. Whisk briefly to combine.

Add the flour, salt, and instant yeast (keep salt and yeast on opposite sides). Mix on low speed (speed 1–2) for 2–3 minutes until a shaggy dough forms and no dry flour remains.

Increase to medium speed (speed 3–4) and knead for 5 minutes until the dough begins to come together and pull away from the sides.

With the mixer running on medium, add the softened butter one or two cubes at a time, waiting until each addition is mostly incorporated before adding the next. This will take 3–4 minutes. The dough will look shaggy and broken at first — this is normal.

Once all butter is added, increase to medium-high speed (speed 5–6) and knead for 6–8 minutes until the dough is:

  • Smooth, glossy, and elastic — it should pull cleanly from the bowl sides and slap against the bottom.
  • Soft and slightly tacky — but not sticky or wet. It should not cling to dry fingers.
  • Passes a windowpane test — stretch a small piece thin enough to see light through it without tearing.

Hand kneading: This enriched dough is challenging by hand. Knead on a lightly floured surface for 15–18 minutes using the slap-and-fold technique. The dough will be very sticky at first but will smooth out as the gluten develops.

Step 2: First Rise (or Overnight Cold Rise)

Lightly oil a large bowl. Place the dough inside, turn to coat, and cover tightly with plastic wrap.

Option A — Same-day rise (faster): Let rise at room temperature for 1.5 to 2 hours until doubled in volume. Then refrigerate for at least 1 hour (up to 2 hours) to firm up the butter before rolling.

Option B — Overnight cold rise (recommended): Place the covered bowl directly in the refrigerator for 8–12 hours (overnight). The cold fermentation develops deeper, more complex flavor and produces a firm dough that is far easier to roll out and fill. Remove from the fridge 15–20 minutes before shaping to take the chill off slightly.

Step 3: Prepare the Filling, Streusel, and Pans

While the dough rises (or in the morning if using overnight method):

Filling: In a medium bowl, combine the dark brown sugar, cinnamon, melted butter, flour, and salt. Mix until a thick, spreadable paste forms. It should have the consistency of wet sand. Set aside.

Streusel: In a small bowl, whisk together the flour, brown sugar, cinnamon, and salt. Add the cold cubed butter and rub with your fingertips until coarse, sandy crumbs form. Some pea-sized pieces of butter are desirable. Refrigerate until needed.

Pans: Grease two 9 × 5 inch loaf pans generously with butter. Line the bottom and two long sides with a strip of parchment paper, leaving a 2-inch overhang on each side (these are your handles for lifting the babka out later).

Step 4: Roll Out and Spread the Filling

Divide the dough into 2 equal pieces (~555 g each). Work with one half at a time, keeping the other covered in the refrigerator.

On a lightly floured surface, roll one piece of dough into a large rectangle, approximately 40 × 30 cm (16 × 12 inches). The dough should be about 5 mm (¼ inch) thick. If it springs back, let it rest for 5 minutes and try again.

Using an offset spatula, spread half of the cinnamon filling evenly over the entire surface, right to the edges. Be thorough — every square centimeter should be covered. The filling should form a thin, even layer.

Step 5: Roll, Twist, and Shape

  1. Roll up tightly from the long edge (the 40 cm / 16-inch side), creating a tight log. Pinch the seam to seal.
  2. Using a sharp knife or bench scraper, slice the log in half lengthwise, from end to end, exposing all the layers of filling inside. You now have two long strands with the layers visible.
  3. With the cut sides facing up (so the layers are exposed), cross the two strands over each other to form an X in the middle.
  4. Twist the strands around each other 2–3 times, keeping the cut sides facing up as much as possible. This is what creates the dramatic swirl pattern in every slice.
  5. Carefully lift the twisted loaf and place it into the prepared pan, tucking the ends underneath if necessary.

Don’t worry about perfection. Babka is forgiving — even a messy twist will look beautiful once baked. The key is keeping the cut (layered) sides facing up so the swirls are visible.

Repeat with the second piece of dough and remaining filling.

Step 6: Second Rise (Proofing)

Cover both pans loosely with plastic wrap or a damp towel. Let rise in a warm place for 1 to 1.5 hours until the dough has risen noticeably and crests about 1 cm (½ inch) above the rim of the pans. The dough should look puffy and jiggle slightly when the pan is tapped.

Do not over-proof. Babka that rises too much will collapse in the oven and lose its defined swirl layers. The dough should be clearly risen but still have spring left in it.

During the last 20 minutes of proofing, preheat your oven to 175°C (350°F) with a rack in the lower third.

Step 7: Top with Streusel and Bake

Remove the plastic wrap. Distribute the streusel topping evenly over both loaves, pressing it gently so it adheres to the surface.

Place the pans in the oven on the lower-third rack. Bake for 35–40 minutes until:

  • The streusel topping is deep golden brown and crisp.
  • The exposed dough swirls are richly browned.
  • An instant-read thermometer inserted into the center reads 88–92°C (190–198°F).

If the top browns too quickly (common after 20–25 minutes), tent loosely with aluminum foil for the remaining baking time. Do not reduce the oven temperature — the interior needs the full heat to bake through.

Step 8: Brush with Simple Syrup

While the babka bakes, prepare the simple syrup: combine 100 g sugar and 100 g water in a small saucepan. Bring to a boil, stir until dissolved, then remove from heat.

The moment the babkas come out of the oven, brush the warm syrup generously over the tops and into every visible crevice. Use all of the syrup, divided between both loaves. It may seem like a lot — trust the process. The hot bread will absorb it immediately, and this is what keeps the babka moist for days.

Let the babkas cool in their pans for 20 minutes, then use the parchment overhangs to lift them out onto a wire rack. Cool for at least 30 minutes more before slicing. (Patience is difficult here — the aroma is extraordinary — but slicing too early will compress the swirl layers.)

Storage & Make-Ahead

  • Room temperature: Wrap tightly in plastic wrap or foil. Cinnamon babka stays moist and delicious for 3–4 days at room temperature thanks to the simple syrup soak and enriched dough.
  • Reheating: Wrap individual slices in foil and warm in a 150°C (300°F) oven for 8–10 minutes, or toast slices lightly for a crispy exterior. Avoid the microwave — it makes the crumb gummy.
  • Freezing: Wrap cooled babka tightly in plastic wrap, then foil, then place in a freezer bag. Freeze for up to 3 months. Thaw overnight at room temperature (still wrapped), then refresh in a warm oven for 10 minutes.
  • Make-ahead: The overnight cold rise method (Step 2, Option B) is the best make-ahead strategy. Shape the babkas in the evening, cover the pans with plastic wrap, refrigerate overnight, then pull from the fridge in the morning, let proof for 1.5–2 hours, and bake fresh.

Troubleshooting Guide

Problem Likely Cause Solution
Filling leaks out during baking Filling spread too thick; dough not sealed properly; too much butter in filling Spread filling in a thin, even layer. Pinch the seam tightly after rolling. The flour in the filling helps — do not skip it.
Babka is dry despite syrup soak Over-baked; syrup applied too late (bread cooled); not enough syrup used Check internal temp — pull at 90°C (194°F). Apply syrup immediately while bread is still hot. Use all the syrup.
Swirl layers are indistinct Filling too thin; dough rolled too thick; not enough twist Roll dough to 5 mm thickness. Spread filling generously. After slicing the log lengthwise, twist with cut sides up for maximum visual impact.
Dough too sticky to roll Dough too warm; insufficient chilling; butter melting Refrigerate dough for at least 1 hour (overnight is best). Lightly flour the surface. If dough warms during shaping, return to fridge for 15 minutes.
Top burns before interior is cooked Oven too hot; rack too high; streusel browning fast Bake on lower-third rack. Tent with foil after 20–25 minutes if browning too quickly. Verify oven temp with a thermometer.
Babka collapses or sinks in the middle Over-proofed; oven temperature too low Proof until just cresting the pan rim — do not let it rise much beyond. Ensure oven is fully preheated to 175°C (350°F).

Frequently Asked Questions

What is the difference between cinnamon babka and chocolate babka?

Both start with the same rich, brioche-like dough. The difference is entirely in the filling: chocolate babka uses a bittersweet chocolate-cocoa filling (and sometimes a chocolate glaze), while cinnamon babka uses a cinnamon-brown sugar butter paste. Cinnamon babka tends to be slightly sweeter and more caramelized, with a warmer spice note. Chocolate babka is richer and more intense. Many bakers (ourselves included) consider them equals — make both and decide for yourself. See our Chocolate Babka Recipe for the other half of the debate.

Can I make cinnamon babka pareve?

Yes, but it requires substitutions. Replace the butter in the dough, filling, and streusel with high-quality margarine (stick, not tub). Replace the milk with non-dairy milk (oat or soy work well). The result will be very good, though dairy babka has a richness and tenderness that margarine cannot fully replicate. If you need a pareve version, we recommend increasing the margarine in the dough by 10–15 g to compensate for the lower fat content of non-dairy milk.

Why do I need to soak the babka in simple syrup?

The simple syrup serves two essential purposes. First, it seals in moisture — the hot bread absorbs the syrup into every crevice and layer, preventing the crumb from drying out over the next several days. Second, it adds a subtle gloss and sweetness that elevates the finished presentation. Without it, babka dries out within a day. With it, the bread stays soft and moist for 3–4 days. Do not skip this step — it is the secret to bakery-quality babka at home.

Can I bake cinnamon babka as a round (in a tube or bundt pan)?

Absolutely. The traditional Eastern European babka was often baked in a tall, fluted tube pan (which is where the “grandmother’s skirt” shape comes from). Use a well-greased 10-inch tube or bundt pan, combine all the dough (no need to divide), and twist it into the pan in a ring. Increase baking time to 40–50 minutes and tent with foil after 25 minutes. The internal temperature should still reach 88–92°C (190–198°F).

How far in advance can I make babka for Shabbat or Yom Tov?

Babka is an excellent make-ahead bake. For Shabbat, bake on Thursday and store tightly wrapped at room temperature — it will be perfect on Friday night and Shabbat morning. For longer planning, bake up to a month in advance and freeze. Thaw overnight and refresh in a warm oven before serving. You can also prepare the dough on Wednesday evening (overnight rise in the fridge), shape on Thursday morning, and bake Thursday afternoon for the freshest possible Shabbat babka.

The Other Babka Deserves Its Moment

Swirled with cinnamon, soaked in syrup, crowned with streusel. This is the babka that ends the chocolate-vs-cinnamon debate — by proving there is room for both.

Save This Recipe
Try Our Chocolate Babka Too →

Have questions? Tag us @kosherbreadpro on Instagram or leave a comment below. We answer every one.

Categories
Recipes

Pretzel Challah Recipe — Dark, Salty, Braided Perfection

Dairy
Butter Wash (Pareve Option Below) • Egg • Contains Gluten
Yield
1 large loaf (8–10 servings)
Difficulty
Intermediate
Active Time
45 minutes
Total Time
3½–4 hours
Bracha
HaMotzi

Pretzel challah is the bread that happens when two beloved traditions collide — and the result is better than either one alone. Take the soft, pillowy, egg-enriched dough of a classic challah. Braid it into that iconic six-strand pattern. Then, just before baking, dip the entire loaf into a baking soda bath that transforms its surface into something extraordinary: a dark, mahogany-brown pretzel crust with that unmistakable alkaline tang, sprinkled with flakes of coarse salt that crunch against the tender crumb beneath.

The magic is in the contrast. Outside, you get the deep color and slight chewiness of a Bavarian soft pretzel — that rich, almost caramel-like crust that no amount of egg wash alone can produce. Inside, the bread remains pure challah: soft, slightly sweet, golden from eggs and oil, pulling apart in long, tender strands. Every bite delivers both textures at once, and it is genuinely difficult to stop eating.

Pretzel challah has swept through Jewish bakeries across America in the last decade, and for good reason. It respects the halachic and spiritual role of challah — this is still lechem mishneh, still HaMotzi bread, still the anchor of the Shabbat table — while adding a playful, modern twist that delights everyone from the youngest child reaching for a salt crystal to the most seasoned baker admiring that burnished crust.

If you have already mastered our Classic Kosher Challah, pretzel challah is the next natural step. The dough is nearly identical — the transformation happens entirely in the baking soda bath and that final shower of coarse salt.

What Makes This Pretzel Challah Special

Pretzel challah is not just challah with salt on top. Every step is designed to deliver that authentic pretzel experience on a foundation of traditional challah dough:

  • Baking soda bath creates the pretzel crust — a brief dip in a boiling water–baking soda solution triggers the Maillard reaction on the dough’s surface, producing that deep mahogany color and distinctive alkaline tang without any food coloring or artificial browning agents.
  • Classic six-strand challah braid — the traditional braiding technique is preserved in full. The baking soda bath does not damage the braid; it enhances it, darkening the ridges and valleys to create stunning visual contrast.
  • Coarse salt topping — pretzel salt or flaky sea salt is pressed into the surface after the bath, adhering perfectly to the alkaline-treated crust. The salt crystals add crunch, flavor, and that unmistakable pretzel-shop appearance.
  • Egg-enriched challah interior — beneath the pretzel crust, the crumb is 100% challah: golden, soft, slightly sweet, and perfect for tearing or slicing.
  • Dairy or pareve flexibility — brush with melted butter after baking for a dairy pretzel challah, or use an egg wash and oil for a fully pareve version suitable for any Shabbat meal.

Challah Meets American Pretzel Culture

Challah and the soft pretzel share more history than most people realize. Both are breads of European origin shaped by immigrant communities in America. Challah traveled with Ashkenazi Jews from Eastern Europe; the soft pretzel arrived with German immigrants to Pennsylvania. For over a century, they occupied parallel worlds — challah on the Shabbat table, pretzels on the streets of Philadelphia and New York. The idea of combining them was, in retrospect, inevitable.

Pretzel challah first appeared in artisan Jewish bakeries in the early 2010s and quickly became a sensation. Bakeries like Breads Bakery in New York, Challah Prince in Los Angeles, and countless neighborhood kosher bakeries across North America began offering pretzel challah as a weekly special — and found it outselling their regular challah by wide margins. It became a social media phenomenon, its dramatic dark crust and glistening salt crystals perfectly photogenic.

What makes pretzel challah more than a trend is that it sits comfortably within the halachic framework of challah. The dough meets all requirements for lechem (bread) and HaMotzi. The baking soda bath is simply a surface treatment — it does not change the bread’s fundamental character. You can still perform hafrashat challah, still use it for lechem mishneh, still make HaMotzi. It is innovation in full respect of tradition.

Today, pretzel challah has earned a permanent place alongside classic challah in many Jewish homes. Some families alternate week to week; others reserve pretzel challah for special occasions or when hosting guests who need no persuading that Shabbat dinner is something extraordinary.

Kosher Observance & Halachic Notes

Kosher Classification: Dairy (with butter wash) or Pareve (with egg wash & oil)

The dairy version uses a melted butter wash brushed on after baking, creating a richer, more authentic pretzel finish. The pareve version omits the butter entirely and uses egg wash before the baking soda dip and vegetable oil brushed on after baking. The dough itself is pareve in both versions. If making dairy, clearly mark the challah so it is not accidentally served at a meat meal.

Hafrashat Challah (Separating Challah)

This recipe calls for 500 g of flour. According to most Ashkenazi poskim, this amount requires separating challah without a bracha. If you double the recipe (1,000 g flour), you should separate challah with a bracha. Sephardi practice may differ — consult your community’s minhag.

How to perform Hafrashat Challah:

  1. After the dough is fully mixed, pinch off a small piece — at least a kezayit (roughly 28 g / 1 oz).
  2. If the total flour exceeds the bracha threshold for your community, recite the bracha:

Hebrew:
  בָּרוּךְ אַתָּה ה’ אֱלֹהֵינוּ מֶלֶךְ הָעוֹלָם אֲשֶׁר קִדְּשָׁנוּ בְּמִצְוֹתָיו וְצִוָּנוּ לְהַפְרִישׁ חַלָּה

Transliteration:
  Baruch Atah Adonai, Eloheinu Melech ha’olam, asher kid’shanu b’mitzvotav v’tzivanu l’hafrish challah.

Translation:
  “Blessed are You, Lord our God, King of the universe, Who has sanctified us with His commandments and commanded us to separate challah.”

  1. Say: “Harei zu challah” (“This is challah”).
  2. Wrap the separated piece in foil and burn it. It may not be eaten.

Checking Eggs for Blood Spots

Each egg should be cracked individually into a clear glass or small bowl and inspected before adding to the dough. If a blood spot is found, the egg must be discarded entirely.

Pas Yisroel

When a Jewish person sets the oven temperature or contributes to the baking in any way, the pretzel challah fulfills Pas Yisroel requirements. This is particularly relevant during the Aseret Yemei Teshuvah.

Brachot (Blessings)

  • Before eating: HaMotzi Lechem Min Ha’Aretz — pretzel challah is bread in every halachic sense. Wash and make HaMotzi.
  • After eating: Birkat HaMazon (Grace After Meals).

Ingredients

Challah Dough

Ingredient Grams Volume Baker’s %
Bread flour (unbleached) 500 g 4 cups 100%
Fine sea salt 9 g 1½ tsp 1.8%
Granulated sugar 50 g ¼ cup 10%
Instant (rapid-rise) yeast 7 g 2¼ tsp 1.4%
Large eggs, room temperature (check for blood spots) 100 g 2 large eggs 20%
Vegetable oil (or neutral oil) 60 g ¼ cup + 1 Tbsp 12%
Warm water (see DDT note below) 170 g ¾ cup 34%
Total Dough Weight ~896 g

Baking Soda Bath

Ingredient Amount Notes
Water 2.5 L (10 cups) Use a wide, shallow pot or roasting pan
Baking soda (sodium bicarbonate) 75 g (⅓ cup) Creates the alkaline environment for pretzel crust

Topping & Finish

Option Amount Classification
Coarse pretzel salt or flaky sea salt 10–15 g (1–2 Tbsp) Essential — do not skip
Dairy: Melted unsalted butter (brushed on after baking) 30 g (2 Tbsp) Dairy — serve only with dairy meals
Pareve: Vegetable oil (brushed on after baking) 15 g (1 Tbsp) Pareve — serve with meat or dairy

For the pareve version, the entire recipe — dough, bath, and finish — is pareve. No dairy touches the bread at any stage.

Desired Dough Temperature (DDT)

Target DDT: 26°C (78°F)

A moderately warm dough gives the yeast a healthy start without over-fermenting before you braid. To calculate your water temperature:

Water Temp = (DDT × 3) − Flour Temp − Room Temp

Example: If your kitchen is 22°C and your flour is 21°C:
Water = (26 × 3) − 22 − 21 = 35°C (95°F)

The water should feel comfortably warm — like bath water. Never exceed 43°C (110°F).

Step-by-Step Instructions

Step 1: Make the Challah Dough

Crack each egg individually into a clear glass and inspect for blood spots. If clear, add to the bowl of a stand mixer along with the warm water, sugar, and oil. Whisk briefly to combine.

Add the bread flour, salt, and instant yeast (keep salt and yeast on opposite sides). Mix on low speed (speed 1–2) for 2–3 minutes until a shaggy dough forms and no dry flour remains.

Increase to medium speed (speed 3–4) and knead for 8–10 minutes until the dough is:

  • Smooth and elastic — it should pull away from the bowl sides cleanly.
  • Soft and slightly tacky — but not wet or sticky. It should not cling to dry fingers.
  • Passes the windowpane test — stretch a small piece thin enough to see light through it without tearing.

Hand kneading: Combine in a large bowl, turn onto a lightly floured surface, and knead 12–15 minutes. The dough should feel supple, smooth, and alive.

Step 2: First Rise (Bulk Fermentation)

Lightly oil a large bowl. Place the dough inside, turn to coat, and cover tightly with plastic wrap or a damp towel.

Let rise at room temperature for 1 to 1½ hours until doubled in volume. The dough should be puffy and spring back slowly when you press it with a floured finger.

Step 3: Divide and Shape the Strands

Turn the risen dough out onto a lightly floured surface. Gently deflate by pressing with your palms.

Using a bench scraper and scale, divide the dough into 6 equal pieces (~149 g each) for a six-strand braid. Roll each piece into a smooth rope, 35–40 cm (14–16 inches) long, tapering slightly at both ends.

If the dough resists rolling and springs back, cover the strands with a towel and let them rest for 5 minutes, then continue. Relaxed gluten rolls much more easily.

Step 4: Braid the Challah

Six-strand braid:

  1. Lay the 6 strands side by side. Pinch all strands together at one end and tuck the pinched end underneath.
  2. Number the strands 1 through 6 from left to right.
  3. Repeat this sequence: Move strand 6 over strand 1. Move strand 2 over strand 6. Move strand 1 over strand 3. Move strand 5 over strand 1. Move strand 6 over strand 4.
  4. Continue the pattern until you reach the end. Pinch the ends together and tuck underneath.

Tip: A four-strand braid also works beautifully. The key is a tight, compact braid — loose braids can come apart during the baking soda bath. Press the strands firmly together at both ends.

Place the braided challah on a parchment-lined baking sheet.

Step 5: Second Rise (Proofing)

Cover the braided challah loosely with lightly oiled plastic wrap or a damp towel. Let rise at room temperature for 30–45 minutes until the loaf is puffy but not fully doubled.

Do not over-proof. The challah will get one final boost of oven spring during baking. A slightly under-proofed loaf also holds up better during the baking soda bath. The braid should look pillowy and expanded, but still hold its shape firmly when the sheet is gently jiggled.

During this rise, preheat your oven to 190°C (375°F) with a rack in the center position.

Step 6: Prepare the Baking Soda Bath

This is the step that transforms challah into pretzel challah.

In a wide, shallow pot or deep roasting pan (large enough to hold the braided challah), bring 2.5 L (10 cups) of water to a rolling boil.

Carefully add the 75 g (⅓ cup) baking soda. The water will foam vigorously — this is normal. Stir to dissolve, then reduce heat to a gentle simmer.

Why baking soda, not lye? Traditional Bavarian pretzels use food-grade lye (sodium hydroxide) for a more intense crust. Baking soda (sodium bicarbonate) is a safer, more accessible alternative that produces an excellent pretzel crust — slightly less dramatic than lye but still deeply colored and distinctly pretzel-flavored. For home baking, baking soda is the standard and recommended approach.

Safety note: The baking soda solution is mildly alkaline. Avoid splashing. Use a large slotted spatula or spider skimmer to handle the challah.

Step 7: Dip the Challah in the Baking Soda Bath

This step requires confidence and a gentle hand. The braided challah is delicate but stronger than you think.

  1. Slide the challah off the parchment and gently lower it into the simmering baking soda bath using two large slotted spatulas (or your hands if you are confident — the water should be at a gentle simmer, not a roaring boil).
  2. Let it sit in the bath for 30 seconds per side. Use the spatulas to carefully flip it once. Total bath time: approximately 60 seconds.
  3. Lift the challah out with the spatulas, letting excess water drain for a few seconds, and return it to the parchment-lined baking sheet.

The challah will look slightly deflated and wet. This is completely normal. It will puff back up dramatically in the oven.

Step 8: Top with Coarse Salt & Bake

Immediately after the bath, while the surface is still wet, sprinkle coarse pretzel salt or flaky sea salt generously over the top and sides of the challah. The wet, alkaline surface acts as glue — the salt will adhere perfectly.

Place the challah in the preheated oven. Bake at 190°C (375°F) for 28–33 minutes until:

  • The crust is a deep, dark mahogany brown — much darker than a regular challah. Do not be alarmed; this is the desired pretzel color.
  • The internal temperature reads 88–93°C (190–200°F) on an instant-read thermometer.
  • The bottom sounds hollow when tapped.

Do not under-bake. The dark crust is normal and desirable. If the top is browning too quickly while the inside is still raw, tent loosely with aluminum foil for the last 10 minutes.

Step 9: Butter Wash & Cool

Remove the challah from the oven and immediately brush the top and sides with melted butter (dairy version) or vegetable oil (pareve version). This adds shine, flavor, and softens the crust slightly — bringing it closer to a soft pretzel’s texture.

Let the challah cool on a wire rack for at least 20 minutes before slicing or tearing. The interior needs time to set; cutting too early will result in a gummy crumb.

Storage & Reheating

  • Same day: Pretzel challah is at its absolute best within a few hours of baking, when the crust is still slightly chewy and the salt crystals are at peak crunch.
  • Room temperature: Wrap tightly in plastic wrap or store in a sealed bag at room temperature for up to 2 days. The pretzel crust will soften over time but the flavor remains excellent.
  • Reheating: Wrap loosely in foil and warm in a 165°C (325°F) oven for 8–10 minutes to partially restore the crust. Do not microwave — it will make the bread gummy and destroy the pretzel crust texture.
  • Freezing: Wrap cooled challah tightly in plastic wrap, then foil. Freeze for up to 2 months. Thaw at room temperature for 2–3 hours, then reheat in foil in the oven.
  • Make ahead: The dough can be prepared through Step 2 (first rise), punched down, wrapped tightly, and refrigerated for up to 24 hours. Remove from the fridge, let warm for 30 minutes, then continue with shaping.

Troubleshooting Guide

Problem Likely Cause Solution
Crust is pale, not dark brown Not enough baking soda in the bath; bath time too short; oven temperature too low Use the full ⅓ cup baking soda. Ensure 30 seconds per side in the bath. Verify oven temperature with a thermometer — bake at a true 190°C (375°F).
Braid fell apart in the bath Braid was too loose; dough was over-proofed; water was at a hard boil Braid tightly and pinch ends securely. Slightly under-proof before the bath. Reduce water to a gentle simmer before dipping.
Salt fell off during baking Surface dried before salt was applied; salt grains too small Apply salt immediately after removing from the bath while surface is still wet. Use coarse pretzel salt or large flaky sea salt, not fine table salt.
Interior is gummy or underbaked Removed from oven too early; cut while still hot Bake until internal temperature reaches 88–93°C (190–200°F). Let cool at least 20 minutes before cutting. The dark crust is normal — do not pull it early.
Challah tastes too salty Too much salt applied; used fine salt instead of coarse Use coarse pretzel salt sparingly — 10–15 g is enough. Coarse salt gives bursts of flavor; fine salt over-seasons the entire surface.
Crust is too hard or thick Overbaked; no butter/oil brushed on after baking Do not exceed 33 minutes. Brush with melted butter or oil immediately after removing from oven — this softens the crust to a pretzel-like chew.

Frequently Asked Questions

What is pretzel challah?

Pretzel challah is a traditional braided challah dough that is dipped in a boiling baking soda (or lye) bath before baking — the same technique used to make soft pretzels and Bavarian pretzels. The alkaline bath triggers a Maillard reaction on the surface, producing a deep mahogany-brown crust with a distinctive, slightly tangy pretzel flavor. The interior remains classic challah: soft, golden, and egg-enriched. Topped with coarse salt, it combines the best of both breads into one stunning loaf.

Can I use lye instead of baking soda for a more authentic pretzel crust?

Yes, food-grade lye (sodium hydroxide) produces a darker, more intensely flavored pretzel crust than baking soda. If using lye, dissolve 25 g food-grade lye in 1 L cold water (always add lye to water, never the reverse). Dip the challah for 15–30 seconds, not longer. Wear gloves and eye protection when handling lye solution, and use only food-grade lye from a reputable supplier. For most home bakers, baking soda produces excellent results and is far easier and safer to work with.

Is pretzel challah pareve or dairy?

The dough itself is pareve in all versions of this recipe — it contains no dairy ingredients. What determines the final classification is the finish: brushing with melted butter after baking makes it dairy; brushing with vegetable oil keeps it pareve. The baking soda bath is pareve. If you need a pareve challah for a meat meal, simply use the oil finish and the entire bread is pareve. Always label clearly if you make a dairy version.

Can I make pretzel challah rolls instead of a large loaf?

Absolutely. Divide the dough into 8–10 pieces (about 90–112 g each). Shape each piece into a round roll or tie into a simple knot. Dip each roll in the baking soda bath for 15–20 seconds per side. Top with coarse salt and bake at 190°C (375°F) for 18–22 minutes. Rolls are ideal for individual Shabbat portions or for sandwiches. Reduce baking time and watch closely — smaller pieces brown faster.

Why is my pretzel challah not as dark as the ones I see in bakeries?

Professional bakeries almost always use food-grade lye rather than baking soda, which produces a significantly darker, more dramatic crust. If you are using baking soda and want a darker result, try these adjustments: increase the baking soda to 100 g per 2.5 L water, extend the bath time to 45 seconds per side, and make sure your oven is at a true 190°C (use an oven thermometer). The baking soda version will be a rich brown — beautiful and delicious — but not quite as dark as the lye version. Both taste wonderful.

Ready to Twist Tradition?

Pretzel challah turns heads at every Shabbat table. That dark, salted crust and soft interior — once you bake it, you will never look at plain challah quite the same way again.

Save This Recipe
Master Classic Challah First →

Have questions? Tag us @kosherbreadpro on Instagram or leave a comment below. We answer every one.

Categories
Recipes

Bialy Recipe — The Forgotten Jewish Roll from Białystok

Pareve
Dairy-Free • Egg-Free • Contains Gluten
Yield
12 bialys
Difficulty
Intermediate
Active Time
45 minutes
Total Time
3–4 hours
Bracha
HaMotzi

The bialy is the bagel’s forgotten cousin — and in many ways, the more interesting one. Where the bagel has conquered the world, the bialy has remained a quiet, stubborn treasure, beloved by those who know it and almost unknown to everyone else. It is not boiled. It is not shiny. It has no hole. What it has is a shallow crater filled with caramelized onions and poppy seeds, a chewy-tender crumb, a flour-dusted crust that crackles softly under your fingers, and a flavor so deeply savory and aromatic that one bite can rearrange your entire understanding of what a roll can be.

The bialy — properly called bialystoker kuchen, the “cake from Białystok” — was born in the Jewish community of Białystok, a city in northeastern Poland near the Lithuanian border. For centuries, Jewish bakers there shaped these small, flat rolls with their distinctive onion-filled depression, baking them in blisteringly hot ovens until the bottoms charred slightly and the onion filling turned sweet and golden. They were the everyday bread of a thriving Yiddish-speaking world.

Unlike bagels, bialys are never boiled, never glazed, and never meant to be toasted. They are best eaten fresh from the oven, still warm, when the contrast between the crisp exterior and the soft, almost custardy center is at its most dramatic. Split one open, spread it with cream cheese or butter if you like, but a truly great bialy needs nothing at all — the caramelized onion filling is its own condiment.

In New York, the bialy survived thanks to a handful of bakeries on the Lower East Side — most famously Kossar’s Bialys, which has been baking them since 1936. If the bagel is New York’s most famous Jewish bread, the bialy is its most soulful. If you love our New York Bagel Recipe, the bialy is the essential next step in your Jewish bread education.

What Makes This Bialy Special

A bialy is deceptively simple — just flour, water, yeast, salt, and an onion filling. But every choice in the process shapes the final roll:

  • High-gluten flour for authentic chew — bialys demand a strong flour (at least 12–13% protein) to develop the chewy, resilient crumb that distinguishes them from ordinary rolls. We use high-gluten bread flour, the same flour New York’s bialy bakeries rely on.
  • No boiling, no egg wash, no sweetener — unlike bagels, bialys go straight into a very hot oven with nothing but a dusting of flour on their surface. The result is an honest, wheaty bread with a matte, crackled crust — no shine, no gloss, just pure bread.
  • The crater, not a hole — the signature depression is pressed into each roll by hand, stretched thin at the center but left thick and puffy at the rim. This creates two textures in one bread: the chewy, pillow-soft outer ring and the thin, almost cracker-like center laden with filling.
  • Slow-cooked onion and poppy seed filling — diced onions are sautéed low and slow until deeply caramelized, then mixed with poppy seeds and a touch of oil. The filling caramelizes further in the oven, becoming sweet, savory, and intensely aromatic.
  • Blistering oven heat — bialys bake at 260°C (500°F) for just 8–10 minutes. The intense heat puffs the rim dramatically while charring the bottom slightly, creating the characteristic leopard-spotted base that bialy lovers prize.

The Story of the Bialy: From Białystok to the Lower East Side

Before the Second World War, Białystok was home to one of Poland’s largest and most vibrant Jewish communities — roughly 50,000 Jews in a city of 100,000. They were weavers, scholars, bundists, Zionists, yeshiva students, and bakers. The Jewish bakeries of Białystok produced the bialystoker kuchen by the thousands every day: small, flat, onion-centered rolls that were as ordinary and essential as the Yiddish language itself.

Then came the Holocaust. In August 1943, the Nazis liquidated the Białystok ghetto. Of the city’s 50,000 Jews, fewer than a thousand survived. An entire world was destroyed — its language, its culture, its daily bread. The bialys of Białystok should have vanished with the community that created them.

But they did not. In the decades before the war, waves of Białystok Jews had emigrated to New York’s Lower East Side, and they brought their bread with them. On Grand Street and Essex Street, Jewish bakeries continued to shape bialys by hand, bake them in coal-fired ovens, and sell them by the dozen from storefront windows. The bread of a murdered community lived on in a new city, carried forward by the hands of those who remembered.

Today, the bialy remains a distinctly New York phenomenon. Unlike the bagel, which has been adapted (and often diminished) worldwide, the bialy has resisted mass production. It does not freeze well, it does not ship well, and it is at its best within an hour of baking. This fragility is part of its beauty — and part of why baking them at home is one of the most rewarding things a Jewish baker can do. For the bialy’s natural companion, see our New York Bagel Recipe.

Kosher Observance & Halachic Notes

Kosher Classification: Pareve

This recipe is entirely pareve. It contains no dairy, eggs, or meat products. The onion filling uses neutral vegetable oil. Bialys can be served alongside both meat and dairy meals without restriction.

Hafrashat Challah (Separating Challah)

This recipe calls for 650 g of flour. According to most Ashkenazi poskim, this amount requires separating challah without a bracha. If you double the recipe (1,300 g flour), you should separate challah with a bracha. Sephardi practice may differ — consult your community’s minhag.

How to perform Hafrashat Challah:

  1. After the dough is fully mixed, pinch off a small piece — at least a kezayit (roughly 28 g / 1 oz).
  2. If the total flour exceeds the bracha threshold for your community, recite the bracha:

Hebrew:
  בָּרוּךְ אַתָּה ה’ אֱלֹהֵינוּ מֶלֶךְ הָעוֹלָם אֲשֶׁר קִדְּשָׁנוּ בְּמִצְוֹתָיו וְצִוָּנוּ לְהַפְרִישׁ חַלָּה

Transliteration:
  Baruch Atah Adonai, Eloheinu Melech ha’olam, asher kid’shanu b’mitzvotav v’tzivanu l’hafrish challah.

Translation:
  “Blessed are You, Lord our God, King of the universe, Who has sanctified us with His commandments and commanded us to separate challah.”

  1. Say: “Harei zu challah” (“This is challah”).
  2. Wrap the separated piece in foil and burn it. It may not be eaten.

Checking Eggs for Blood Spots

This recipe does not contain eggs. However, if you choose to add an egg wash or modify the dough to include eggs, each egg should be cracked individually into a clear glass or small bowl and inspected before adding to the dough. If a blood spot is found, the egg must be discarded entirely.

Pas Yisroel

When a Jewish person sets the oven temperature or contributes to the baking in any way, the bialys fulfill Pas Yisroel requirements. This is particularly relevant during the Aseret Yemei Teshuvah.

Brachot (Blessings)

  • Before eating: HaMotzi Lechem Min Ha’Aretz — bialys are bread in every halachic sense. Wash and make HaMotzi.
  • After eating: Birkat HaMazon (Grace After Meals).

Ingredients

Dough

Ingredient Grams Volume Baker’s %
High-gluten bread flour (12–13% protein) 650 g 5 cups 100%
Water (see DDT note below) 400 g 1⅔ cups 61.5%
Instant (rapid-rise) yeast 5 g 1½ tsp 0.8%
Fine sea salt 12 g 2 tsp 1.8%
Barley malt syrup (or diastatic malt powder) 8 g 1½ tsp 1.2%
Total Dough Weight ~1,075 g

Onion & Poppy Seed Filling

Ingredient Grams Volume
Yellow onions, finely diced 300 g 2 medium onions
Neutral vegetable oil (canola or sunflower) 30 g 2 Tbsp
Poppy seeds 15 g 2 Tbsp
Fine sea salt 2 g ¼ tsp
Freshly ground black pepper pinch

The filling should be prepared in advance and cooled completely before shaping the bialys.

Equipment

  • Stand mixer with dough hook (or large bowl for hand kneading)
  • Kitchen scale
  • Large skillet or sauté pan for the onion filling
  • Two large baking sheets lined with parchment paper
  • Baking stone or steel (strongly recommended for a crisp bottom; a heavy inverted baking sheet works as substitute)
  • Bench scraper
  • Kitchen towels or plastic wrap for covering dough

Desired Dough Temperature (DDT)

Target DDT: 24°C (75°F)

A slightly cool dough ferments slowly and develops more flavor, which is ideal for bialys. To calculate your water temperature:

Water Temp = (DDT × 3) − Flour Temp − Room Temp

Example: If your kitchen is 22°C and your flour is 21°C:
Water = (24 × 3) − 22 − 21 = 29°C (84°F)

The water should feel barely warm — just slightly above room temperature. Never exceed 38°C (100°F) or you risk overactivating the yeast.

Step-by-Step Instructions

Step 1: Prepare the Onion Filling

Begin with the filling so it has time to cool while the dough ferments.

Heat the vegetable oil in a large skillet over medium-low heat. Add the finely diced onions and salt. Cook, stirring occasionally, for 15–20 minutes until the onions are deeply golden, sweet, and soft — they should be caramelized, not merely softened. Reduce the heat if they begin to brown too quickly.

Remove from heat, stir in the poppy seeds and black pepper. Transfer to a bowl and let cool to room temperature. The filling can be made up to 2 days ahead and refrigerated.

Step 2: Mix the Dough

In the bowl of a stand mixer, combine the water and barley malt syrup. Stir briefly to dissolve.

Add the flour, salt, and instant yeast (keep salt and yeast on opposite sides). Mix on low speed (speed 1–2) for 2–3 minutes until a shaggy, rough dough forms. The dough will look dry at first — this is correct. Bialys use a relatively stiff dough.

Increase to medium speed (speed 3–4) and knead for 10–12 minutes until the dough is:

  • Smooth and elastic — it should pull cleanly from the sides of the bowl.
  • Firm but not hard — stiffer than challah dough, similar in feel to bagel dough.
  • Passes a windowpane test — a small piece stretches thin enough to see light through without tearing.

Hand kneading: Combine in a large bowl, turn onto an unfloured surface, and knead 12–15 minutes. The dough is stiff, so hand kneading requires patience and effort. Use the heel of your palm and fold repeatedly.

Step 3: Bulk Fermentation

Lightly oil a large bowl. Place the dough inside, turn to coat, and cover tightly with plastic wrap.

Let rise at room temperature for 1.5 to 2 hours until doubled in volume. The dough should be puffy and should hold an indentation when pressed gently with a floured finger.

Step 4: Divide and Pre-Shape

Turn the risen dough out onto a lightly floured work surface. Gently deflate.

Using a bench scraper and scale, divide the dough into 12 equal pieces (~89 g each). Shape each piece into a tight, smooth ball by tucking the edges underneath and rolling on the surface with a cupped hand.

Place the balls on a lightly floured surface, cover loosely with a kitchen towel, and let rest for 15–20 minutes. This relaxes the gluten and makes shaping the craters much easier.

Step 5: Shape the Bialys

This is the defining moment — creating the signature bialy crater.

Working with one ball at a time:

  1. Flatten the ball with your fingertips into a disc roughly 10 cm (4 inches) in diameter.
  2. Press and stretch the center using your thumbs and fingers, working outward from the middle. Create a wide, shallow depression — the center should be very thin (almost translucent), while the rim stays thick and puffy, about 2 cm (¾ inch) wide.
  3. Do not create a hole. The center should be paper-thin but intact. Think of it as a small, shallow bowl — a crater, not a puncture.
  4. Stretch the overall disc to about 10–12 cm (4–5 inches) in diameter. The final bialy should look like a small, slightly irregular flying saucer.
  5. Place each shaped bialy on a parchment-lined baking sheet, spaced 5 cm (2 inches) apart. Six bialys per sheet.

Do not overfill. Spoon approximately 1 generous tablespoon of cooled onion filling into each crater. The filling should sit in the depression, not overflow onto the rim.

Step 6: Final Proof

Cover the shaped bialys loosely with kitchen towels. Let proof at room temperature for 15–20 minutes — just until the rims look slightly puffy. Bialys should not be over-proofed. They need to hit the oven while still taut so the high heat creates a dramatic puff.

Meanwhile, preheat your oven to 260°C (500°F) — as hot as it will go. If you have a baking stone or steel, place it on the middle rack and preheat for at least 30 minutes. The intense heat is non-negotiable for authentic bialys.

Step 7: Bake

High heat. Fast bake. That is the bialy way.

Lightly dust the tops of the bialys with flour — this gives them their characteristic matte, flour-dusted appearance.

If using a baking stone or steel, slide the parchment with bialys directly onto the hot stone. If using baking sheets, place them directly in the oven.

Bake for 8–10 minutes until the rims are golden-brown and puffed, the bottoms have dark, leopard-spotted char marks, and the onion filling is sizzling and deeply caramelized.

Do not overbake. Bialys should be golden, not dark brown. They continue to firm up as they cool. Remove them from the oven when the rim is just golden and the bottom has some dark spots.

Step 8: Cool and Serve

Transfer bialys to a wire rack. Let cool for 5–10 minutes — just enough to handle comfortably.

Bialys are best eaten within 2–3 hours of baking, while the crust still has its crackle and the interior is soft and fragrant. Split horizontally and eat plain, or with cream cheese, butter, or a smear of good mustard. Purists eat them unsplit, tearing off pieces of the thick rim and scooping up bits of the onion center.

Storage & Reheating

  • Same day: Bialys are at their absolute best fresh from the oven. Unlike bagels, they do not improve with age. Eat them the day they are baked.
  • Room temperature: Store in a paper bag (not plastic, which softens the crust) for up to 6–8 hours. They will lose their crispness but remain good.
  • Reheating: Split and toast cut-side down in a dry skillet over medium heat for 2–3 minutes, or place whole bialys in a 190°C (375°F) oven for 4–5 minutes. Do not microwave — it makes them gummy and lifeless.
  • Freezing: Bialys can be frozen, but they are never quite the same. Wrap individually in plastic wrap, then place in a freezer bag. Freeze for up to 1 month. Thaw at room temperature, then refresh in a hot oven for 5 minutes.
  • Make-ahead dough: After the bulk fermentation, you can refrigerate the dough overnight (up to 18 hours). The cold retard develops additional flavor. Let the dough warm at room temperature for 30 minutes before dividing and shaping.

Troubleshooting Guide

Problem Likely Cause Solution
Crater closes up during baking Center not pressed thin enough; dough over-proofed and too relaxed Stretch the center paper-thin — almost translucent. Keep the final proof short (15–20 min). The dough should still feel taut when it hits the oven.
Bialys are too pale Oven not hot enough; baked too briefly Preheat fully to 260°C (500°F). Use a baking stone preheated for at least 30 minutes. Bialys need blistering heat for color and puff.
Onion filling burns Filling too dry; oven rack too high Ensure filling has enough oil. Bake on the middle rack, not the top. The filling should caramelize, not blacken.
Dough is too stiff to shape Not enough hydration; bench rest too short Allow the full 15–20 minute bench rest after dividing. If dough still resists, cover and wait another 5 minutes. Do not add extra flour.
Bialys are dense and heavy Under-kneaded; yeast inactive; insufficient fermentation Knead until the windowpane test passes. Test your yeast before using. Allow full doubling during bulk fermentation — do not rush.
Bottom is too dark or burned Baking stone too hot; baked too long on bottom rack Use middle rack. Some dark charring on the bottom is traditional and desirable, but if it’s burning, double up your baking sheets for insulation.

Frequently Asked Questions

What is the difference between a bialy and a bagel?

Though both are iconic Jewish breads from Eastern Europe, the bialy and bagel are fundamentally different. A bagel is shaped into a ring (with a hole), boiled in water before baking, and has a shiny, chewy crust. A bialy has no hole — instead, it has a shallow crater filled with caramelized onions and poppy seeds. Bialys are never boiled, resulting in a softer, more bread-like texture with a flour-dusted, matte crust. Bagels are denser and chewier; bialys are lighter and more delicate. Both are best fresh, but bialys are even more ephemeral — they begin to stale within hours. For a side-by-side baking project, try our New York Bagel Recipe alongside these bialys.

Can I use all-purpose flour instead of high-gluten flour?

You can, but the result will be noticeably different. High-gluten flour (12–13% protein) gives bialys their characteristic chew and structure — the firm, resilient crumb that distinguishes a real bialy from an ordinary roll. All-purpose flour (10–11% protein) will produce a softer, more tender bialy. If all-purpose is all you have, add 1 tablespoon of vital wheat gluten per cup of flour to boost the protein content. King Arthur bread flour (12.7% protein) is an excellent and widely available choice.

Why do my bialys need to bake at such a high temperature?

The blistering 260°C (500°F) heat is essential to the bialy’s character. It accomplishes three things simultaneously: it puffs the thick rim dramatically (creating the airy, chewy ring), it chars the bottom slightly (giving those prized leopard spots), and it deeply caramelizes the onion filling. At lower temperatures, the bialy bakes more slowly, the rim does not puff properly, and the result tastes more like a soft roll than a bialy. If your home oven maxes out at 230°C (450°F), bake for 10–12 minutes and use a preheated baking stone for the best bottom crust.

Can I make bialys ahead of time?

The dough can be made ahead — after the bulk fermentation, punch it down, wrap tightly, and refrigerate for up to 18 hours. The cold overnight retard actually improves flavor. Let it warm for 30 minutes at room temperature before dividing and shaping. However, baked bialys do not keep well. They are at their peak within the first 2–3 hours after baking. Unlike bagels, bialys were never meant to be a make-ahead bread. The Białystok bakers made them fresh every morning for a reason.

What other fillings can I use besides onion?

The classic onion and poppy seed filling is traditional and definitive — it is what makes a bialy a bialy. That said, some modern variations include: garlic and fresh herbs (minced garlic sautéed with parsley and dill), everything seasoning (a nod to the everything bagel, using sesame, poppy, dried onion, dried garlic, and salt), or caramelized leeks for a milder, sweeter filling. Whatever you choose, keep the filling savory and use restraint — the bialy is about the bread, not the topping. The filling accents; it does not overwhelm.

Bake the Bread Białystok Remembers

Every bialy you shape is a small act of memory — a bread that survived when the community that created it did not. Bake them fresh, eat them warm, share them generously.

Save This Recipe
Bake Our New York Bagels Too →

Have questions? Tag us @kosherbreadpro on Instagram or leave a comment below. We answer every one.

Categories
Recipes

Malawach Recipe — Flaky Yemenite Pan-Fried Flatbread

Pareve
Dairy-Free (with margarine) • Egg-Free • Contains Gluten
Yield
8 flatbreads
Difficulty
Intermediate
Active Time
45 minutes
Total Time
2–3 hours (includes resting)
Bracha
Mezonot

Malawach is the bread that shatters. Imagine lifting a golden disc from a hot skillet, its surface blistered and crackling, and tearing it open to reveal dozens of tissue-thin layers that peel apart like the pages of a parchment manuscript. Steam rises from every stratum, carrying the warm scent of toasted fat and flour. This is malawach — the flaky, laminated flatbread of the Yemenite Jewish table, and one of the most magnificent breads in the entire Jewish baking tradition.

Malawach (malawach, מלאווח) is, at its heart, deceptively simple: flour, water, salt, a pinch of sugar, and generous amounts of fat worked into impossibly thin layers. There is no yeast, no leavening agent of any kind. The magic is entirely structural — the same principle that gives croissants their shatter, that gives puff pastry its lift, but achieved here not with cold butter and precise folding but with warm hands, melted margarine, and a technique perfected over centuries in the kitchens of Sana’a, Aden, and the mountain villages of Yemen.

Where kubaneh is patient and slow, baked overnight in a sealed pot, malawach is bold and immediate. It goes from dough to plate in minutes once shaped — pan-fried in a dry or lightly greased skillet until each side is deeply golden and the layers have puffed with steam. The contrast between the two breads is part of what makes the Yemenite bread tradition so rich: one bread for long waiting, another for the satisfying immediacy of hot fat and a cast-iron pan.

Malawach is traditionally served with grated fresh tomato (resek agvaniyot), hard-boiled eggs, and a generous spoonful of s’chug — the fiery Yemenite chile paste. Tear it open, dip, and eat with your hands. This is Yemenite street food elevated to an art form.

What Makes This Malawach Special

Malawach occupies a unique place among the world’s laminated breads. Every element of the process is designed for maximum flakiness with minimum complexity:

  • Hand-laminated layers without folding or turning — unlike croissants or puff pastry, malawach achieves its dozens of layers through a simple roll-and-fold technique that requires no chilling, no precise timing, and no marble countertop. The dough is stretched paper-thin, brushed with fat, folded into a square or coiled into a spiral, and pressed flat. That is it.
  • Pan-fried, not baked — malawach is cooked in a dry skillet or with the barest film of oil. The direct contact with hot metal creates a shattering, almost cracker-like exterior while the interior layers remain soft, steamy, and tender.
  • No leavening required — every bit of lift comes from steam trapped between the fat-separated layers. When the malawach hits the hot pan, the water in the dough turns to steam and puffs each layer apart. Pure physics, pure deliciousness.
  • Completely pareve — made with margarine, this malawach is dairy-free and can be served alongside meat or dairy meals with equal ease. A true kitchen workhorse.
  • Freezes beautifully — shaped malawach can be stacked between parchment paper and frozen for months. Cook directly from frozen in a hot pan. This is why Israeli freezer sections are stacked with malawach — it is the ultimate make-ahead bread.

The Yemenite Bread Trio: Malawach, Kubaneh & Jachnun

Malawach is the third pillar of the great Yemenite Jewish bread tradition, alongside kubaneh (the golden overnight pull-apart bread) and jachnun (the slow-baked rolled pastry). Together, these three breads represent one of the most distinctive and beloved culinary legacies in all of Jewish cuisine.

Each bread has its own character and its own relationship to Shabbat. Kubaneh goes into the oven before candle-lighting and bakes overnight, emerging on Shabbat morning as a golden, steaming dome. Jachnun follows the same overnight method, slow-baking into a dark, sweet, almost caramelized roll. Malawach takes a different path entirely: it is prepared and shaped before Shabbat, stacked between parchment, and then pan-fried fresh — or reheated from frozen — for Shabbat morning or any weekday meal.

When the Yemenite Jewish community was airlifted to Israel during Operation Magic Carpet (1949–1950), they carried these recipes in memory and in practice. Within a generation, malawach had become one of Israel’s most popular street foods, sold at market stalls, bus station kiosks, and corner bakeries from Eilat to Haifa. Today, it is as Israeli as falafel — but its roots remain deeply, beautifully Yemenite.

The word malawach likely derives from the Arabic mulawwah, meaning “folded” or “rolled.” And indeed, the folding is everything. A single ball of dough, stretched to near-transparency and folded upon itself with fat between every layer, becomes something that transcends the sum of its ingredients.

Kosher Observance & Halachic Notes

Kosher Classification: Pareve (with margarine)

This recipe uses margarine as the laminating fat, making the malawach fully pareve and suitable to serve alongside meat or dairy meals. If you substitute butter, the malawach becomes dairy — clearly label which version you have made to avoid confusion.

Hafrashat Challah (Separating Challah)

This recipe calls for 500 g of flour. According to most Ashkenazi poskim, this amount requires separating challah without a bracha. If you double the recipe (1,000 g flour), you should separate challah with a bracha (consult your community’s minhag for exact thresholds). Sephardi practice may differ.

How to perform Hafrashat Challah:

  1. After the dough is fully mixed, pinch off a small piece — at least a kezayit (roughly 28 g / 1 oz).
  2. If the total flour exceeds the bracha threshold for your community, recite the bracha:

Hebrew:
  בָּרוּךְ אַתָּה ה’ אֱלֹהֵינוּ מֶלֶךְ הָעוֹלָם אֲשֶׁר קִדְּשָׁנוּ בְּמִצְוֹתָיו וְצִוָּנוּ לְהַפְרִישׁ חַלָּה

Transliteration:
  Baruch Atah Adonai, Eloheinu Melech ha’olam, asher kid’shanu b’mitzvotav v’tzivanu l’hafrish challah.

Translation:
  “Blessed are You, Lord our God, King of the universe, Who has sanctified us with His commandments and commanded us to separate challah.”

  1. Say: “Harei zu challah” (“This is challah”).
  2. Wrap the separated piece in foil and burn it. It may not be eaten.

Checking Eggs for Blood Spots

This recipe does not contain eggs in the dough. However, malawach is traditionally served with hard-boiled or fried eggs. Each egg should be cracked individually into a clear glass or small bowl and inspected before cooking. If a blood spot is found, the egg must be discarded entirely.

Pas Yisroel

When a Jewish person lights the stove or contributes to the cooking in any way, the malawach fulfills Pas Yisroel requirements. This is particularly relevant during the Aseret Yemei Teshuvah.

Brachot (Blessings)

  • Before eating (snack or side dish): Borei Minei Mezonot — malawach is a pat haba’ah b’kisnin (baked/fried item not typically eaten as a bread meal). When eaten as a snack or side dish, the bracha is Mezonot.
  • After eating (snack): Al HaMichya.
  • If eaten as a meal: When malawach is the basis of a full meal (eaten in significant quantity, “kevi’at se’uda”), the bracha becomes HaMotzi with washing, and Birkat HaMazon after. Consult your rabbi if unsure about your specific situation.

Ingredients

Dough

Ingredient Grams Volume Baker’s %
All-purpose flour (unbleached) 500 g 4 cups 100%
Fine sea salt 8 g 1½ tsp 1.6%
Granulated sugar 15 g 1 Tbsp 3%
Warm water (see DDT note below) 275 g 1 cup + 2 Tbsp 55%
Vegetable oil (for the dough) 15 g 1 Tbsp 3%
Total Dough Weight ~813 g

Laminating Fat

Option Amount Classification
Pareve: Margarine (stick, not tub), softened 200 g (⅞ cup) Pareve — serve with meat or dairy
Dairy: Unsalted butter, softened 200 g (⅞ cup) Dairy — serve only with dairy meals

The fat should be softened to a spreadable consistency — not melted, not cold. Think of room-temperature margarine that yields easily to a knife. This consistency allows you to spread it evenly across the paper-thin dough without tearing.

Traditional Accompaniments

  • Grated tomato (resek agvaniyot) — halve ripe tomatoes and grate on a box grater, discarding the skin
  • S’chug (zhug) — Yemenite hot green or red chile paste
  • Hard-boiled or fried egg — one per person, served alongside
  • Hilbeh — whipped fenugreek paste (optional, for the adventurous)
  • Honey or date syrup — for a sweet variation, drizzle on the hot malawach

Equipment

  • Large heavy skillet or flat griddle — cast iron is ideal, 25–30 cm (10–12 inch)
  • Rolling pin (a thin, French-style rolling pin works best for stretching the dough)
  • Large clean work surface — the dough needs room to be stretched very thin
  • Kitchen scale
  • Pastry brush or offset spatula for spreading fat
  • Parchment paper (for stacking and freezing)
  • Plastic wrap (for resting the dough)

Desired Dough Temperature (DDT)

Target DDT: 25°C (77°F)

A slightly warm dough is more pliable and easier to stretch paper-thin — which is critical for malawach. To calculate your water temperature:

Water Temp = (DDT × 2) − Flour Temp

Example: If your flour is 21°C:
Water = (25 × 2) − 21 = 29°C (84°F)

The water should feel barely warm. Since there is no yeast to kill, temperature is less critical than with yeasted doughs — but a warm, relaxed dough stretches far more easily than a cold one.

Step-by-Step Instructions

Step 1: Make the Dough

In a large mixing bowl, combine the warm water, sugar, salt, and vegetable oil. Stir until the sugar and salt dissolve.

Add the flour and mix with a wooden spoon or your hand until a shaggy dough forms. Turn the dough out onto a clean, unfloured work surface.

Knead by hand for 8–10 minutes until the dough is:

  • Smooth and supple — it should feel like soft clay, yielding easily when pressed.
  • Slightly tacky but not sticky — it should not cling to your hands or the work surface.
  • Extensible — you can stretch a small piece without it snapping back. Unlike bread dough, malawach dough should be more extensible than elastic. We want it to stretch, not spring back.

Stand mixer method: Use the dough hook on low speed (speed 2) for 6–8 minutes. The dough should clear the sides of the bowl and wrap around the hook.

Resist the urge to add extra flour. The dough should be soft — softer than you might expect. A soft dough stretches thin; a stiff dough fights you.

Step 2: Rest the Dough

Coat the dough lightly with vegetable oil. Place it back in the bowl, cover tightly with plastic wrap, and let it rest at room temperature for 30 minutes.

This rest is essential. It allows the gluten to relax fully, which is what makes the dough stretchable to near-transparency. Do not skip it.

Step 3: Divide the Dough

Turn the rested dough out onto a lightly oiled work surface. Using a bench scraper and kitchen scale, divide the dough into 8 equal pieces (~100 g each).

Shape each piece into a smooth ball by tucking the edges underneath and rolling gently against the surface. Place the balls on an oiled sheet pan or plate, spacing them apart so they don’t touch. Brush the tops with a thin film of oil.

Cover with plastic wrap and let rest for another 30 minutes. This second rest makes the balls extraordinarily pliable — they will practically stretch themselves.

Step 4: Roll and Stretch Paper-Thin

This is the defining moment of malawach — the step that creates the layers.

Working with one ball at a time (keep the rest covered):

  1. Oil your work surface lightly — not flour. Oil keeps the dough pliable; flour makes it stiff.
  2. Press the ball flat with your palm into a disc about 12 cm (5 inches) across.
  3. Roll outward with a rolling pin, working from the center to the edges. Rotate the dough a quarter turn after every few strokes. Roll until you have a very thin circle or rectangle, roughly 35–40 cm (14–16 inches) across.
  4. Stretch by hand if needed. Drape the dough over the backs of your hands (knuckles up, like pizza makers) and gently stretch outward. The dough should be nearly translucent — you should be able to see the surface underneath through it. A few small tears are acceptable and will not affect the final result.

The golden rule: Thinner is always better. Every extra millimeter of thickness is a layer you lose. The best malawach comes from dough so thin it looks like it could not possibly hold together — and yet it does.

Step 5: Spread with Fat and Fold into Layers

With the dough stretched paper-thin on your work surface:

  1. Spread a thin, even layer of softened margarine (about 25 g / 1 heaping tablespoon) over the entire surface. Use your fingers, an offset spatula, or the back of a spoon. Cover right to the edges — the fat is what creates separation between every layer.
  2. Fold into thirds like a business letter: bring the bottom third up, then fold the top third down over it. You now have a long rectangle, three layers thick.
  3. Fold into thirds again from the short side: bring one end to the center, then fold the other end over it. You now have a roughly square packet, nine layers thick.
  4. Press gently to flatten the packet slightly and seal the edges. Do not press hard — you want to preserve the air between layers.

Alternative spiral method: Instead of folding into thirds, you can roll the fat-coated sheet into a tight log from one edge, then coil the log into a spiral (like a snail shell) and press flat. This creates a different layer pattern — more concentric rings than rectangular sheets. Both methods are traditional.

Place each folded malawach on a parchment-lined sheet pan. Do not stack without parchment between them — they will fuse together.

Repeat with all remaining dough balls. You will have 8 folded, layered malawach ready to cook or freeze.

Step 6: Final Rest (or Freeze)

Cover the sheet pan of folded malawach with plastic wrap and refrigerate for at least 30 minutes (or up to overnight). The cold rest firms the fat between the layers, which is critical for flakiness — when the cold fat hits the hot pan, it creates bursts of steam that puff each layer apart.

Freezing for later (highly recommended):

Stack the folded malawach with a square of parchment paper between each one. Place the stack in a large zip-top freezer bag or wrap tightly in plastic wrap, then foil. Freeze for up to 3 months.

To cook from frozen: Place the frozen malawach directly in a hot skillet — no thawing needed. Cook 3–4 minutes per side over medium heat. The frozen state actually helps the layers, as the fat stays solid longer and creates more steam separation.

Step 7: Pan-Fry Until Golden and Shattering

Heat a large, heavy skillet (cast iron is ideal) over medium heat for 2–3 minutes. The pan should be hot but not smoking.

No oil is needed in the pan — the margarine in the dough provides all the fat for frying. If your pan is well-seasoned, the malawach will not stick.

  1. Place one malawach in the dry skillet. You will hear an immediate gentle sizzle — that is the margarine beginning to render.
  2. Cook for 3–4 minutes on the first side over medium heat. Do not press down with a spatula — pressing squeezes out the steam and compresses the layers. The bottom should become deeply golden with dark spots, and the edges should begin to look crisp and layered.
  3. Flip carefully with a large spatula (or slide onto a plate, invert the pan over it, and flip). Cook the second side for 3–4 minutes until equally golden.
  4. Remove to a cutting board. Immediately — while it is screaming hot — scrunch the malawach between your palms (use a towel to protect your hands) or crumple it gently by pushing in from the sides with two spatulas. This loosens and separates the layers, creating that signature shattered, flaky texture.

Temperature control: If the malawach browns too quickly, reduce the heat slightly. If it takes much longer than 4 minutes per side, increase the heat. The goal is a deeply golden, almost leopard-spotted exterior with fully cooked, steamy layers inside.

Serve each malawach immediately as it comes off the pan, or keep cooked malawach warm in a 100°C (200°F) oven while you fry the remaining ones.

How to Serve Malawach

Malawach is served hot from the pan, torn open by hand. The classic Yemenite way:

  • Grated tomato (resek agvaniyot) — Grate ripe tomatoes on a coarse box grater, discard the skin, season with salt. The cool, fresh tomato against the hot, crisp bread is the essential combination.
  • Hard-boiled egg — One per person, peeled and roughly mashed or quartered.
  • S’chug — Green or red Yemenite hot sauce. A little goes a long way. The heat cuts through the richness of the bread beautifully.
  • Sweet variation — Drizzle hot malawach with honey or date syrup (silan) and sprinkle with sesame seeds. A popular Israeli breakfast and street food presentation.

Tear, don’t cut. Malawach is meant to be ripped open by hand to reveal the layers. Cutting with a knife compresses the very layers you worked so hard to create.

Storage & Make-Ahead

  • Uncooked (refrigerator): Shaped, folded malawach can be refrigerated between parchment paper for up to 2 days. The extended cold rest actually improves flakiness.
  • Uncooked (freezer): Stack between parchment, wrap tightly, and freeze for up to 3 months. Cook directly from frozen — no thawing needed. This is the best make-ahead method.
  • Cooked (same day): Malawach is best eaten immediately, but cooked flatbreads can be kept warm in a 100°C (200°F) oven for up to 30 minutes.
  • Cooked (leftovers): Wrap cooled malawach in foil and refrigerate for up to 2 days. Reheat in a dry skillet over medium heat for 1–2 minutes per side to restore crispness. Do not microwave — it turns the bread soft and gummy, destroying the layers.
  • Shabbat planning: Shape and freeze malawach during the week. Before Shabbat, cook them and wrap in foil. Reheat on a plata (Shabbat hot plate) or blech on Shabbat morning. They will not be as crisp as fresh, but remain delicious.

Troubleshooting Guide

Problem Likely Cause Solution
Malawach is dense, not flaky Dough not stretched thin enough; insufficient fat between layers Stretch thinner — you should see the surface through the dough. Use a full 25 g of margarine per piece. More fat = more layers.
Dough tears when stretching Dough not rested enough; too much flour in the mix Let the dough ball rest another 15–20 minutes. Ensure dough is soft and tacky. Small tears are fine — they close during folding.
Dough springs back when rolling Gluten is too tight; insufficient resting time Walk away for 10 minutes. The gluten will relax and the dough will hold its shape. Work on another ball in the meantime.
Malawach burns on the outside, raw inside Pan too hot Reduce heat to medium-low. Malawach needs 3–4 minutes per side — if it browns in under 2 minutes, your pan is too hot.
Malawach sticks to the pan Pan not properly seasoned; heat too low so fat did not render Use a well-seasoned cast iron pan. Ensure the pan is properly preheated. A tiny film of oil can be added if needed.
Layers are greasy, not crisp Too much fat; heat too low; malawach not scrunched after cooking Use no more than 25 g fat per piece. Cook over steady medium heat. Scrunch immediately after removing from pan to release steam and crisp the layers.

Frequently Asked Questions

What is malawach?

Malawach is a traditional Yemenite Jewish flatbread made from unleavened dough that is stretched paper-thin, spread with fat (margarine or butter), folded into layers, and pan-fried until golden and flaky. It belongs to the family of laminated flatbreads alongside Indian paratha and Malaysian roti canai, but has its own distinctive character shaped by centuries of Yemenite Jewish baking tradition. In Israel, malawach is one of the most beloved street foods and breakfast items, served with grated tomato, hard-boiled egg, and s’chug (hot sauce).

What is the difference between malawach, kubaneh, and jachnun?

All three are Yemenite Jewish breads, but each is made differently. Malawach is an unleavened, laminated flatbread that is pan-fried — it is flaky and crisp. Kubaneh is a yeasted, layered pull-apart bread that is slow-baked overnight in a sealed pot — it is soft, golden, and pillowy. Jachnun is an unleavened dough rolled paper-thin and baked overnight — it emerges dark, dense, and naturally sweet from long caramelization. Together, they form the Yemenite bread trio, one of the richest bread traditions in the Jewish culinary world.

Is malawach the bracha Mezonot or HaMotzi?

When eaten as a snack or as a side dish alongside other foods, malawach is considered pat haba’ah b’kisnin and the bracha is Mezonot before and Al HaMichya after. However, if you eat malawach as the basis of a full meal (kevi’at se’uda) — consuming a significant quantity as your primary food — the bracha becomes HaMotzi with netilat yadayim (hand washing), and Birkat HaMazon after. When in doubt, consult your rabbi.

Can I make malawach with butter instead of margarine?

Yes. Butter produces an even richer flavor and slightly crispier texture. However, using butter makes the malawach dairy, which limits when you can serve it in a kosher kitchen. The margarine version is pareve and can accompany meat or dairy meals, which is why most Israeli and diaspora recipes default to margarine. Both are completely traditional — in Yemen, clarified butter (samneh) was the original fat of choice.

Can I bake malawach in the oven instead of pan-frying?

You can, though the result will be different. Place the shaped malawach on a parchment-lined baking sheet and bake at 200°C (400°F) for 12–15 minutes, flipping once halfway through. The oven version will be puffier and more bread-like, with less of the characteristic crisp, shattering exterior that pan-frying provides. For the authentic experience, the skillet is the way to go. However, the oven method is useful for cooking a large batch at once.

Complete Your Yemenite Bread Collection

You have mastered malawach. Now bake kubaneh overnight, and the Yemenite trio is nearly complete. Three breads, one magnificent tradition.

Save This Recipe
Bake Our Kubaneh Next →

Have questions? Tag us @kosherbreadpro on Instagram or leave a comment below. We answer every one.