Search 150+ Kosher Recipes
This chocolate babka recipe delivers the babka that makes the whole house smell like a bakery.
There is a moment — right around minute thirty-five in the oven — when the scent crosses some invisible threshold and fills every room. Dark chocolate, warm butter-rich dough, a whisper of vanilla. Your kitchen smells like a Yerushalayim bakery on Erev Shabbos. That is the moment you know you have done something extraordinary.
This chocolate babka is not a quick project. It is a labor of love — the kind of baking that rewards patience with swirls of bittersweet chocolate tucked between tender, pull-apart layers, all drenched in a glistening sugar syrup that keeps every slice impossibly moist for days. This is the recipe that disappears before it cools. We have watched it happen, loaf after loaf.
Below, you will find everything you need: precise gram weights, baker’s percentages, a foolproof chocolate filling, detailed shaping instructions, and complete kosher guidance for both pareve and dairy versions. Whether this is your first babka or your fiftieth, this recipe will elevate your baking.
Recipe at a Glance
| Yield | 2 large loaves |
| Difficulty | Intermediate |
| Active Time | 1 hour 15 minutes |
| Total Time | 5 to 6 hours (including rises), or overnight |
| Kosher Status | Pareve (as written) — dairy variation noted below |
| Bracha | Mezonot or HaMotzi (see kosher notes) |
Kosher Notes & Halachic Guidance
Before we begin, a few important points for the kosher kitchen. These details matter, and understanding them will help you serve this babka with confidence in any context.
Pareve vs. Dairy
This recipe, as written, is entirely pareve. We use neutral-flavored oil in place of butter and unflavored oat milk, soy milk, or almond milk in place of dairy milk. This means the babka can be served after a meat meal or at any Shabbos or Yom Tov table without restriction.
A dairy version exists and is delicious — simply substitute unsalted butter (140g) for the oil and whole milk for the non-dairy milk. However, a dairy babka cannot be served at a meat meal, and you must wait the appropriate time after eating meat before consuming it (the waiting period varies by community custom: 1, 3, or 6 hours). If you bake the dairy version, it is wise to clearly label it to avoid confusion, especially in a busy kitchen.
Bracha (Blessing)
The correct bracha depends on how the babka is eaten:
- Mezonot — when eaten as a snack or cake, in a small quantity, outside the context of a bread meal. Because this dough is enriched with sugar, oil, and eggs, many poskim classify it as pas haba’ah b’kisnin (a bread-like food eaten as a snack), which takes the bracha of Mezonot.
- HaMotzi — when eaten as part of a formal meal where you are eating enough to be considered kove’a seudah (establishing a meal), or if you personally eat a substantial quantity (the shiur varies, but many poskim say approximately 230 grams / 4 k’beitzim of the babka), you would wash, say HaMotzi, and bentch. When in doubt, consult your Rav.
Hafrashat Challah
This recipe calls for 500 grams of flour. If you are baking a single batch, this amount does not require you to separate challah. However, if you double the recipe (1,000g of flour) or combine this dough with other doughs you are baking in the same session, you may reach the threshold for hafrashat challah. The common practice is:
- Without a bracha: separate challah when using 1,200g to 1,666g (approximately 2.6 to 3.6 lbs) of flour.
- With a bracha: separate challah when using 1,666g or more (approximately 3.6 lbs) of flour.
Many dedicated bakers intentionally scale up to reach the shiur for this mitzvah.
Ingredient Checks
- Eggs: Each egg must be cracked individually into a clear glass or cup and checked for blood spots before use. If a blood spot is found, that egg must be discarded.
- Chocolate and cocoa powder: Must bear a reliable hechsher (kosher certification). This applies to chocolate bars, chocolate chips, and cocoa powder alike. For pareve babka, confirm that the chocolate is certified pareve — many dark chocolates are, but always check the label.
- Non-dairy milk: Must have a reliable hechsher. Most major brands of oat, soy, and almond milk do.
The Dough — Brioche-Style, Pareve
This is a rich, enriched dough — soft, supple, and fragrant. We build it using the straight-dough method with a brief autolyse-style rest. The result is a crumb so tender it pulls apart in feathery layers.
Dough Ingredients
| Ingredient | Grams | Volume (approx.) | Baker’s % |
|---|---|---|---|
| Bread flour (or all-purpose) | 500g | 4 cups | 100% |
| Granulated sugar | 100g | ½ cup | 20% |
| Fine sea salt | 8g | 1½ tsp | 1.6% |
| Instant (rapid-rise) yeast | 9g | 2¼ tsp (1 packet) | 1.8% |
| Non-dairy milk, lukewarm (oat, soy, or almond) | 120g | ½ cup | 24% |
| Large eggs, room temperature | 150g (about 3 large) | 3 eggs | 30% |
| Egg yolk (for extra richness) | 18g (1 yolk) | 1 yolk | 3.6% |
| Pure vanilla extract | 8g | 2 tsp | 1.6% |
| Neutral oil (canola, sunflower, or light olive) | 85g | 6 Tbsp | 17% |
Total hydration (milk + eggs + yolk + oil): approximately 74.6%. This is a moderately enriched dough — rich but workable.
For the dairy version: Replace the oil with 140g (10 Tbsp) unsalted butter, softened and cubed. Replace non-dairy milk with whole milk. The butter is added gradually after the dough comes together, a few cubes at a time, kneading until each addition is absorbed. Dairy version baker’s percentage for fat: 28%.
Chocolate Filling
| Ingredient | Grams | Volume (approx.) |
|---|---|---|
| Dark chocolate (60-70% cacao), finely chopped | 200g | about 7 oz |
| Dutch-process cocoa powder | 30g | ¼ cup + 1 Tbsp |
| Granulated sugar | 65g | ⅓ cup |
| Neutral oil (or melted butter for dairy version) | 60g | 4 Tbsp |
| Pinch of fine sea salt | 1g | pinch |
All chocolate and cocoa must bear a reliable hechsher. For pareve babka, confirm the chocolate is certified pareve.
Sugar Syrup (Non-Negotiable)
This is the secret that separates a good babka from an unforgettable one. The syrup seals in moisture, adds a subtle sweetness, and gives the crust that gorgeous, glistening sheen. Do not skip it.
| Ingredient | Grams | Volume (approx.) |
|---|---|---|
| Granulated sugar | 100g | ½ cup |
| Water | 80g | ⅓ cup |
| Vanilla extract (optional) | 5g | 1 tsp |
Equipment
- Stand mixer with dough hook (strongly recommended) or strong arms and a large bowl
- Two 9×5-inch (23×13 cm) loaf pans
- Rolling pin
- Parchment paper
- Instant-read thermometer
- Plastic wrap
- Sharp knife or bench scraper
Step-by-Step Instructions
Step 1: Mix the Dough
In the bowl of a stand mixer fitted with the dough hook, combine the flour, sugar, salt, and instant yeast. Whisk briefly with a fork to distribute the yeast evenly.
In a separate bowl or large measuring cup, whisk together the lukewarm non-dairy milk, eggs (checked for blood spots), egg yolk, and vanilla extract.
With the mixer on low speed, pour the wet ingredients into the dry ingredients. Mix on low for 2 minutes until a shaggy, rough dough forms. It will look messy — that is exactly right. Stop the mixer, scrape down the sides, and let the dough rest for 5 minutes. This brief rest allows the flour to hydrate and makes the next stage much easier.
Step 2: Knead and Add Oil
Turn the mixer to medium-low (speed 3 on a KitchenAid) and knead for 4 minutes. The dough will start to become smoother but will still be quite sticky.
With the mixer still running, drizzle in the oil in a slow, thin stream over the course of about 2 minutes. This gradual addition is important — dumping it in all at once will make the dough greasy and slack.
Once the oil is incorporated, increase the speed to medium (speed 4) and knead for another 6 to 8 minutes. Here is what you are looking for:
- Visual cue: The dough should be smooth, elastic, and pulling cleanly away from the sides of the bowl, collecting around the dough hook in a cohesive mass.
- Touch cue: When you poke the dough, it should feel soft, slightly tacky, but not wet or sticky. It should spring back slowly. If it sticks aggressively to your finger, knead for another 2 minutes.
- Windowpane test: Pinch off a small piece and gently stretch it between your fingers. You should be able to stretch it thin enough to see light through it without it tearing. If it tears immediately, continue kneading.
For the dairy version: After the initial 4-minute knead, add the softened butter a few cubes at a time, waiting until each addition is fully absorbed before adding the next. This will take 8 to 10 minutes total. The dough will look like it is falling apart after each butter addition — this is normal. Keep kneading and it will come back together beautifully.
Step 3: First Rise (Bulk Fermentation)
Transfer the dough to a lightly oiled large bowl. Cover tightly with plastic wrap. Allow it to rise at room temperature (about 24-26°C / 75-78°F) for 1½ to 2 hours, until it has doubled in volume. The dough should feel puffy and airy when you gently press it with a floured finger — the indentation should fill back very slowly.
Overnight option: For superior flavor and easier handling, you can place the covered bowl in the refrigerator immediately after kneading. Let it cold-ferment for 8 to 16 hours (overnight). The next day, remove the dough from the fridge and let it sit at room temperature for 30 minutes before proceeding. Cold dough is firmer and easier to roll and shape, which is especially helpful for beginners.
Step 4: Prepare the Chocolate Filling
While the dough rises (or before you take it out of the fridge), make the filling.
Melt the chopped dark chocolate with the oil in a heatproof bowl. You can use a double boiler (a bowl set over a pot of barely simmering water, making sure the bowl does not touch the water) or the microwave (30-second bursts, stirring between each). The mixture should be smooth and glossy.
Add the cocoa powder, sugar, and salt to the melted chocolate mixture. Stir until completely combined. The filling should be thick but spreadable — like a dense, luxurious chocolate paste. If it is too thick, add oil one teaspoon at a time. If it is too thin, let it cool slightly to thicken. Set aside at room temperature. Do not refrigerate it or it will become too stiff to spread.
Step 5: Roll and Fill
Line two 9×5-inch loaf pans with parchment paper, leaving overhang on the long sides for easy removal. Lightly oil the parchment.
Divide the dough into two equal pieces (use a kitchen scale — each piece should be approximately 445g).
Working with one piece at a time (keep the other covered), place the dough on a lightly floured surface. Using a rolling pin, roll it out into a large rectangle, approximately 35×30 cm (14×12 inches). The dough should be about 5mm (¼ inch) thick. Roll from the center outward, turning the dough 90 degrees occasionally to maintain an even rectangle. If the dough springs back stubbornly, cover it with a clean towel and let it rest for 5 minutes before continuing.
Spread half of the chocolate filling evenly over the entire surface of the rectangle, leaving a 1 cm (½ inch) border along one of the long edges. Use an offset spatula for the smoothest, most even layer. Be generous and even — gaps in the filling mean gaps in the swirl.
Step 6: Roll, Cut, and Twist
Starting from the long edge opposite the bare border, roll the dough up tightly into a log, like a jelly roll. Roll it toward the bare edge. The bare strip helps seal the log. Pinch the seam gently to seal. You should have a log about 35 cm (14 inches) long.
Chill the log: Place the rolled log on a parchment-lined sheet pan and refrigerate for 15 to 20 minutes. This firms up the chocolate and makes cutting clean and easy. Do not skip this step.
Remove the log from the fridge. Using a sharp knife (not serrated), cut the log in half lengthwise, from end to end, so you have two long halves with the layers of dough and chocolate exposed. This is the dramatic moment — you will see beautiful spiraling layers.
Now, twist:
- Lay the two halves side by side, cut sides facing up. All that gorgeous chocolate should be visible.
- Pinch the two halves together firmly at one end.
- Lift the right strand over the left strand, keeping the cut sides facing up as much as possible. Then lift the left over the right. Continue this braiding/twisting pattern all the way down the length. You are essentially creating a two-strand twist.
- Pinch the ends together and tuck them under slightly.
Carefully transfer the twisted babka into the prepared loaf pan. It will look messy. That is exactly what you want. The imperfection is the beauty — all those exposed layers will bake into a swirled, chocolate-ribboned masterpiece.
Repeat with the second piece of dough and remaining filling.
Step 7: Second Rise (Proofing)
Cover the pans loosely with plastic wrap or a clean, damp kitchen towel. Allow the babkas to rise at room temperature for 45 minutes to 1 hour. They should look puffy and risen about 1 inch above the rim of the pan. The dough should jiggle gently when you tap the side of the pan. Do not over-proof — the babka should still have some spring left for the oven.
While the babkas proof, preheat your oven to 175°C (350°F) with a rack in the lower third of the oven. Positioning the rack lower helps the bottom bake through without over-browning the top.
Step 8: Bake
Remove the plastic wrap. Place the pans in the preheated oven.
Bake for 35 to 45 minutes. Here is how to know they are done:
- Visual cue: The top should be deeply golden brown, almost mahogany in places. The chocolate areas will look dark and set. If the top is browning too quickly after 25 minutes, tent loosely with aluminum foil.
- Internal temperature: This is the most reliable test. Insert an instant-read thermometer into the center of the babka (try to avoid a pocket of chocolate). The internal temperature should read 185-190°F (85-88°C). Below 185°F means the center is still underbaked dough — return it to the oven.
- Sound cue: Tap the top gently. It should sound hollow, not dense or thudding.
Step 9: Sugar Syrup — Apply Immediately
While the babkas bake, prepare the sugar syrup. Combine the sugar and water in a small saucepan over medium heat. Stir until the sugar dissolves completely. Bring to a gentle boil, then reduce heat and simmer for 3 to 4 minutes until the syrup is slightly thickened (it will coat the back of a spoon lightly). Remove from heat and stir in the vanilla extract if using. Keep warm.
The moment the babkas come out of the oven, while they are still blazing hot in their pans, brush the sugar syrup generously over the entire top surface. Use a pastry brush and apply it in multiple layers — brush, let it soak in for 30 seconds, brush again, repeat. Use all of the syrup between the two loaves. The hot bread drinks it in like rain on dry earth. You will see it glisten and hear a faint sizzle.
This step is non-negotiable. The syrup does three things: it locks in moisture (babka stays soft for days), it adds a beautiful sheen, and it provides a subtle sweetness that balances the dark chocolate. Professional bakeries never skip this, and neither should you.
Step 10: Cool and Slice
Let the babkas cool in their pans for 20 minutes. Then, using the parchment overhang, gently lift them out and transfer to a wire rack to cool completely — at least 1 hour before slicing. This is the hardest step. The aroma will test your resolve.
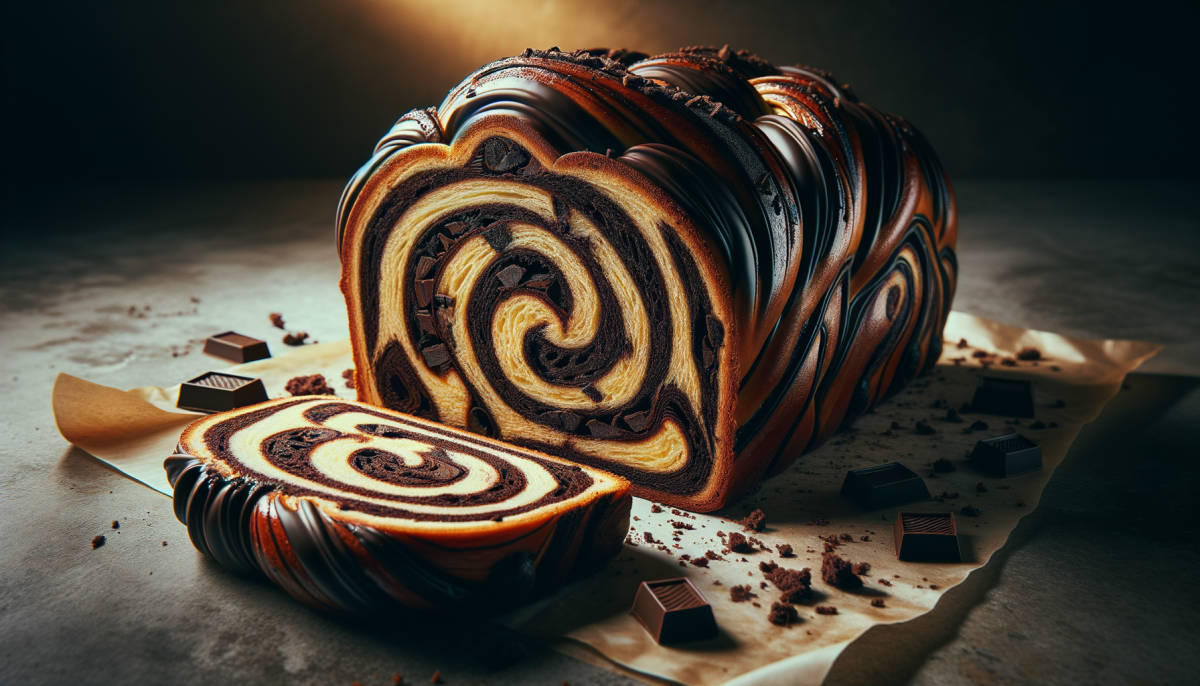
Slice with a serrated knife using a gentle sawing motion. Each slice will reveal a stunning cross-section of chocolate swirls nested in golden, tender crumb.
Make-Ahead, Storage, and Freezing
- Overnight dough: The dough can be refrigerated after kneading for up to 16 hours. This cold fermentation develops deeper flavor and makes shaping easier. Highly recommended.
- Assembled, unbaked babka: After shaping and placing in the loaf pan, you can cover the pan tightly with plastic wrap and refrigerate for up to 18 hours. The next day, remove from the fridge, let the babka sit at room temperature for 45 to 60 minutes (until it looks puffy and has risen about an inch above the pan rim), and then bake as directed.
- Room temperature storage: Baked babka keeps beautifully at room temperature, wrapped tightly in plastic wrap or stored in an airtight container, for 3 to 4 days. The sugar syrup is the reason for this remarkable shelf life.
- Freezing baked babka: Wrap the completely cooled loaf tightly in plastic wrap, then in a layer of aluminum foil. Freeze for up to 2 months. To serve, thaw at room temperature for 2 to 3 hours (still wrapped, to prevent condensation on the surface). Reheat individual slices in a 175°C (350°F) oven for 5 minutes, or briefly toast them for irresistible crispy edges.
- Freezing individual slices: Slice the cooled babka, separate slices with parchment paper, place in a freezer bag, and freeze. Pull out slices as needed and toast from frozen — 2 to 3 minutes in a toaster oven is all it takes.
Troubleshooting
The filling is leaking out during baking
This almost always means the filling was too warm or too loose when the dough was rolled, or the dough was not chilled enough after rolling. Next time, make sure the filling is at room temperature (not warm) and is thick enough to hold its shape. Always chill the rolled log for 15 to 20 minutes before cutting. Also, make sure you are not over-proofing — overproofed dough becomes fragile and the layers separate, allowing filling to escape. Some filling leakage at the bottom is normal and actually creates delicious caramelized edges.
The dough is too sticky to work with
Enriched doughs are naturally stickier than lean bread doughs. Resist the urge to add excessive flour, which will make the babka dense and dry. Instead: (1) Make sure you knead long enough — underkneaded dough is stickier. (2) Use the cold fermentation method (overnight in the fridge). Cold dough is dramatically easier to roll and handle. (3) Lightly flour your work surface and rolling pin, but use a light hand. (4) If the dough keeps springing back while rolling, let it rest under a towel for 5 minutes — the gluten needs to relax.
The center is underbaked (raw/doughy inside)
This is the most common babka problem, and the instant-read thermometer is your solution. The center must reach 185-190°F (85-88°C). If the top is getting too dark before the center is done, tent with foil and continue baking. Positioning the rack in the lower third of the oven also helps. Other causes: your oven may run cool (use an oven thermometer to verify), or the loaf pans may be too dark (dark pans absorb more heat on the outside, creating a false sense of doneness while the center remains raw). Glass or light-colored metal pans are preferable.
The babka is dry
You either overbaked it or skipped the sugar syrup. The syrup is not decorative — it is structural. It is the moisture insurance policy. If you suspect you have overbaked slightly, apply an extra-generous coat of syrup. For next time, pull the babka at 185°F internal temperature rather than waiting for 190°F, and apply the syrup immediately while the bread is still hot.
Frequently Asked Questions
What is the difference between babka and challah?
Both are enriched yeasted doughs from the Ashkenazi Jewish tradition, but they serve different purposes and have different textures. Challah is a braided bread made for Shabbos and holidays — it is rich but lighter, with a slightly chewy crumb, and is always HaMotzi. Babka is sweeter and richer, filled with chocolate or cinnamon, and baked in a loaf pan. It is more cake-like, often classified as Mezonot, and originated as a way to use leftover challah dough. Think of challah as the dignified centerpiece of the Shabbos table, and babka as the irresistible treat that follows.
Why do you put syrup on babka?
The sugar syrup serves three critical purposes. First, it seals in moisture — babka is a dense, enriched bread that can dry out quickly without it. The syrup soaks into the crumb while the bread is still hot, keeping every slice soft and tender for days. Second, it adds a beautiful, glossy sheen to the surface. Third, it provides a delicate sweetness that balances the bittersweet chocolate filling. Every professional bakery uses a soaking syrup on their babka. Once you try it, you will never bake without it.
Can I freeze babka?
Absolutely, and it freezes beautifully. Wrap the completely cooled loaf tightly in plastic wrap, then in aluminum foil, and freeze for up to two months. Thaw at room temperature for two to three hours while still wrapped. You can also freeze individual slices between sheets of parchment paper in a freezer bag, pulling out slices as needed and toasting them from frozen. In fact, many people argue that a toasted slice of frozen babka is even better than fresh — the edges get crispy while the inside stays soft and chocolatey.
What is pareve babka?
Pareve (also spelled “parve”) is a kosher classification meaning the food contains neither meat nor dairy ingredients. A pareve babka uses oil instead of butter and non-dairy milk instead of regular milk, making it suitable to serve after a meat meal or alongside any kosher menu. This recipe, as written, is entirely pareve. The chocolate filling must also be certified pareve — most quality dark chocolates are, but always check the label for kosher certification. Pareve babka is just as rich and delicious as its dairy counterpart, and it offers much more flexibility for kosher meal planning.
Can I make babka with cinnamon instead of chocolate?
Yes. For a cinnamon filling, combine 100g (1/2 cup) dark brown sugar, 10g (1 Tbsp) ground cinnamon, a pinch of salt, and 60g (4 Tbsp) oil (or melted butter for dairy). Spread this mixture over the rolled-out dough, and optionally sprinkle with 60g (1/3 cup) raisins or chopped pecans. Follow the same rolling, cutting, twisting, and baking instructions. Apply the sugar syrup exactly the same way. The cinnamon version is a classic in its own right.
You Did It. Now Share It.
Pull a slice. Watch those layers separate, each one threaded with dark, bittersweet chocolate. Listen to the soft tear of the crumb. This is what real baking feels like — the kind that fills your kitchen with warmth and your table with people reaching for seconds.
This chocolate babka is more than a recipe. It is an invitation — to slow down, to work with your hands, to create something extraordinary from flour and eggs and chocolate. And when you brush that final coat of syrup over the golden top and watch it glisten, you will understand why this recipe endures, generation after generation.
Loved this recipe? Save it, bookmark it, pin it — and come back to it often. Every batch teaches you something new.
Bake next: Our Classic Challah Recipe uses a similar enriched dough and is the perfect companion to your babka baking. Or explore our Complete Guide to Kosher Baking for more recipes, techniques, and halachic guidance.
🍞 Get a New Kosher Recipe Every Week
Join our baking community. One recipe, one tip, one story — delivered every Friday before Shabbat.
No spam. Just bread. Unsubscribe anytime.
You Might Also Enjoy
- Cinnamon Babka — The other essential babka flavor
- Sourdough Babka — Tangy slow-fermented twist
- Babka Buns — Individual portion swirled rolls
- Chocolate Babka Muffins — Muffin-sized chocolate swirls
- Krantz Cake — Israeli-style chocolate rolled cake
Leave a Reply
You must be logged in to post a comment.