Search 150+ Kosher Recipes
Butter-based • Egg • Contains Gluten
Oil-based • Dairy-Free • Egg • Contains Gluten
36–40 cookies
Beginner
1 hour
3–4 hours
Mezonot
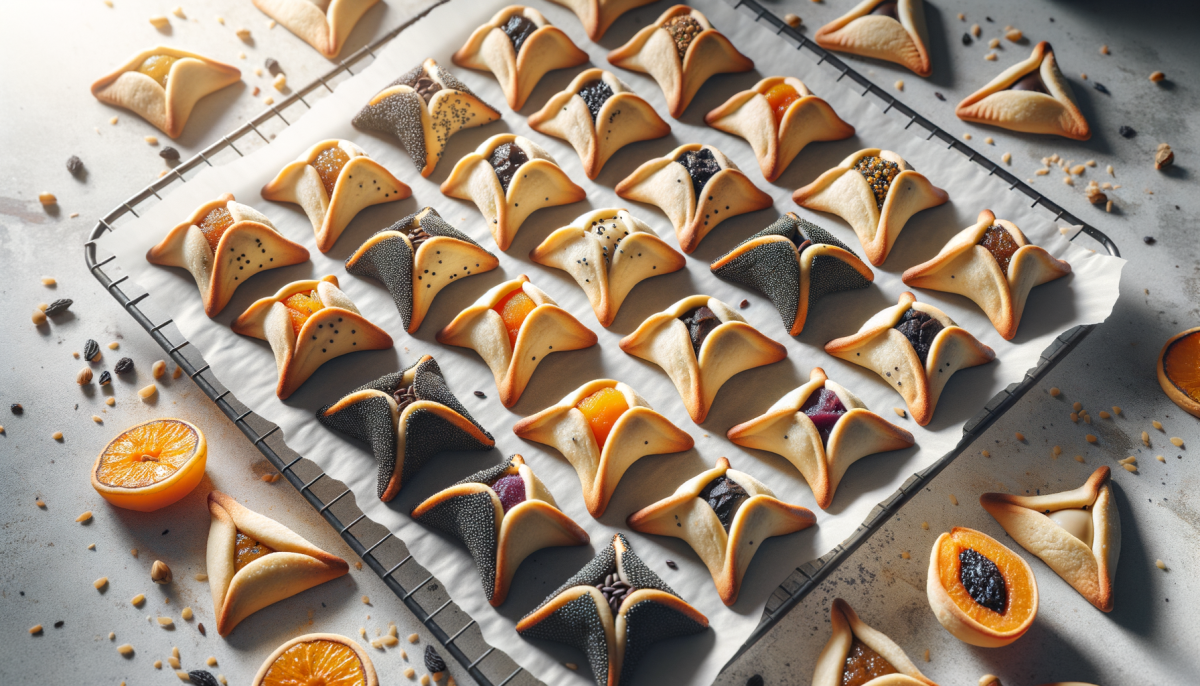
This hamantaschen recipe gives you the one cookie that tells a story of survival, triumph, and a lot of poppy seeds.
Purim is March 3 this year, and if you have not started planning your baking, now is the time. These small, triangular cookies — golden at the edges, tender in the center, hiding a pocket of sweet filling — are not just a holiday treat. They are a tradition you can hold in your hand. Every fold carries the memory of a people who refused to be destroyed, wrapped in butter and sugar and a generous spoonful of mohn.
Hamantaschen are the centerpiece of mishloach manot, the Purim mitzvah of sending food gifts to friends and neighbors. Bake one batch and you have enough to fill plates for everyone you love. Wrap them up, walk them over, leave them on a doorstep. This is what Purim tastes like — the joy of giving, sealed inside a triangle of cookie dough.
Below you will find everything: two complete dough versions (dairy and pareve), five filling options including a traditional poppy seed filling made from scratch, the precise folding technique that keeps your hamantaschen closed during baking, and complete kosher guidance for every ingredient. Whether you are baking your first batch or your fiftieth, this recipe will not let you down.
Purim 2026 falls on Tuesday, March 3. Start baking now — hamantaschen freeze beautifully and mishloach manot plates do not assemble themselves. Bake once, gift to everyone you love.
The Purim Connection: Why We Bake Hamantaschen
Hamantaschen — literally “Haman’s pockets” in Yiddish (or oznei Haman, “Haman’s ears,” in Hebrew) — are the iconic cookie of the Purim holiday. Their triangular shape is said to represent either the three-cornered hat worn by Haman, the villain of the Megillah, or his ears, which according to midrashic tradition drooped in shame at his downfall. This association is minhag (custom) rather than halacha (law), but it has become so deeply woven into the holiday that Purim without hamantaschen is almost unimaginable.
The holiday of Purim commemorates the events recorded in Megillat Esther. When Haman plotted to destroy the Jewish people throughout the Persian Empire, Queen Esther — at great personal risk — revealed her identity to King Achashverosh and exposed the plot. The Jewish people were saved, and the day of intended destruction became a day of celebration. We read the Megillah on Purim night and again during the day, we celebrate with the Seudat Purim (the festive Purim meal), and we fulfill the mitzvah of mishloach manot: sending at least two ready-to-eat food items to at least one friend.
Hamantaschen are the classic choice for mishloach manot. They travel well, they keep for days, and they carry the symbolism of the holiday in their very shape. Fill a plate, wrap it up, deliver it to your neighbors — this is Purim at its most generous and joyful.
Kosher Observance & Halachic Notes
Dairy (Milchig) vs. Pareve: Choosing Your Dough
This recipe provides two complete dough versions. Version A (Dairy / Milchig) uses butter for a richer, more tender cookie with a deeper flavor. Version B (Pareve) uses neutral oil and is dairy-free, making it suitable to serve after a meat meal or at any Purim seudah without restriction.
If you bake the dairy version: Clearly label your hamantaschen and any mishloach manot plates containing them as milchig. Recipients need to know, especially those who plan to serve them at a meat-based Seudat Purim. When in doubt, pareve is the more universally shareable option for mishloach manot.
Bracha: Mezonot
Hamantaschen are classified as pas haba’ah b’kisnin (a sweet baked item eaten as a snack). The bracha before eating is Mezonot, and after eating is Al HaMichyah. If one eats a very large quantity and is kove’a seudah (establishing a meal), one would wash, say HaMotzi, and bentch. For the typical amount consumed, Mezonot applies.
Ingredient Checks
- Eggs: Each egg must be cracked individually into a clear glass and checked for blood spots before adding to the dough. If a blood spot is found, discard the entire egg.
- Poppy seeds (for mohn filling): Poppy seeds can harbor tiny insects. Before use, soak the poppy seeds in warm water for 10 minutes, then drain through a fine-mesh strainer and rinse thoroughly. Inspect a small sample against a white plate. If you see any dark specks that move or appear different from the seeds themselves, rinse again. This step is non-negotiable for kashrus.
- Chocolate: All chocolate (bars, chips, cocoa) must bear a reliable hechsher (kosher certification). For pareve hamantaschen, confirm the chocolate is certified pareve — many dark chocolates are, but always check the label.
- Jam and preserves: Must have a reliable hechsher. Some commercial jams contain gelatin (which may not be kosher) or grape juice (which requires kosher supervision). Check labels carefully. This applies to both the apricot jam and prune (lekvar) fillings.
- Halva and tahini: Must have a reliable hechsher. Most Israeli-made tahini and halva brands carry certification, but check each product.
Hafrashat Challah
This recipe uses approximately 375–400g of flour per dough version. A single batch does not reach the shiur (minimum amount) for separating challah. However, if you double or triple the recipe, or if you are baking multiple batches in the same session alongside challah or babka dough, you may reach the threshold. Separate challah without a bracha for 1,200g–1,666g of combined flour, or with a bracha for 1,666g or more.
The Dough — Two Versions
Version A: Dairy (Milchig) — Butter-Based
This is the richer version. Butter gives the cookies a deeper flavor, a more tender crumb, and slightly crisper edges. If your mishloach manot will be served in a dairy or neutral context, this is the dough to choose.
| Ingredient | Grams | Volume (approx.) |
|---|---|---|
| All-purpose flour | 375 g | 3 cups |
| Granulated sugar | 150 g | ¾ cup |
| Unsalted butter, softened (room temperature) | 115 g | ½ cup (1 stick) |
| Large eggs (checked for blood spots) | 100 g (2 large) | 2 eggs |
| Pure vanilla extract | 8 g | 2 tsp |
| Baking powder | 6 g | 1½ tsp |
| Fine sea salt | 3 g | ½ tsp |
| Finely grated lemon zest (optional) | 4 g | 1 tsp (from ~1 lemon) |
Version B: Pareve — Oil-Based
This version is dairy-free and universally shareable. The texture is slightly firmer than the butter version but still tender and delicious. This is the safest choice for mishloach manot, since recipients can enjoy them after any meal.
| Ingredient | Grams | Volume (approx.) |
|---|---|---|
| All-purpose flour | 400 g | 3¼ cups |
| Granulated sugar | 150 g | ¾ cup |
| Neutral vegetable oil (canola or sunflower) | 80 g | ⅓ cup + 1 Tbsp |
| Large eggs (checked for blood spots) | 100 g (2 large) | 2 eggs |
| Orange juice (freshly squeezed preferred) | 30 g | 2 Tbsp |
| Pure vanilla extract | 8 g | 2 tsp |
| Baking powder | 6 g | 1½ tsp |
| Fine sea salt | 3 g | ½ tsp |
| Finely grated orange zest (optional) | 4 g | 1 tsp (from ~1 orange) |
Five Filling Options
Choose one or make several — a mixed plate of hamantaschen with different fillings is a beautiful thing for mishloach manot. Each filling below yields enough for one full batch of dough (36–40 cookies).
1. Poppy Seed (Mohn) — The Traditional Filling
This is the original. The filling that your great-grandmother made. Cooked poppy seeds with honey and lemon, ground into a thick, sweet paste. If you only make one filling, make this one.
Kashrus note: Poppy seeds must be checked for insects before use. Soak in warm water for 10 minutes, drain through a fine-mesh strainer, rinse well, and inspect a sample against a white surface. See Kosher Notes above for details.
| Ingredient | Grams | Volume (approx.) |
|---|---|---|
| Poppy seeds (soaked, rinsed, and drained) | 200 g | 1½ cups |
| Honey | 80 g | ¼ cup |
| Granulated sugar | 50 g | ¼ cup |
| Milk or non-dairy milk (see note) | 60 g | ¼ cup |
| Unsalted butter or neutral oil | 15 g | 1 Tbsp |
| Fresh lemon juice | 15 g | 1 Tbsp |
| Lemon zest | 3 g | ½ tsp |
| Pinch of fine sea salt | 1 g | pinch |
Note on dairy status: If using milk and butter, this filling is milchig — pair it only with the dairy dough (Version A). For a fully pareve filling, use non-dairy milk and neutral oil. The result is nearly identical.
To make the mohn filling:
- After soaking, draining, and rinsing the poppy seeds, grind them in a food processor or spice grinder in batches, pulsing until the seeds are partially broken down and the mixture looks like coarse, wet sand. You do not need a perfectly smooth paste — some texture is traditional and pleasant.
- Combine the ground poppy seeds, honey, sugar, milk (or non-dairy milk), and butter (or oil) in a small saucepan over medium-low heat.
- Cook, stirring frequently, for 8–10 minutes. The mixture will thicken and become paste-like as the liquid absorbs. It should hold its shape on a spoon without dripping.
- Remove from heat. Stir in the lemon juice, lemon zest, and salt.
- Transfer to a bowl and let cool completely before using. The filling will thicken further as it cools. It can be made up to 3 days ahead and stored covered in the refrigerator.
2. Prune (Lekvar)
The other great classic. Lekvar — thick, dark, slightly tart prune butter — has been filling hamantaschen since long before chocolate was an option. You can buy prepared lekvar (check for a hechsher), or make it from scratch:
- 300 g (2 cups) pitted prunes
- 120 g (½ cup) water
- 30 g (2 Tbsp) sugar
- 15 g (1 Tbsp) fresh lemon juice
- Pinch of cinnamon (optional)
Combine prunes and water in a saucepan. Simmer over medium-low heat for 15–20 minutes until very soft. Add sugar and lemon juice. Blend with an immersion blender or food processor until smooth. Cool completely. Should be thick enough to hold its shape on a spoon. Pareve.
3. Apricot Jam
The simplest option and absolutely delicious. Use 300 g (1 cup) of high-quality apricot preserves. The jam must bear a reliable hechsher — check for gelatin and grape juice in the ingredients. If the preserves are very loose or runny, simmer them in a small saucepan for 5–8 minutes until thickened, then cool. Thick jam holds up better during baking and resists leaking. Typically pareve — check the label.
4. Chocolate
The modern favorite. Rich, slightly gooey, and irresistible to children and adults alike.
- 150 g (5 oz) dark or semisweet chocolate (60–70% cacao), finely chopped — must have a reliable hechsher
- 30 g (2 Tbsp) neutral oil (or butter for dairy version)
- 15 g (1 Tbsp) cocoa powder
- Pinch of flaky sea salt
Melt the chocolate with the oil in a double boiler or in 30-second microwave bursts, stirring between each. Stir in the cocoa powder and salt. Cool until thick and spreadable but not solid — the consistency of thick frosting. If making ahead, rewarm gently before using. Check each chocolate product for pareve or dairy certification.
5. Halva & Tahini
A Middle Eastern twist that has become increasingly popular. Nutty, sweet, and deeply savory all at once.
- 120 g (½ cup) tahini (raw, well-stirred) — must have a reliable hechsher
- 60 g (¼ cup) honey or date syrup (silan)
- 50 g (¼ cup) halva, crumbled into small pieces
- Pinch of fine sea salt
- Pinch of cinnamon (optional)
Stir the tahini and honey together until smooth. Fold in the crumbled halva, salt, and cinnamon if using. The filling should be thick and scoopable. If it is too loose, refrigerate for 20 minutes. Typically pareve — check all labels.
Equipment
- Stand mixer with paddle attachment, or a large bowl and hand mixer
- Kitchen scale (critical for consistent results)
- Rolling pin
- 3-inch (7.5 cm) round cookie cutter (or a drinking glass)
- 2 large sheet pans lined with parchment paper
- Plastic wrap
- Fine-mesh strainer (for poppy seed filling)
- Clear glass or small bowl (for checking eggs)
Step-by-Step Instructions: Making the Dough
These instructions apply to both dough versions. Where the method differs, the pareve variation is noted.
Step 1: Cream the Fat and Sugar
Dairy version: In the bowl of a stand mixer fitted with the paddle attachment, cream the softened butter and sugar on medium speed for 3–4 minutes, until light, fluffy, and noticeably paler in color. Scrape down the sides of the bowl halfway through. The mixture should look like pale, whipped cream cheese — this aeration is what gives the cookies their tender texture.
Pareve version: Whisk the oil and sugar together on medium speed for 2 minutes. The mixture will not become fluffy the way butter does, but it should be thoroughly combined and slightly thickened.
Step 2: Add the Eggs
Crack each egg individually into a clear glass, inspect for blood spots, then add to the mixer bowl one at a time, beating on medium speed for 30 seconds after each addition. The mixture should be smooth and well emulsified. Add the vanilla extract (and lemon zest for dairy, or orange juice and orange zest for pareve) and beat until incorporated.
Step 3: Fold in the Dry Ingredients
In a separate bowl, whisk together the flour, baking powder, and salt.
Add the dry ingredients to the wet mixture in two additions, mixing on low speed just until the flour disappears each time. Do not overmix. The moment you can no longer see streaks of flour, stop the mixer. Overmixing develops gluten, which makes the dough tough and causes the cookies to spread and lose their shape during baking.
This is the most important instruction in the entire dough process: Mix until just combined. The dough should look slightly shaggy and soft. If you can still see a few tiny flour streaks, that is better than overmixing. They will disappear during chilling and rolling.
Step 4: Chill the Dough
Divide the dough in half. Flatten each half into a disc about 2 cm (¾ inch) thick — this makes rolling easier later. Wrap each disc tightly in plastic wrap.
Refrigerate for 1 to 2 hours, until the dough is firm but still pliable. You should be able to press a finger into it and leave a slight dent, but it should not feel soft or sticky. If the dough has been refrigerated overnight or longer, let it sit at room temperature for 10–15 minutes before rolling — it should bend without cracking.
Chilling is non-negotiable. Warm dough is the enemy of hamantaschen that stay closed. Cold dough holds its shape, takes the pinch, and does not fight you during rolling.
Step-by-Step Instructions: Shaping & Filling
Step 5: Roll the Dough
Lightly flour your work surface and rolling pin. Working with one disc of dough at a time (keep the other in the refrigerator), roll the dough to a 3 mm (⅛ inch) thickness. This is thinner than you might expect — about the thickness of two stacked coins. Roll from the center outward, rotating the dough a quarter turn every few strokes to maintain an even thickness and prevent sticking.
If the dough starts to warm up and feel sticky: Slide it onto a parchment-lined sheet pan and return it to the refrigerator for 10 minutes. Working with cold dough is the single most important factor in hamantaschen that hold their shape.
Step 6: Cut the Circles
Using a 3-inch (7.5 cm) round cutter (or the rim of a drinking glass), cut circles from the rolled dough. Cut as close together as possible to minimize scraps. You should get 18–20 circles from each disc.
Gather the scraps gently, press them together (do not knead), re-flatten into a disc, chill for 15 minutes, and re-roll once. Scraps re-rolled more than once will be tough.
Step 7: Fill the Hamantaschen
Place 1 level teaspoon of filling in the center of each circle. Not more. This is where most hamantaschen fail. The temptation to add more filling is strong, but overfilling is the number one reason hamantaschen open during baking. One level teaspoon is enough — the ratio of tender cookie to sweet filling should favor the cookie.
Step 8: The Three-Fold Pinch — The Critical Technique
This is the step that determines whether your hamantaschen stay closed or open into sad, flat circles in the oven. Read this carefully.
- Lift the bottom edge of the circle up and over the filling, folding about one-third of the circle toward the center. Do not fold all the way to the top — you are creating one side of the triangle.
- Fold the left side in toward the center, overlapping slightly with the first fold. You should now see two sides of a triangle forming, with a small opening at the top where the filling peeks through.
- Fold the top flap down to close the triangle. The three corners should overlap slightly, creating three small flaps at the corners.
- Now pinch — hard. Press each of the three corner points firmly between your thumb and forefinger. Squeeze until the dough feels compressed and sealed. Then go back and pinch each corner a second time. The corners should look slightly pinched and pointy, not smooth and rounded.
- Final check: Look at the hamantaschen from above. You should see a small triangular window of filling in the center, framed by three walls of dough. The three corners should be tightly sealed with no gaps. If a corner looks loose, pinch it again.
The secret: Most people pinch once and move on. That is not enough. You must pinch each corner twice, firmly, pressing the dough layers together until they bond. Think of it as sealing an envelope — you press the flap, then run your finger along it again to make sure it holds.
If your dough has warmed up during shaping: Stop. Place the filled, pinched hamantaschen on a parchment-lined sheet pan and refrigerate for 10–15 minutes before baking. Cold dough holds its pinch. Warm dough relaxes and opens.
Place the shaped hamantaschen on parchment-lined sheet pans, spacing them about 4 cm (1½ inches) apart. They spread slightly but not dramatically.
Why Hamantaschen Open During Baking (and How to Prevent It)
This is the question every hamantaschen baker asks, and the answer is almost always one of these four problems:
| Problem | Why It Causes Opening | The Fix |
|---|---|---|
| Overfilling | Too much filling pushes against the seams as it heats and expands. The pressure overwhelms the pinch and the corners pop open. | Use 1 level teaspoon of filling, no more. Resist the temptation. The cookie-to-filling ratio should favor the cookie. |
| Underpinching | A gentle, single pinch is not enough. As the dough warms in the oven and the butter or oil softens, a weak seal releases. | Pinch each corner twice, firmly. The dough should feel compressed and bonded, not just folded. |
| Warm dough | Dough that is too warm when shaped will be soft, pliable, and unable to hold the pinch. It relaxes and unfolds in the oven. | Chill the dough thoroughly before rolling (1–2 hours). If dough warms during shaping, refrigerate the shaped cookies for 10–15 minutes before baking. |
| Too much baking powder | Excessive leavening creates too much puff and rise, which pushes the seams apart from the inside. | Use exactly the amount specified (6 g / 1½ tsp). Do not round up. More leavening does not mean better cookies — it means open cookies. |
If you follow all four rules — modest filling, aggressive pinching, cold dough, correct leavening — your hamantaschen will stay closed.
Step-by-Step Instructions: Baking
Step 9: Preheat and Bake
Preheat your oven to 175°C (350°F) conventional. Position a rack in the center of the oven.
Bake for 12–15 minutes, rotating the pan front-to-back halfway through for even browning.
The hamantaschen are done when:
- The edges are just golden — a light, warm gold, not brown.
- The centers still look slightly pale and soft. They will firm up as the cookies cool.
- The bottoms are lightly golden when you lift one with a spatula to check.
Do not overbake. Hamantaschen that are baked until the entire surface is golden will be dry and crumbly once cool. They continue to set on the pan for several minutes after leaving the oven. Pull them when the edges are golden and the centers look barely done — they will be perfect.
Step 10: Cool
Let the hamantaschen cool on the baking sheet for 5 minutes, then transfer to a wire rack to cool completely. They are fragile when warm but firm up beautifully as they reach room temperature.
Storage & Make-Ahead
- Room temperature: Store in an airtight container at room temperature for up to 5 days. Layer with parchment paper between rows to prevent sticking.
- Freezing (baked): Place cooled hamantaschen in a single layer in a freezer-safe container or bag, with parchment between layers. Freeze for up to 2 months. Thaw at room temperature for 1 hour. They taste remarkably fresh.
- Freezing (dough): The wrapped dough discs freeze beautifully for up to 1 month. Thaw in the refrigerator overnight before rolling.
- Freezing (shaped, unbaked): Arrange shaped hamantaschen on a parchment-lined sheet pan, freeze until solid (about 2 hours), then transfer to a freezer bag. Bake from frozen, adding 2–3 minutes to the bake time. This is an excellent strategy for Purim: shape everything days ahead, then bake fresh batches as needed.
- Fillings: All five fillings can be made up to 3 days ahead and stored in airtight containers in the refrigerator. Bring to room temperature before filling (cold filling on cold dough is fine; you just need it scoopable).
Troubleshooting Guide
| Problem | Likely Cause | Solution |
|---|---|---|
| Hamantaschen open during baking | Overfilling, underpinching, warm dough, or too much baking powder | See the detailed table above. Use 1 tsp filling, pinch twice, chill dough, measure leavening precisely. |
| Dough is dry, crumbly, and cracks when rolled | Too much flour (likely measured by volume, not weight) or dough is over-chilled | Use a kitchen scale. If dough cracks when rolling, let it sit at room temperature for 10–15 minutes. If still crumbly, knead in 1 tsp of milk (dairy) or orange juice (pareve) at a time until pliable. |
| Cookies are too thick, puffy, and cakey | Dough rolled too thick, or too much baking powder | Roll to 3 mm (⅛ inch) — thinner than you think. Use exactly 6 g / 1½ tsp baking powder, measured level. More leavening makes puffier, cakier cookies that are more likely to open. |
| Cookies are tough or hard | Dough was overmixed, or scraps were re-rolled too many times | Mix the dry ingredients into the wet only until flour just disappears. Re-roll scraps only once. If dough resists rolling, let it rest — do not force it. |
| Filling leaks or burns on the pan | Filling is too thin, or too much filling was used | Thicken jam fillings by simmering before use. Use 1 level tsp. Ensure corners are pinched tightly with no gaps. |
| Cookies spread too much and lose their shape | Dough was too warm when it went into the oven, or butter was over-creamed | Always bake from a chilled state. If your kitchen is warm, refrigerate shaped cookies for 15 minutes before baking. |
Frequently Asked Questions
Why are hamantaschen triangular?
The triangular shape is traditionally said to represent either the three-cornered hat (dreispitz) worn by Haman, the villain of the Purim story, or his ears (oznei Haman in Hebrew), which according to midrashic sources drooped in humiliation at his downfall. Some interpretations connect the three corners to the three Patriarchs — Avraham, Yitzchak, and Yaakov — whose merit protected the Jewish people. The shape is minhag (established custom) rather than halacha (law), but it has become so universal that the triangular cookie is inseparable from the holiday itself. Whatever the origin, the shape makes hamantaschen instantly recognizable and deeply symbolic of Purim.
Why do hamantaschen open during baking?
Almost always one of four causes: too much filling (the expanding filling pushes the seams apart), insufficiently pinched corners (a single light pinch is not enough to survive the oven’s heat), dough that is too warm when shaped (warm dough relaxes and unfolds), or too much baking powder (excess leavening creates puff that blows the seams open from within). The solution is straightforward: use exactly one level teaspoon of filling, pinch each corner firmly twice, work with well-chilled dough, and measure your baking powder precisely. Follow all four rules and your hamantaschen will stay closed.
What is the traditional hamantaschen filling?
The most traditional filling is mohn — poppy seed. In fact, the Yiddish name for poppy seed hamantaschen, mohntaschen (“poppy seed pockets”), may actually be the origin of the cookie’s name, with “Haman” being a folk-etymological substitution over time. Prune butter (lekvar) is the other deeply traditional filling, especially in Hungarian and Czech Jewish communities. Today, apricot jam, chocolate, and newer options like halva and tahini are equally popular, but mohn remains the classic — the filling that connects the cookie most directly to its Eastern European roots.
Can I make hamantaschen ahead of time?
Yes, and they are ideal make-ahead cookies. You have multiple options: the dough can be made and refrigerated for up to 2 days, or frozen for up to 1 month. Shaped, unbaked hamantaschen can be frozen on sheet pans, then transferred to freezer bags and baked from frozen (add 2–3 minutes to the bake time). Baked hamantaschen keep at room temperature in an airtight container for 5 days and freeze beautifully for up to 2 months. All five fillings can be prepared up to 3 days ahead. This flexibility makes hamantaschen the perfect Purim cookie — spread the work across several days, then assemble your mishloach manot plates fresh on Purim morning.
What is mishloach manot?
Mishloach manot (also spelled shalach manos) is one of the four mitzvot of Purim. It requires every Jewish adult to send at least two different ready-to-eat food items to at least one friend on Purim day. The purpose is to increase friendship, unity, and joy within the community. The two foods should ideally require two different brachot (blessings). A plate of hamantaschen (bracha: Mezonot) paired with a piece of fruit (bracha: Ha’Etz) or a small bottle of grape juice (bracha: HaGafen) fulfills this requirement beautifully. Hamantaschen are the classic mishloach manot item because they are festive, portable, keep well, and carry the symbolism of the holiday. Bake a batch, fill your plates, wrap them, and deliver them with joy.
🍞 Get a New Kosher Recipe Every Week
Join our baking community. One recipe, one tip, one story — delivered every Friday before Shabbat.
No spam. Just bread. Unsubscribe anytime.
Your Purim Table Starts Here
Purim is March 3. The dough takes two hours to chill, the fillings keep for days, and your neighbors are waiting. Start baking now.
Save This Recipe
Master Our Classic Challah →
Made these? Tag us @kosherbreadpro on Instagram or leave a comment below. We answer every one.
You Might Also Enjoy
- Savory Hamantaschen — Savory twist on the classic
- Rugelach — Flaky filled cookies
- Mohn Cookies — Poppy seed cookies
- Date Ma’amoul — Filled Middle Eastern cookies
- Mandelbrot — Jewish almond biscotti
Community Bakes
See how other bakers made this recipe.
Loading community bakes…
Leave a Reply
You must be logged in to post a comment.